 12. Insert a Picture (Image)
TO PRINT THESE INSTRUCTIONS, RIGHT-CLICK IN THIS BOX AND SELECT 'Print'
Note that this process loads a picture (image) into Portal AND creates a link to it on the page. There is NO image library in Portal which you can search.
- Position the cursor at the point on the page where you want the image to appear. Then click the Picture wizard icon

The Picture wizard dialogue box appears: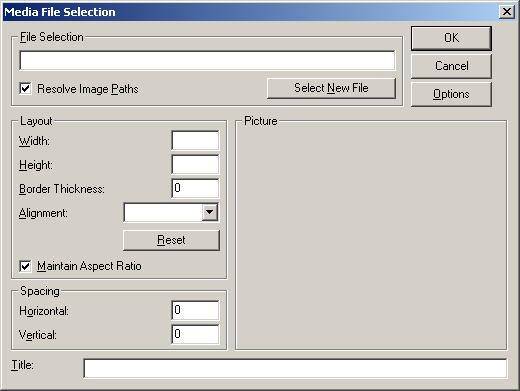
- Click the Select New File button
The 'Media File Upload' box will appear i.e.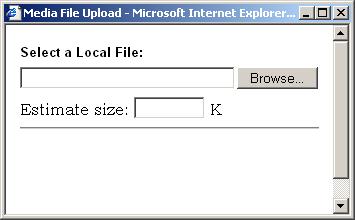
- Click on the Browse button, then browse to the image file you want. Click to select it and click Open. The Portal file path will be inserted in the file path in the Picture wizard dialogue box e.g.
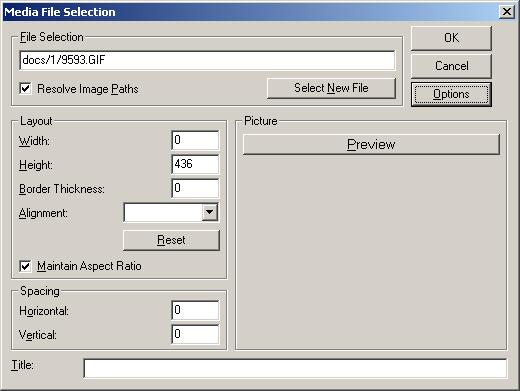
Note that Resolve Image Paths and Options are not used. - Check that it is the correct picture by clicking the Preview bar. This will also correctly populate the Width box.
- Set the required settings:
Border thickness - enter the required border width. If left blank there will be no border.
Alignment - select from dropdown - left, right etc.
Maintain Aspect Ratio - If you want to resize the image for display, leave this ticked and when you change either Width or Height, the other value will change to correspond. NOTE THAT THIS DOES NOT CHANGE THE SIZE OF THE IMAGE FILE ITSELF, only the size which is displayed.
Spacing - Horizontal - The space in pixels to be left either side of the image.
Spacing - Vertical - The space in pixels to be left at the top and bottom of the image
Title - THIS MUST BE COMPLETED - Enter a helpful description if ther image. This is used to create the ALT tag which s essential to comply with accessibility guidelines. - Click OK and the iomage will be inserted.