SPIRIT (2025) Statement for Protocols
If you are not familiar with writing study protocols, or even as a starting point, it would be beneficial to familiarise yourself with the SPIRIT Guidelines. They provide a handy checklist that includes the main points and information you should be including in your protocol. The SPIRIT Guidelines include all items of the specific associated protocol information to include, such as laying out Data Sharing & Availability plans, sponsor and REC contact information, acknowledgements, and authorship; This can be particularly useful if you intend to publish your protocol as a protocol paper. Naturally not all of the items will apply to your project, but you should endeavour to include as many as possible.
You can download a copy of the SPIRIT 2025 guidelines at the end of this resource, or find out more information at www.spirit-consort.org
Study Information
The opening page of your protocol should include the key information about the project:
- Project title and acronym
- Project ID or registration numbers
- REC details (title, location)
- Ethics registrations numbers / project codes
- Chief Investigator
- Principal Investigator/s
- Trial Manager
- Other team members and their role title (e.g. Dr XXX YYY – Clinical Research Nurse)
- Start date and planned end date
- Sites, including the short-form addresses
- Study contact details, including emails and phone numbers
- Emergency contact details – Most commonly the Study Manager and the Chief Investigator, but may also include Site specific information such as Security teams and local emergency services.
Study Information
- 1. Glossary
- 2. Funding Statement
- 3. Declaration of Interests
- 4. Sponsor Contact Information
- 5. Sponsor & Funder
- 6. REC Approval
It can be useful to include a glossary of terms and acronyms at the beginning of the protocol. You should list all the study specific terms and acronyms you use throughout the document – Don’t assume all of the readers will be aware of acronyms that you think are common knowledge.
Briefly describe the funding for the project, including financial and non-financial support. You should include details of whether the project is industry funded or non-industry funded, the names of the funders, and where there are multiple funders, briefly describe which funders are providing support for which parts of the project e.g. Funder X has provided £X for staff salaries, and Funder Y has provided £Y for all other aspects of the project, Funder Z is providing equipment Z.
Some areas and projects will require more thorough statements, and more detailed disclosures, including items such as the actual mechanism for financial support (e.g. a fixed sum payment, or per recruited participant etc.), and the specific fund recipient (e.g. the named person rather than just “the project”). More detailed disclosures allow the REC that assesses your project to understand the financial viability of the project, and to check for any potential bias, conflict of interest, or ulterior motive from the funder.
Similar to the above section, the Declaration of Interests is used to explicitly state any known competing interests, conflicts of interest, or other relationship that may be construed as such. The SPIRIT (2025) Guidelines include some excellent examples of items that may need to be included here.
If there are none, you should still use this section to explicitly state that at the time of writing there were no known conflicts of interest etc.
The Sponsor is the individual, company, or organisation assuming overall responsibility for the project. They are not necessarily the main funder, but it is common for there to be overlap.
Usually, where the project is industry-initiated, the company is the Sponsor. For investigator-initiated projects either the funder or the organisation the investigator works for are the Sponsor e.g. the University.
This section should explicitly name the Sponsor, and where the Sponsor is a company or organisation, this section should include the name and contact details for the specific person within the Sponsor organisation who is responsible for this project.
This section outlines the responsibilities of the Sponsor and of the Funder, in particular where they are the same organisation. As there is, in these cases, the potential for bias or conflicting interests, the Sponsor will be bound by contractual agreements with the trial investigators stating the limits of their authority, particularly in relation to study design, conduct, data analysis, interpretation, and dissemination.
You must state in this section if the Sponsor or Funder control the final decision on any of these aspects of the project.
A necessity for all projects undertaken in the UK, in this section you should make a short statement about which REC is responsible for your project including the name, address, and registration number for your project. You should also include the date your Favourable Opinion was received.
Introduction & Background

The introduction section of the protocol should cover a short discussion of the main literature related to the project and should encapsulate any existing data or understanding of the intervention as it fits into the current landscape, where applicable. If this project is one of a series, or broader course of work, treat the previous projects as if they were normal literature and discuss them in this section.
This section does not need to be long, with a reasonable maximum of 500 words, but should use plain and easy to understand language where possible.
Avoid the heavy usage of jargon and ensure that any acronyms are explained at the first use in the text. It is recommended to include a glossary of acronyms and any study specific terms within the first few pages of the protocol (before the Introduction).
Study Objectives
This section makes clear what scientific question the project aims to answer, and defines the project’s purpose and scope. The objectives will also define both the trial design and the data analysis methods. For multi-arm trials the objectives should be stated in a way that clarifies how the treatment groups will be compared.
Additionally, you must clearly state any related research question/s in a way that makes them easily understood to any reader. Whilst the protocol will mainly be for the usage of the study team, it will be submitted to external reviewers (such as Ethics Committees, Patient and Public Involvement delegates, and sometimes prospective funding bodies), so should be in as plain language as is practical.
Where the project aims to assess multiple research questions, for the sake of easy understanding, it is useful to organise them in a numbered or bullet point list. State the primary hypothesis / research question first. The SPIRIT (2025) guidelines have an excellent example of how to write your objectives and research questions clearly.
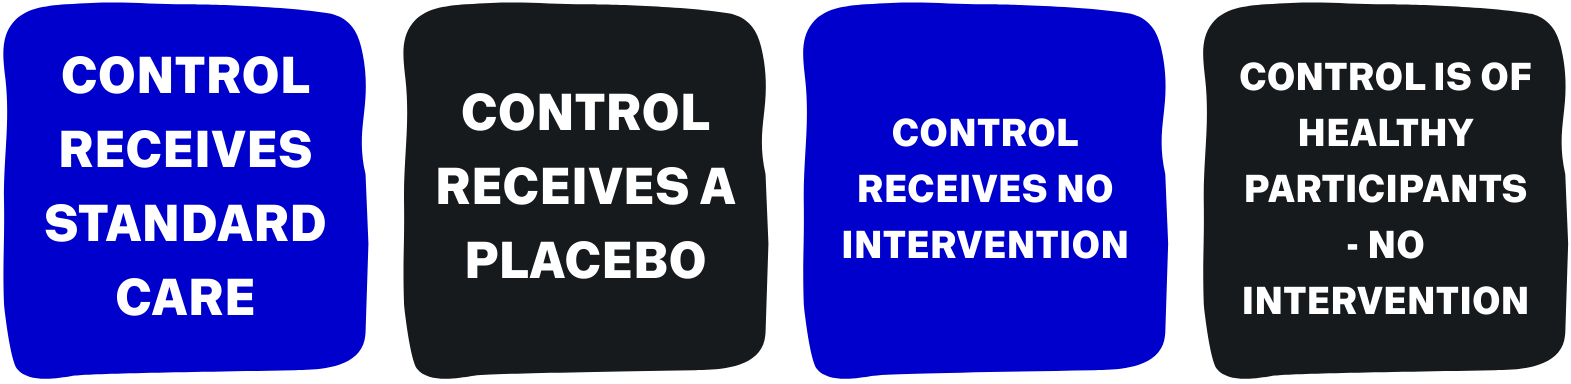
Where your project involves a Control Group you must clearly state the reasons for the choice of control mechanisms. Some examples of control mechanisms are:
Trial Design
This section allows you to expand on the mechanics of the trial design, and you must specifically outline the planned structure of the trial. The most common study design for randomised trials is the parallel group, two-arm, trial using 1:1 participant allocation.
If you intend for your participant groups to be unequally allocated (i.e. a ratio other than 1:1), you should outline the reasons for this choice and note any adjustments that will be made to the analysis (or describe where that information can be found e.g. in the Statistical Analysis Plan).
Other trial types include:
Trial Design
- 1. Crossover
- 2. Cluster
- 3. Case Study // n=1 Study
- 4. Factorial
- 5. Split-body
- 6. Single Group
- 7. Parallel Group
- 8. Comparative Non-randomised
Where all participants receive two or more interventions/treatments, but the order they receive them depends on their group allocation. Example: Group A receives intervention X then intervention Y. Group B receives intervention Y then intervention X. There is usually a rest period between treatments.
Where the factor for randomisation is an aspect other than the individual participant. Cluster groups can be geographical, such as villages or towns, communities, schools or classes, hospitals or clinics, or students of a specific teacher, patients treated by a specific clinician etc.
Where the intervention is so novel that this trial is the first in human, or where the condition / presentation being studied is so unusual or rare that it is only practical to have a single participant.
Where there is a single group of participants who are randomised to each intervention. The most common type of factorial study has four intervention groups (Group A, Group B, Group AB (both interventions), Group 00 (no intervention)).
Where the intervention and control occur simultaneously within/on each participant. For example, a medicated ointment applied to the left hand, and at the same time, a placebo ointment applied to the right hand.
Where there is only one intervention arm or group for all study participants. All participants will receive exactly the same intervention, with no variations in dosage, frequency etc.
Where there are at least two groups, who progress through the project simultaneously, but may receive different interventions e.g. an intervention group and a control group.
Where the investigator controls allocation, and allocation is not random. For example, they may recruit patients with a specific condition from a clinic, who will always be assigned to Group A, and recruit healthy members of the public who will always be assigned to Group B.
Sample
You should clearly state the planned sample size and recruitment plan using a standardised format, for example “We will recruit n=100 participants total, of which n=50 will be randomised to Group A, and n=50 will be randomised to Group B”, or “We will recruit n=100 participants total, of which n=50 will be from (insert demographic group / condition name), and n=50 will be healthy volunteers to serve as the Control group”, or similar. Use best judgement to decide on how to state the sample size and stratification.
You do not usually need to outline how the sample size was calculated here, as the Statistical Power calculations will be recorded within the Statistical Analysis Plan document and, when the protocol is being submitted as part of a funding or ethics application, the sample size calculations will be included in the body of the proposal.
A feasible sample size, in relation to budget, can be the key to ethical approval – The REC will assess how achievable, statistically powerful, and scientifically valid the intended sample size is. As a ground rule, the intended sample size should be large enough to have a significant probability of detecting a true effect of a given magnitude, where it exists. Sample size calculations tend to be based solely on the primary outcome, but you can report the power that will be achieved for other outcomes with the sample size you intend to achieve.
Your study statistician can give you more information about sample sizes.
Study Setting
An overview of the place, community, culture, and general environment in which the project will take place. This provides important context about the applicability of the study results, amongst other things, and can vary substantially between countries.
In this section you should, at minimum, report the countries involved, type of setting (urban vs rural, or any other specifics), and the likely number of study sites, plus any known information on the specific Sites involved.
Study Team & Sites
The study team and their responsibilities will be more thoroughly detailed within the Delegation Log.
This section of the protocol should contain a list of the team members who will be working on the project, along with their job titles or role on the project and contact details for the senior team members such as the Chief Investigator and the Project Manager.
This section should also include the names, addresses, and opening hours of all sites where the study or trial is being conducted and should name which staff will be based at which sites and their roles there, as well as any important contact details for that site such as the Main Reception, and the Security Team.

The Intervention
You must clearly describe the intervention, as much as possible in plain language. Ensure you define any acronyms or jargon at the first point they appear in the text.
Where the intervention includes the use of a novel medical device or procedure, describe the intervention in as much detail as is practical, including how the trial team and participants will interact with it, and the kind of data it will generate for the purposes of answering the research question / hypothesis.
It can also be useful to make a full bullet-point list of all the measures that will be taken, especially in studies using human participants (e.g. blood tests and what they are for, biometric measurements like weight or blood pressure, any imaging such as ultrasounds, x-rays, or MRIs, specific measures relating to the response to the intervention etc.), and where there are multiple participant groups receiving different interventions, you should state which measures apply to which group.
Studies using medical devices as part of their intervention should also include any instruction manuals and technical specifications within the Site File and Trial Master File, but any important or specific information about the device should be briefly outlined in the protocol as well.
You should also include an overview of the screening and enrolment procedures for your project. You don’t need to go too in depth on the specific inclusion criteria here, as they are defined in a later section.
The first appointment in a study utilising human participants will always be a screening visit to ensure the prospective participant meets the inclusion criteria and does not meet any of the exclusion criteria. You must receive consent at the screening appointment and must receive consent at all further clinician / participant interactions (often termed “re-consenting”).
The Intervention: Participant Timeline
It is also prudent to include a summary of the plan for any participation, for example a brief description of the appointment’s participants will be attending, and what will be completed at each one. This is known as the “Participant Timeline”, and will define what participating in this project will look like.
For example:
- Appointment 1 – Screening – Participants are screened for enrolment using measure A and measure B. Bloods will be taken to assess measure C.
- Appointment 2 – Baseline – Participants will have bloods taken for measures C, D, E, F, and will be instructed on the use of the device.
- Appointment 3 – Follow up – Participants will have bloods taken for measures C, D, E, F, and the clinician will check in with their compliance with the usage of the device.
If there are differences in the appointment structure for different participant groups (e.g. intervention group vs control group), make sure you outline these clearly.
Information on the time commitment expected of participants is usually a key factor in how participants decide to join a project. You must be up front and honest about the time commitment involved, as a high number of participants withdrawing from the project due to an inability to make the time will impact your data.
To help participants visualise your project, it’s a great idea to include a graphic or schematic diagram of the timeline. See the example below:
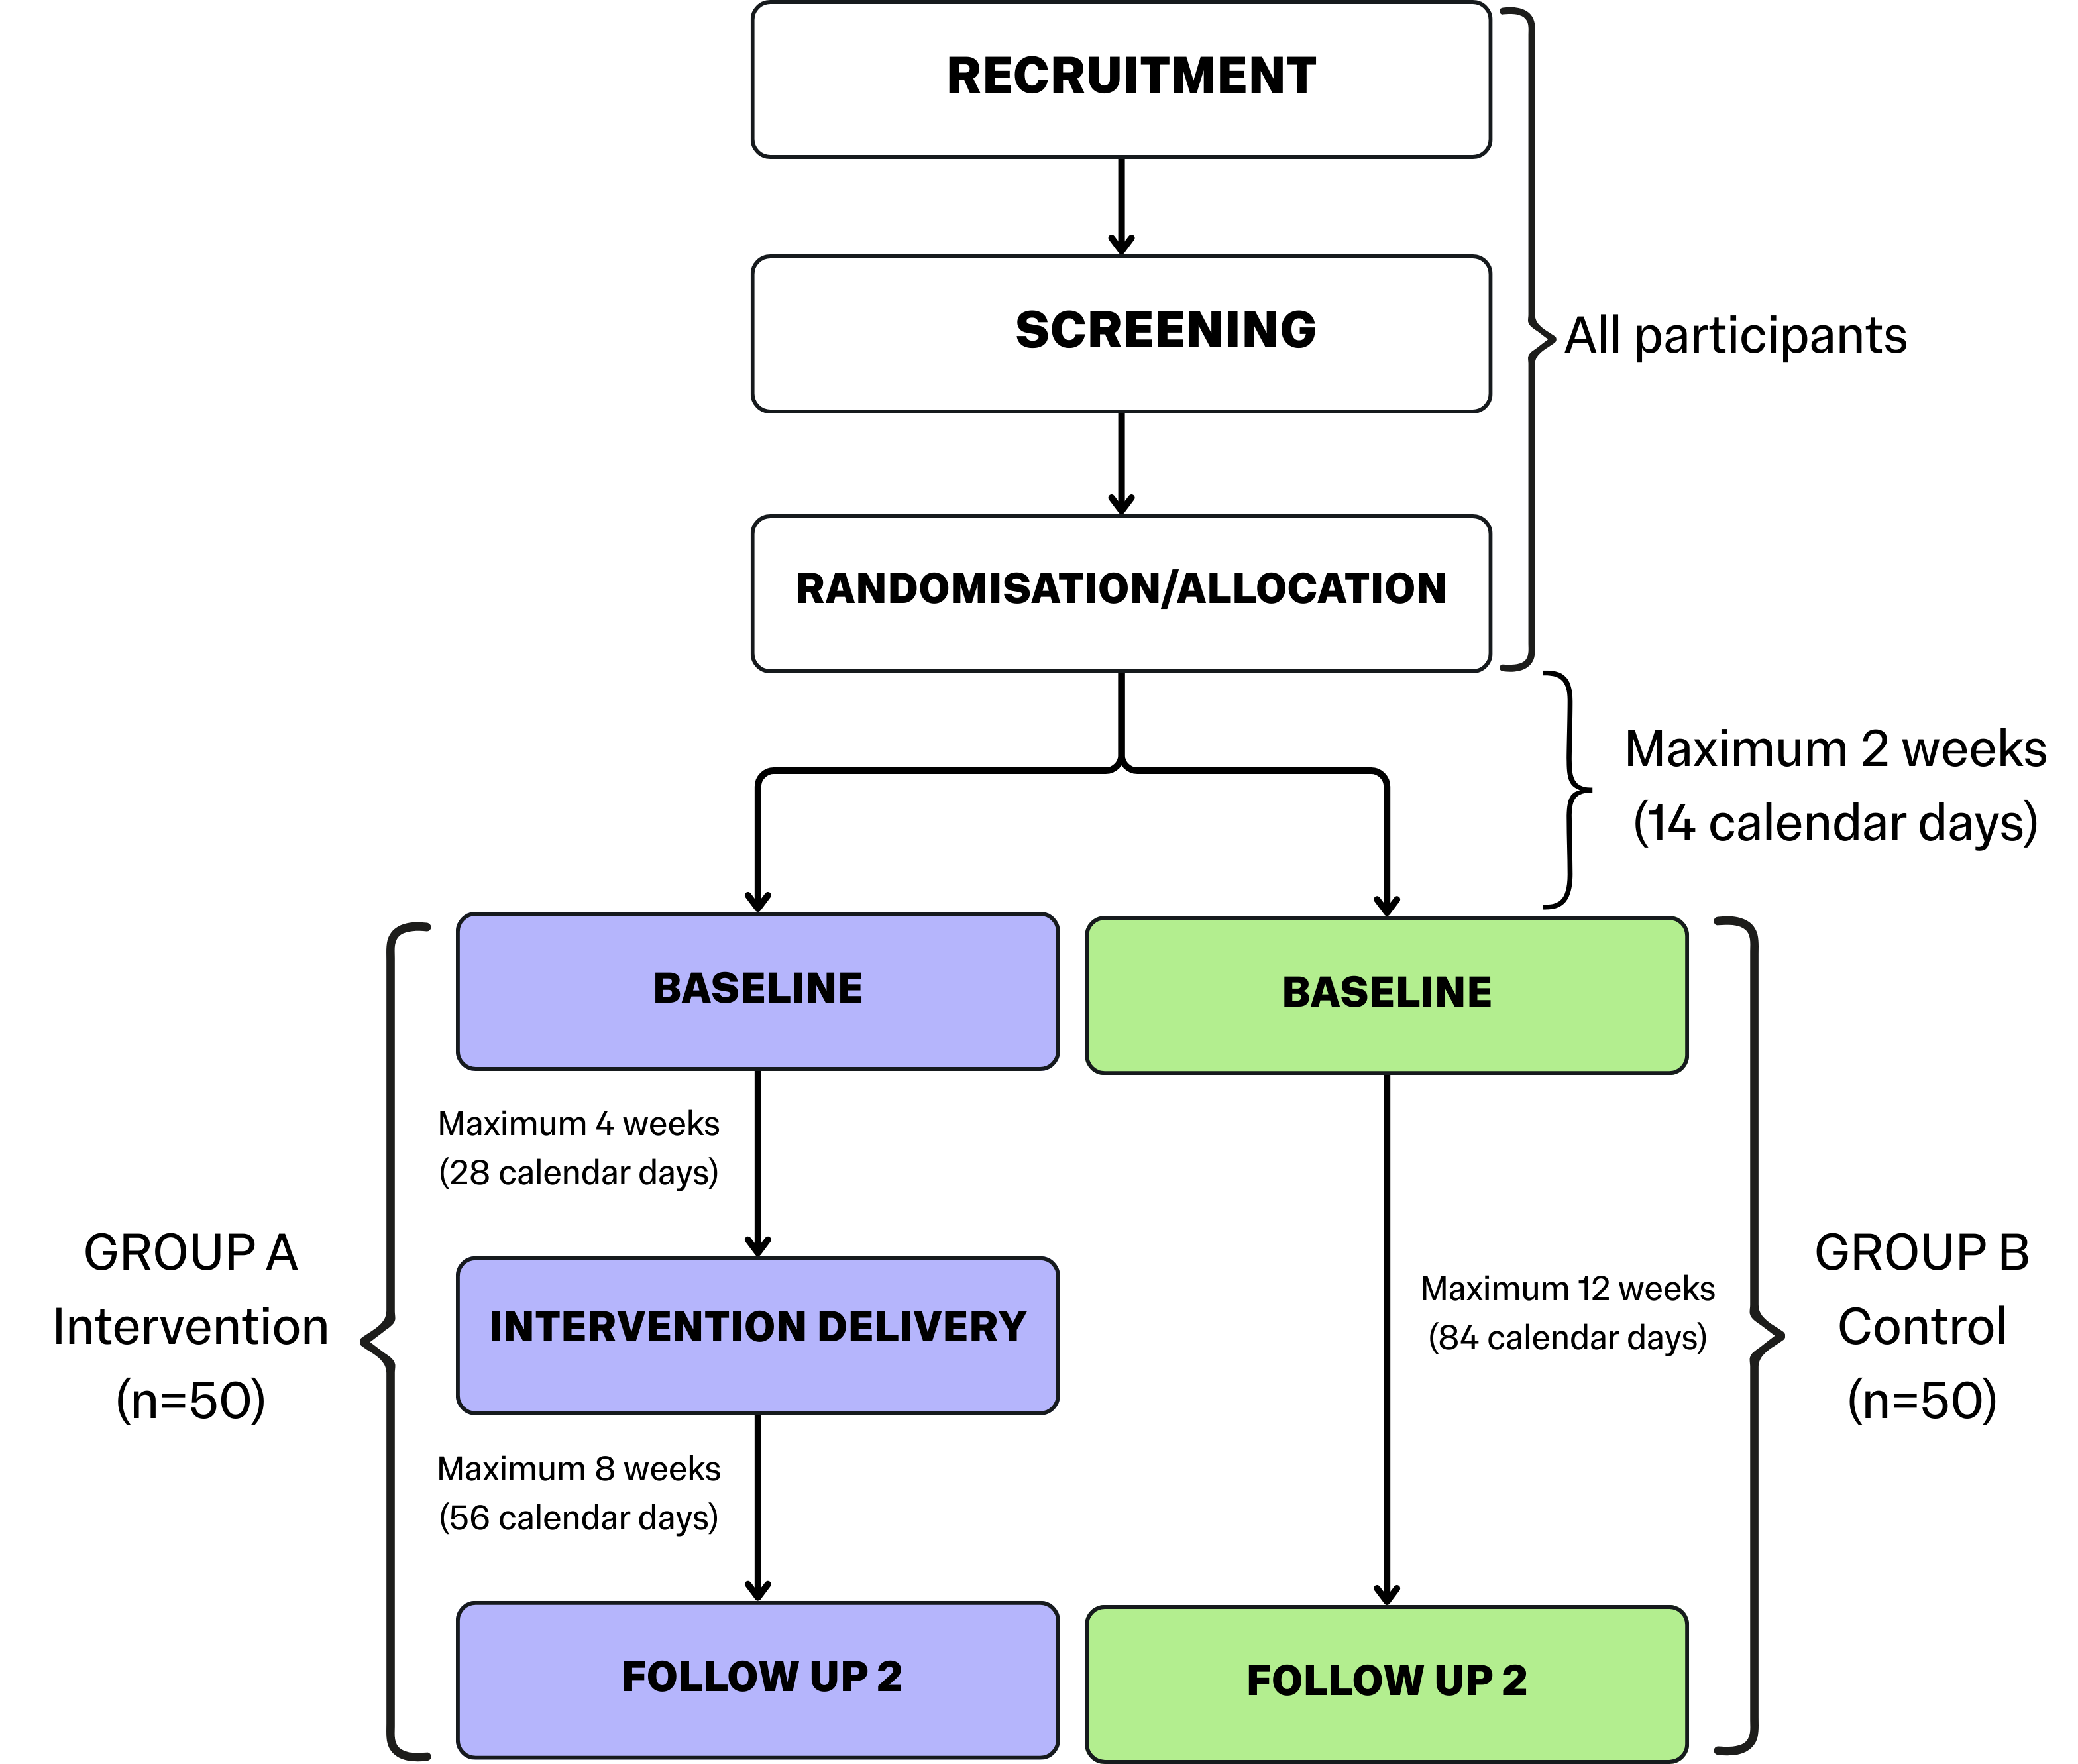
N.B. Your participant timeline should be as detailed as possible to clearly show how the project will work in practice. Include, where applicable, details like timeframes (in weeks and calendar days), sample sizes, and notes on which processes will apply to all participants. Tailor your timeline to your project.
Participant Stratification & Allocation
You should describe any participant groups as clearly as possible. State the name of each study group e.g. “Group A – Medicine 1, Group B – Medicine 2, Group C – Control – No medicine”, give a brief description of each group, and state how many (n=?) participants will be allocated to each group.
You should then state how participants will be allocated to each group e.g. an anonymised electronic randomisation system (e.g. Sealed Envelope), an anonymised manual randomisation system (e.g. pre-made group name cards in closed envelopes, handed out at random), or by condition (e.g. participants with the condition to be studied go to Group A or B, healthy participants without the condition go to Group C).
Consideration should be given to the method by which participant allocations are completed to prevent bias on the part of the researcher. You must also state if any of the study team will be blinded to participant group allocation, you must state how this will be achieved, and how the blinding will be maintained across the course of the project.
Where members of the team will be blinded, you should also include any instructions related to emergency unblinding. These instructions should include clear procedures for what triggers emergency unblinding (e.g. a medical emergency), and the procedures for quickly and efficiently unblinding.
This will not apply to projects with only one participant group.
The SPIRIT (2025) guidelines have some excellent examples of types of randomisations, the biases they are vulnerable to, and how to avoid bias during randomisation. They also give further information on blinding, including the different kinds of blinding, and notes on how blinding works for the different people involved in a project.
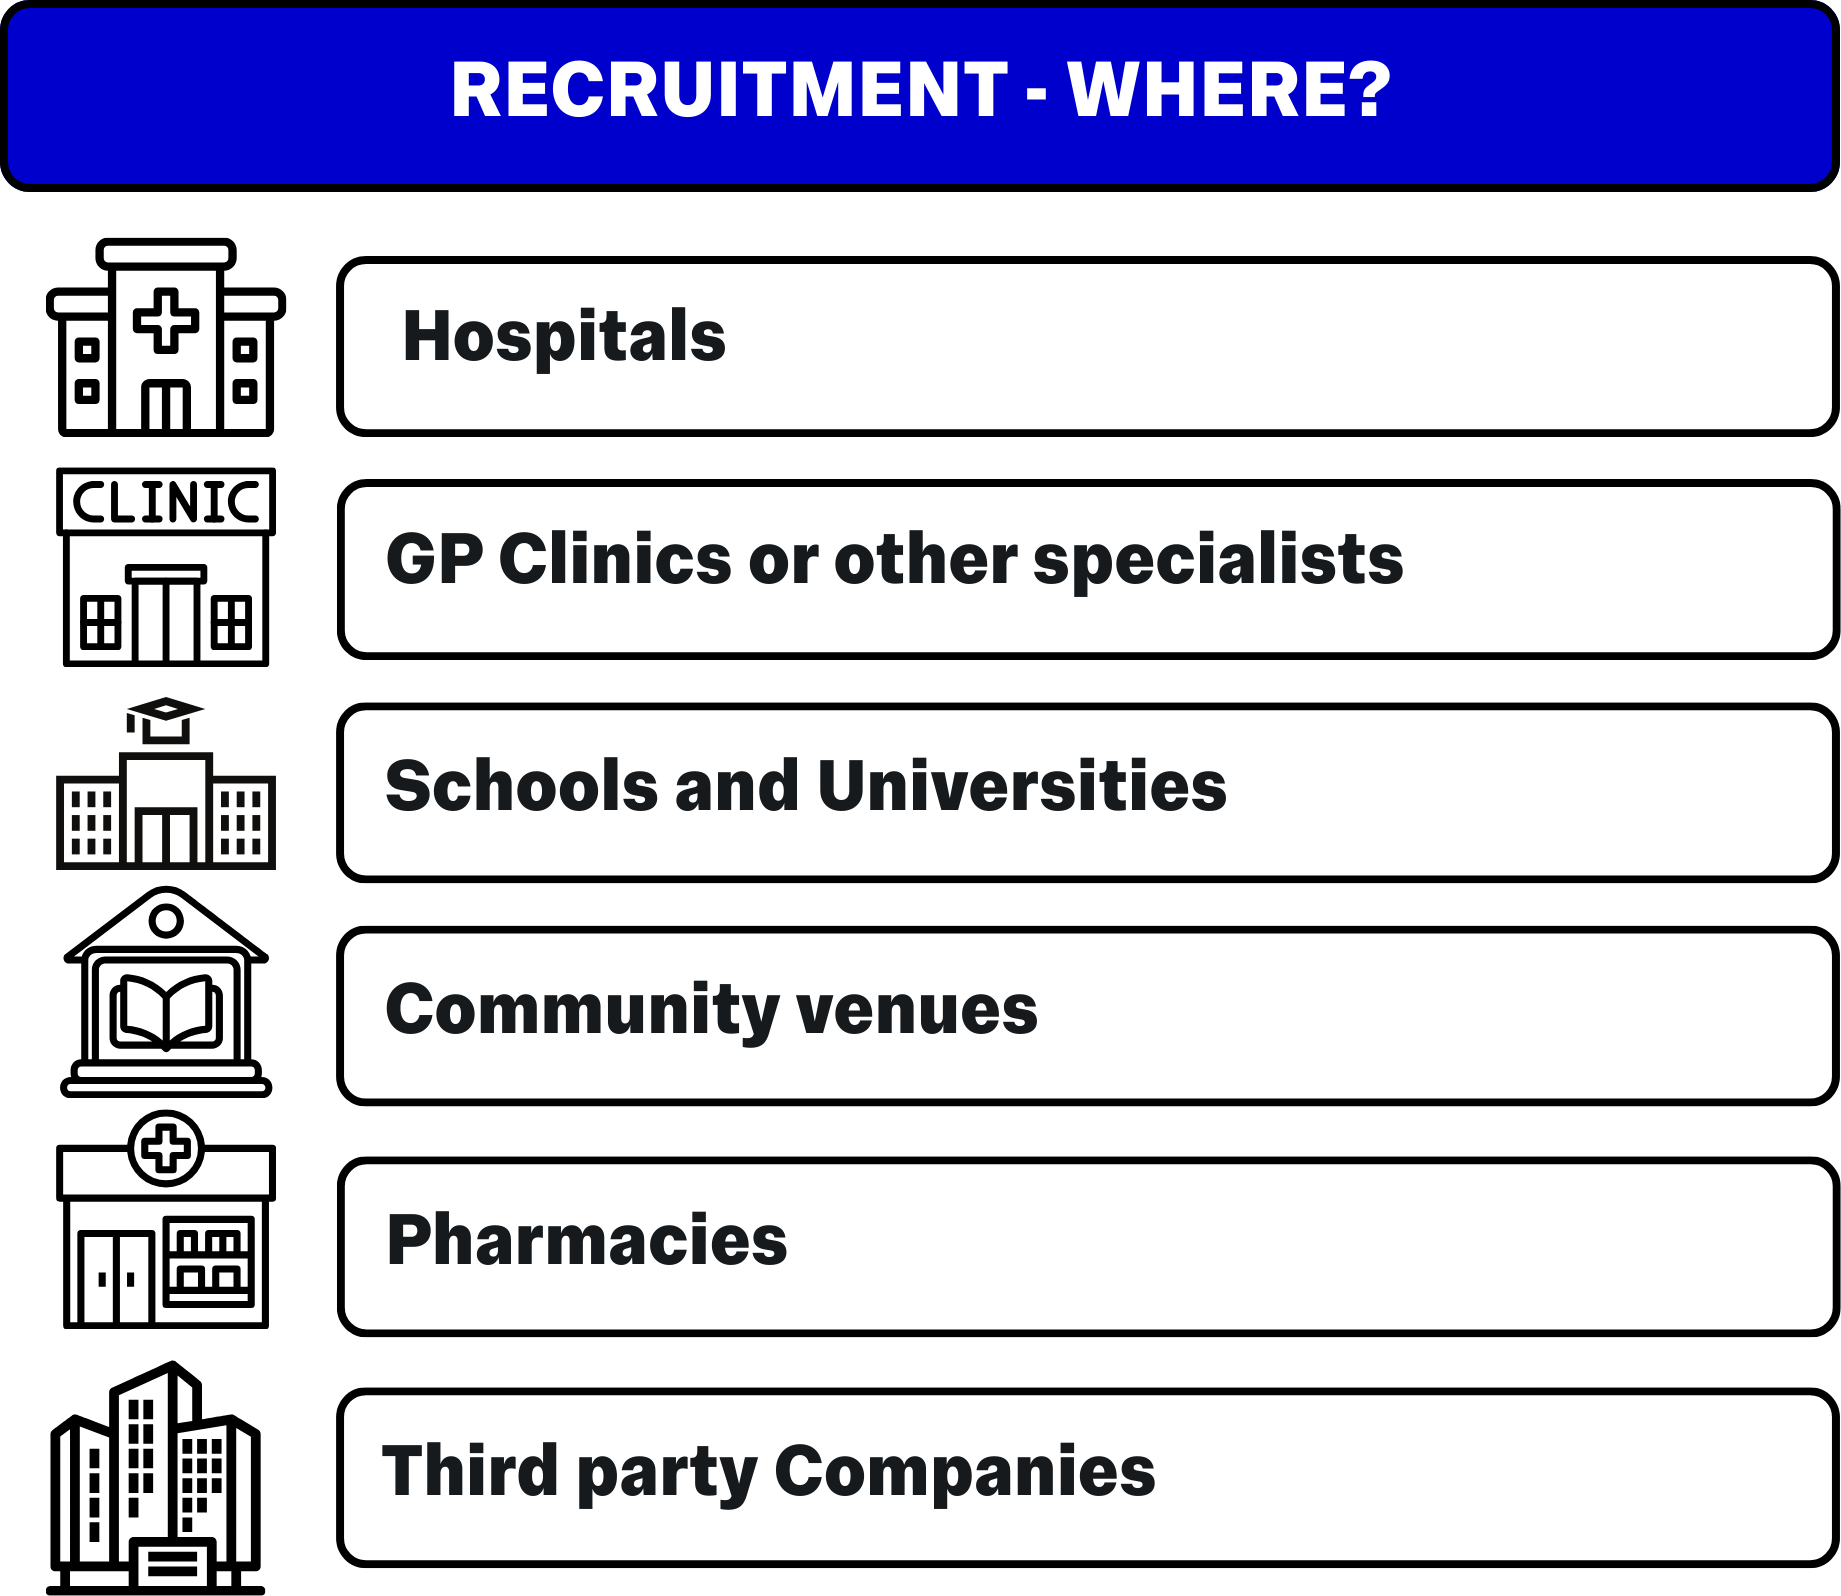
Recruitment
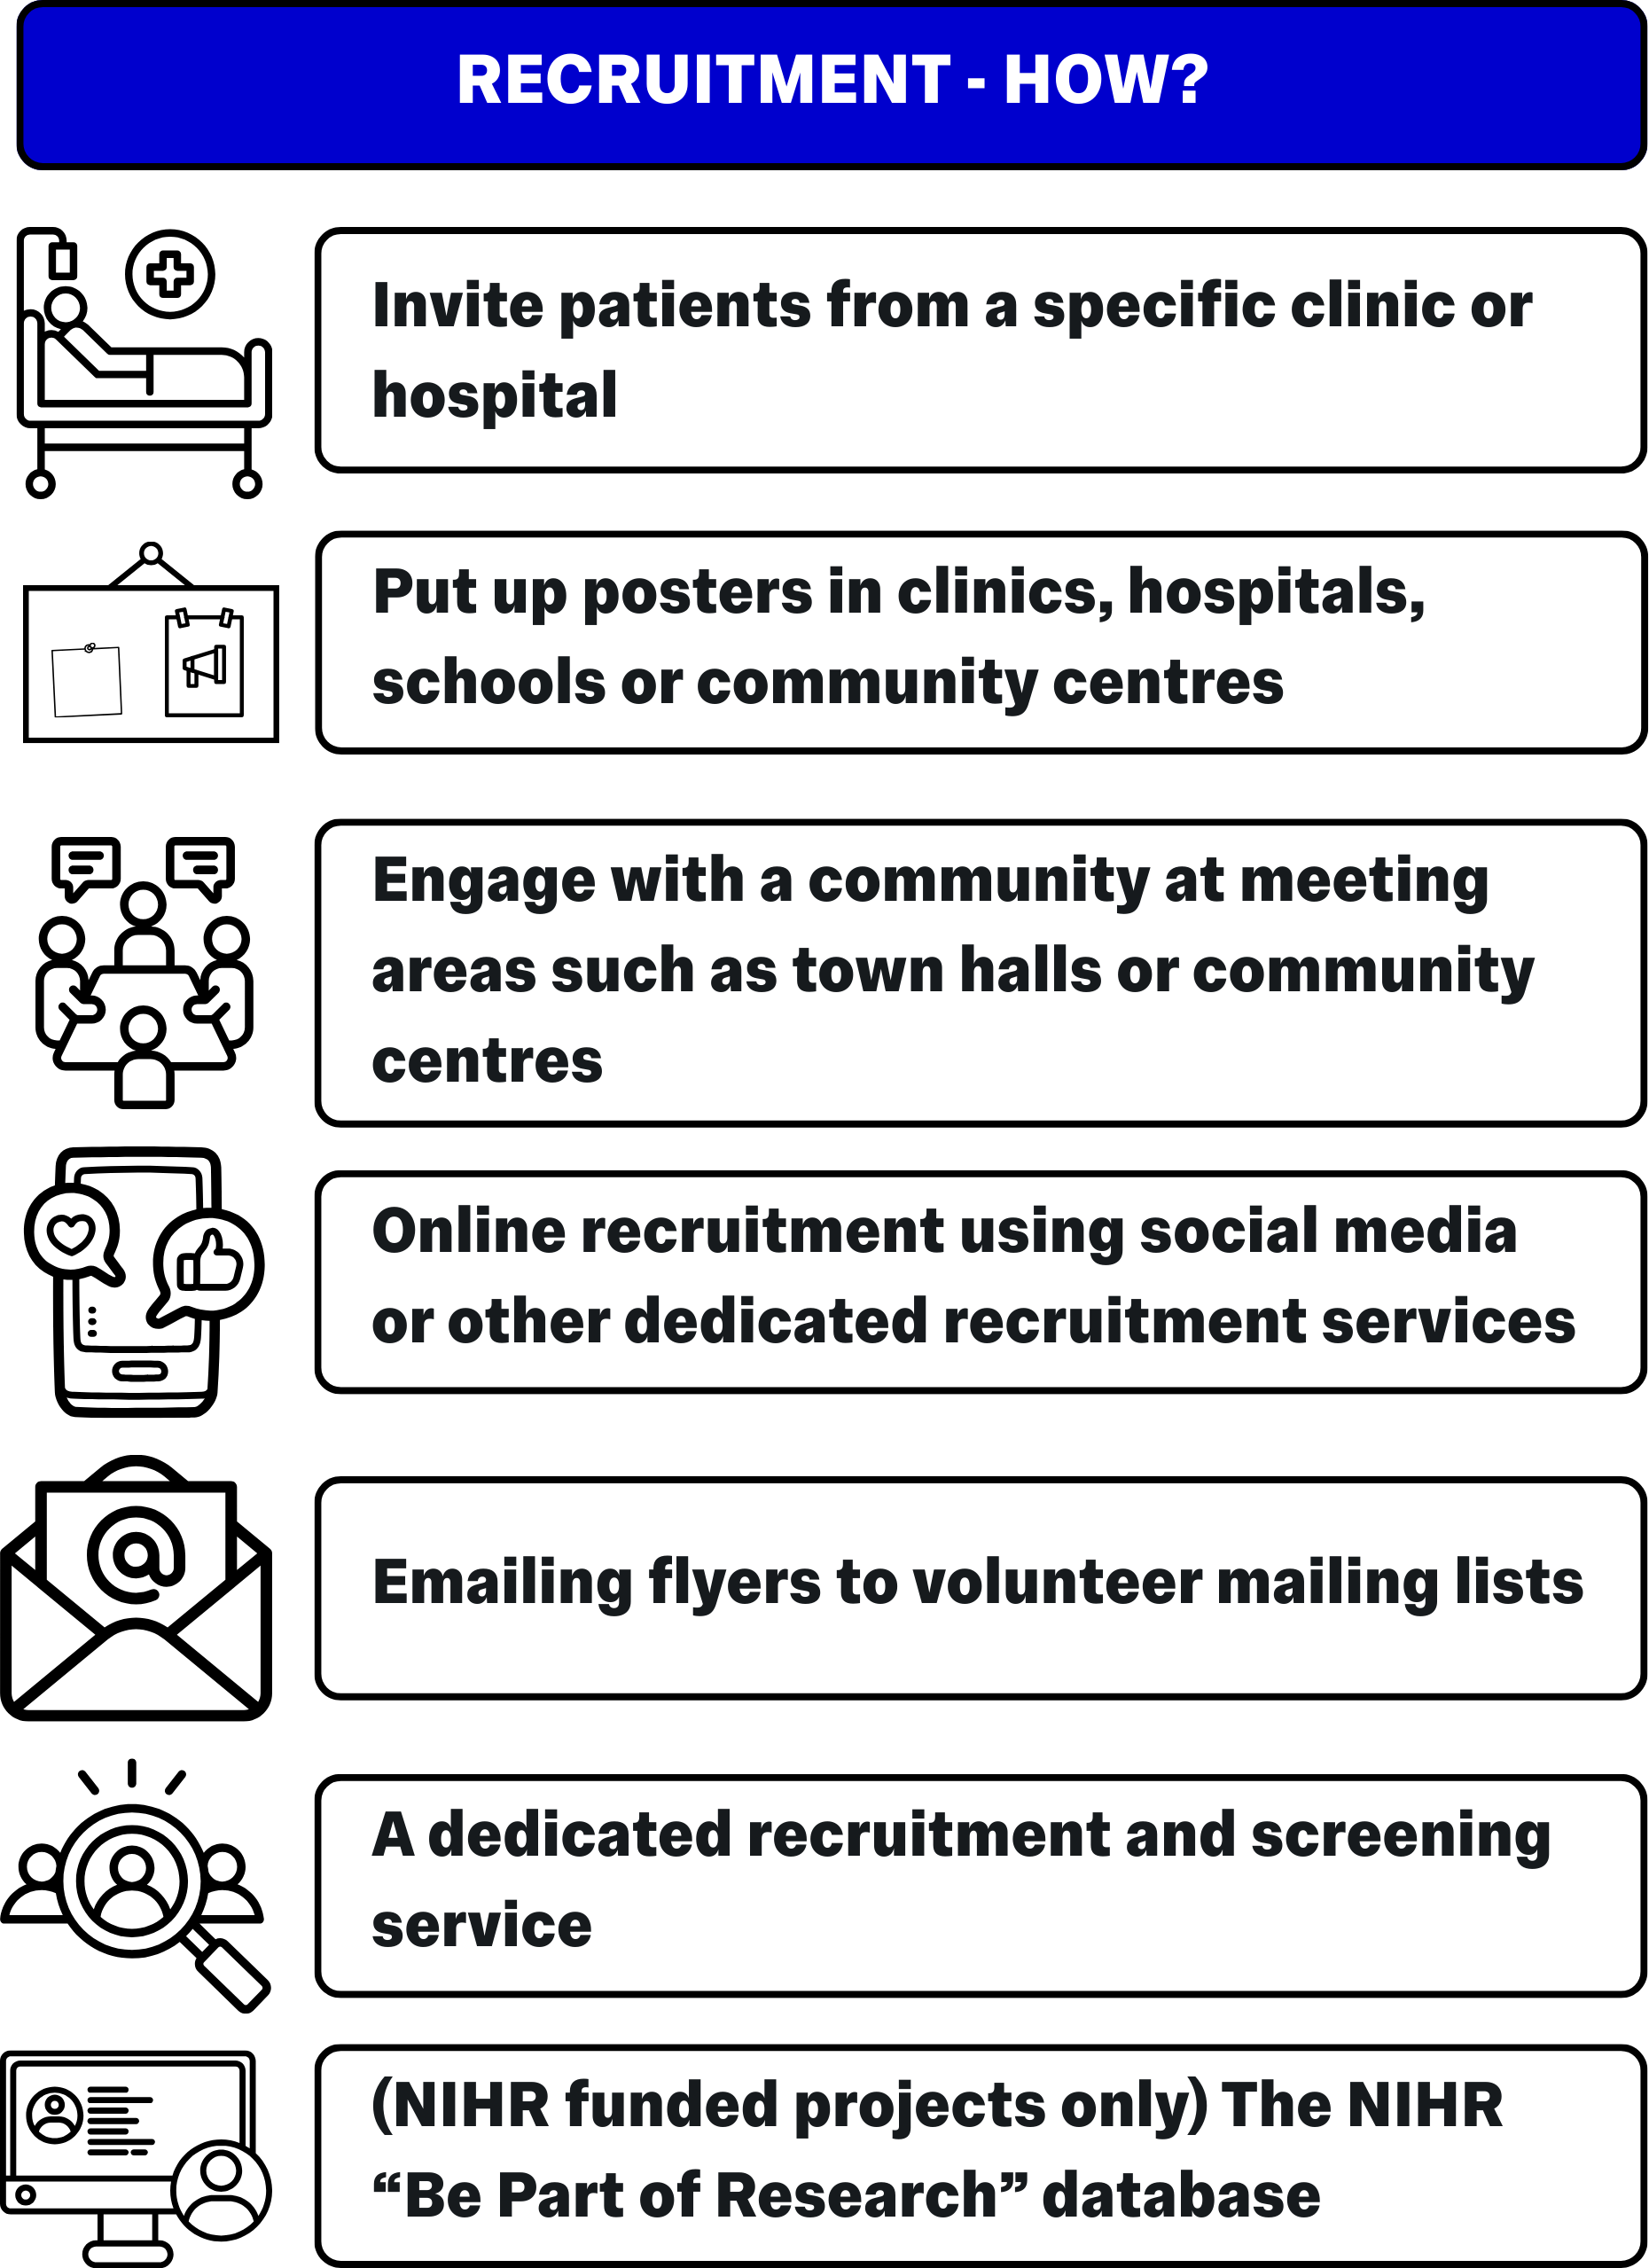
You should provide a comprehensive overview of how, where, and for how long you plan to recruit participants. It is important to remember that your ethics approval locks down the recruitment strategies you are able to use – If you decide to change recruitment strategies later in the project, you will need to formally submit an amendment to your REC.
- How long – State the point at which recruitment will end. This can be handled in a few ways:
- “Recruitment will end on XX/YY/ZZZZ (date).”
- “Recruitment will end at n=X participants successfully screened and enrolled.”
- “Recruitment will end when a total of n=X participants have successfully completed their (primary outcome) appointment.”
The last point, where possible, is the ideal recruitment end point as it will guarantee your sample size is adequately powered for your primary outcome. Unfortunately, you may be hindered by budget and time constraints, as aiming for full recruitment to an outcome can take significantly longer.
Recruitment strategies will vary from project to project, but it can be a good idea to brainstorm recruitment ideas and strategies with your team during the project planning phase, so you can pursue as many recruitment leads as is practical.
Remember to carefully consider the nature of the community you plan to recruit from and prepare to have materials available not just in written English, but in any specific forms useful to the intended audience e.g. braille, audio, sign language, specific spoken/written languages common to the community etc.
Inclusion Criteria
The protocol should contain a complete and comprehensive list of all inclusion, exclusion, and withdrawal criteria relating to how participants should be assessed before being enrolled in the trial. You should use bullet points for these lists to ensure clarity.
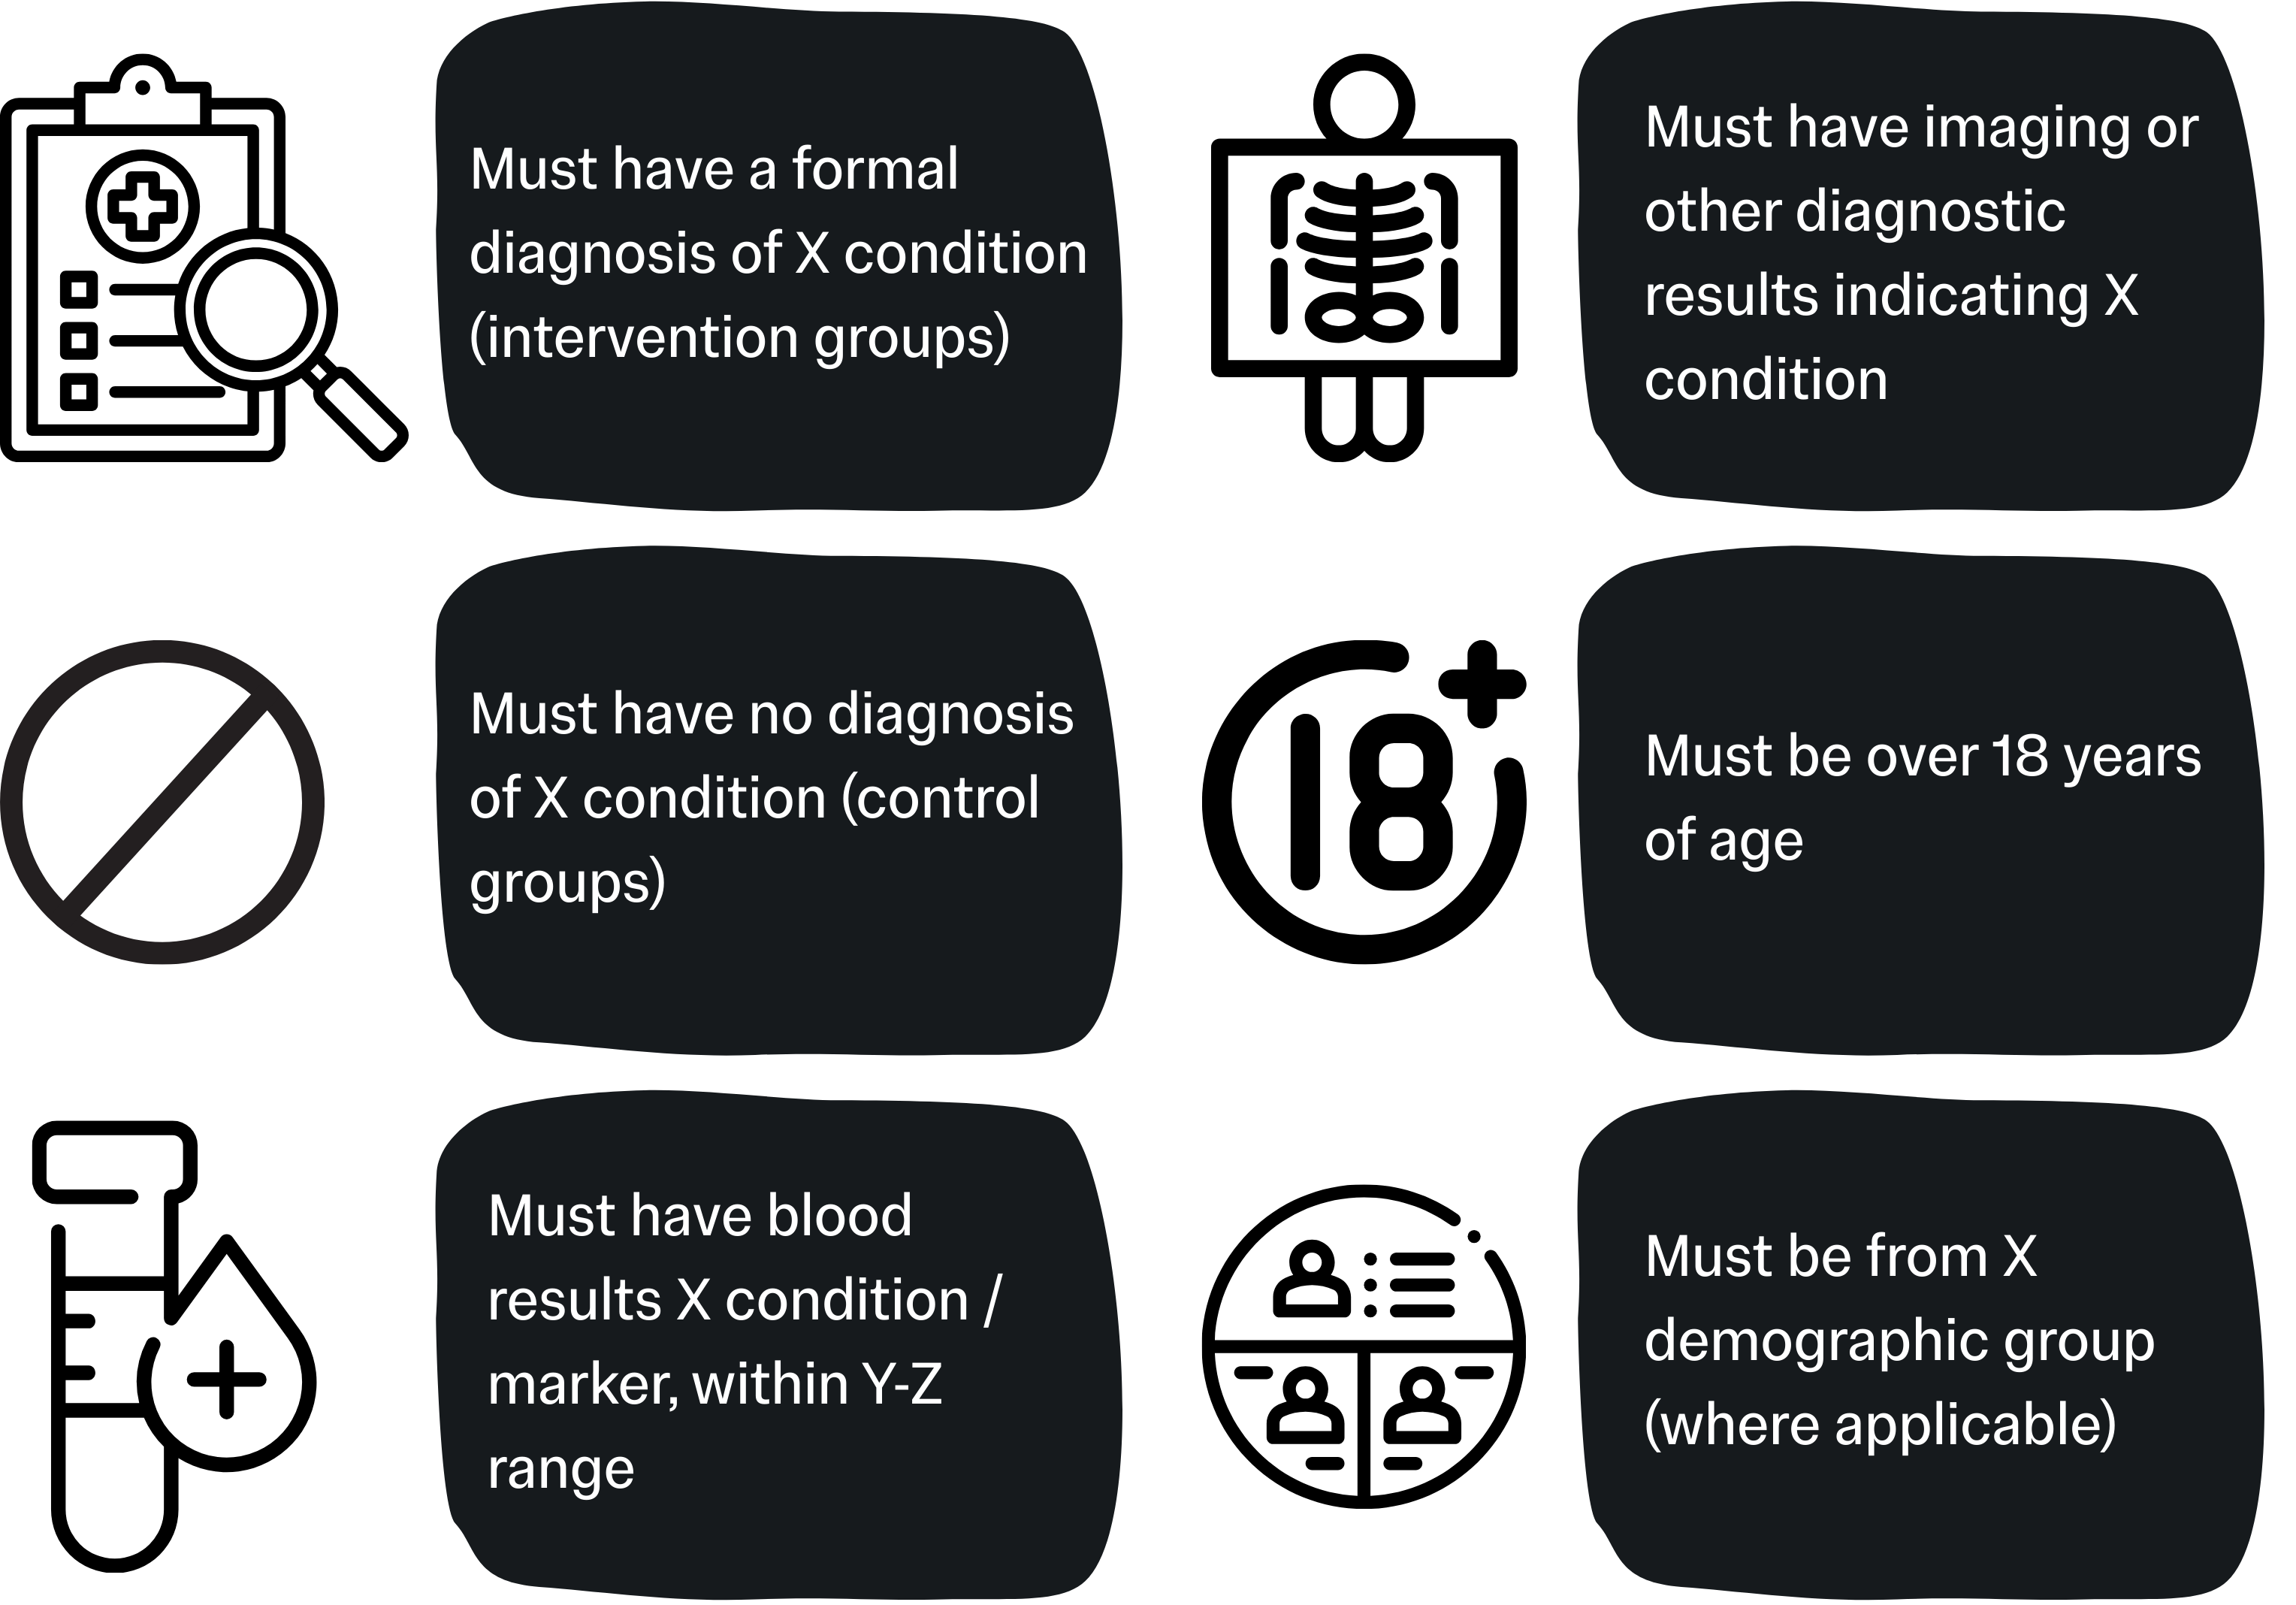
This is an explicit statement of the minimum requirements a prospective participant must reach before being considered for enrolment. Depending on the nature of your project it can be useful to stratify this list by study group (e.g. inclusion criteria for the group with the condition being studied, and inclusion criteria for the control group).
Use common sense to define inclusion criteria that best fit your project, are appropriate, and would not overly or unnecessarily limit recruitment.
Examples of Inclusion Criteria include:
Exclusion Criteria
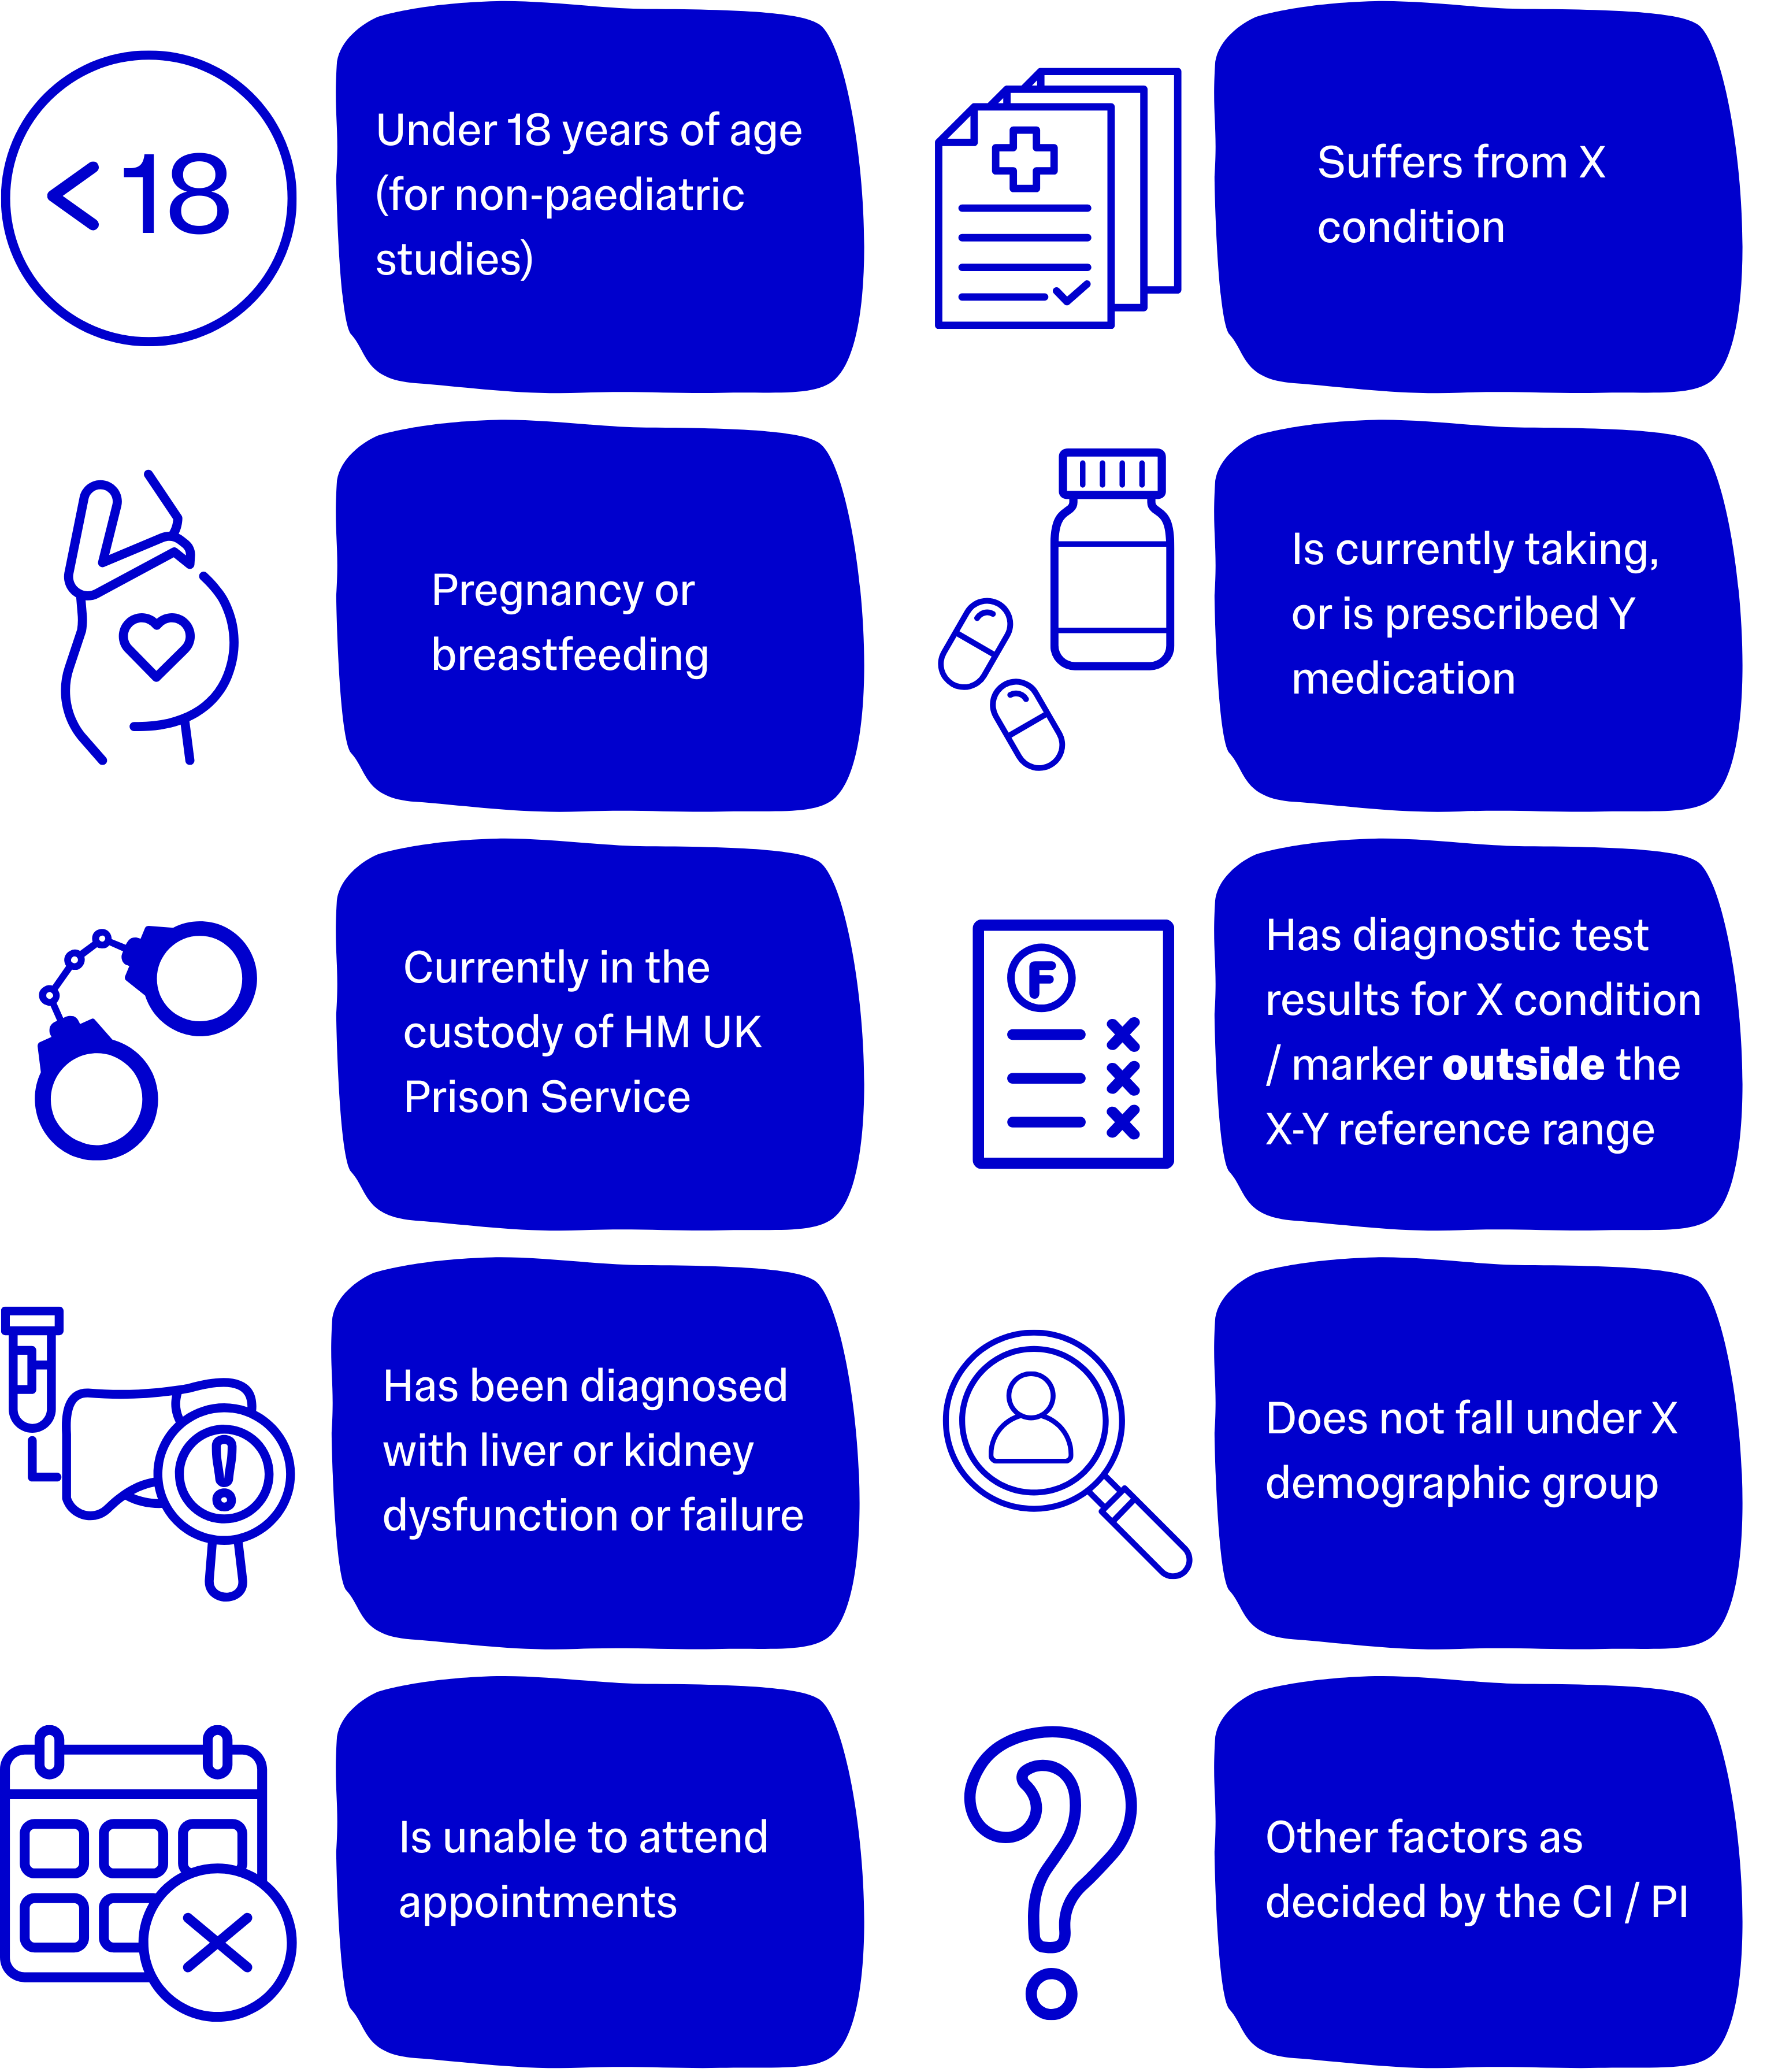
Usually a more expansive list, exclusion criteria refer to the diseases, symptoms, health conditions, medications, age restrictions, demographic restrictions, or social restrictions that would prohibit an individual from safely participating in the trial.
Use common sense to define exclusion criteria that best fit your project, are appropriate, and would not overly or unnecessarily limit recruitment, but most importantly that will protect the safety of participants.
Many studies that use new medicines or technologies must exclude potential participants for whom the intervention may be medically unsafe, for example, a trial of a new medication may need to exclude participants with liver problems until the intervention has been sufficiently validated and proven safe for that group.
You should always consult with your CI and any other clinically qualified team members when drawing up your list of inclusion and exclusion criteria.
The last item on the example list is always a good one to include as it means that, if an unusual case presents, the study team can liaise with the CI / PI to check if the prospective participant can be enrolled. The CI / PI will always have the final say on participant enrolment where there is any uncertainty. This consultation process must always be documented.
Examples of exclusion criteria include:
Withdrawal Criteria
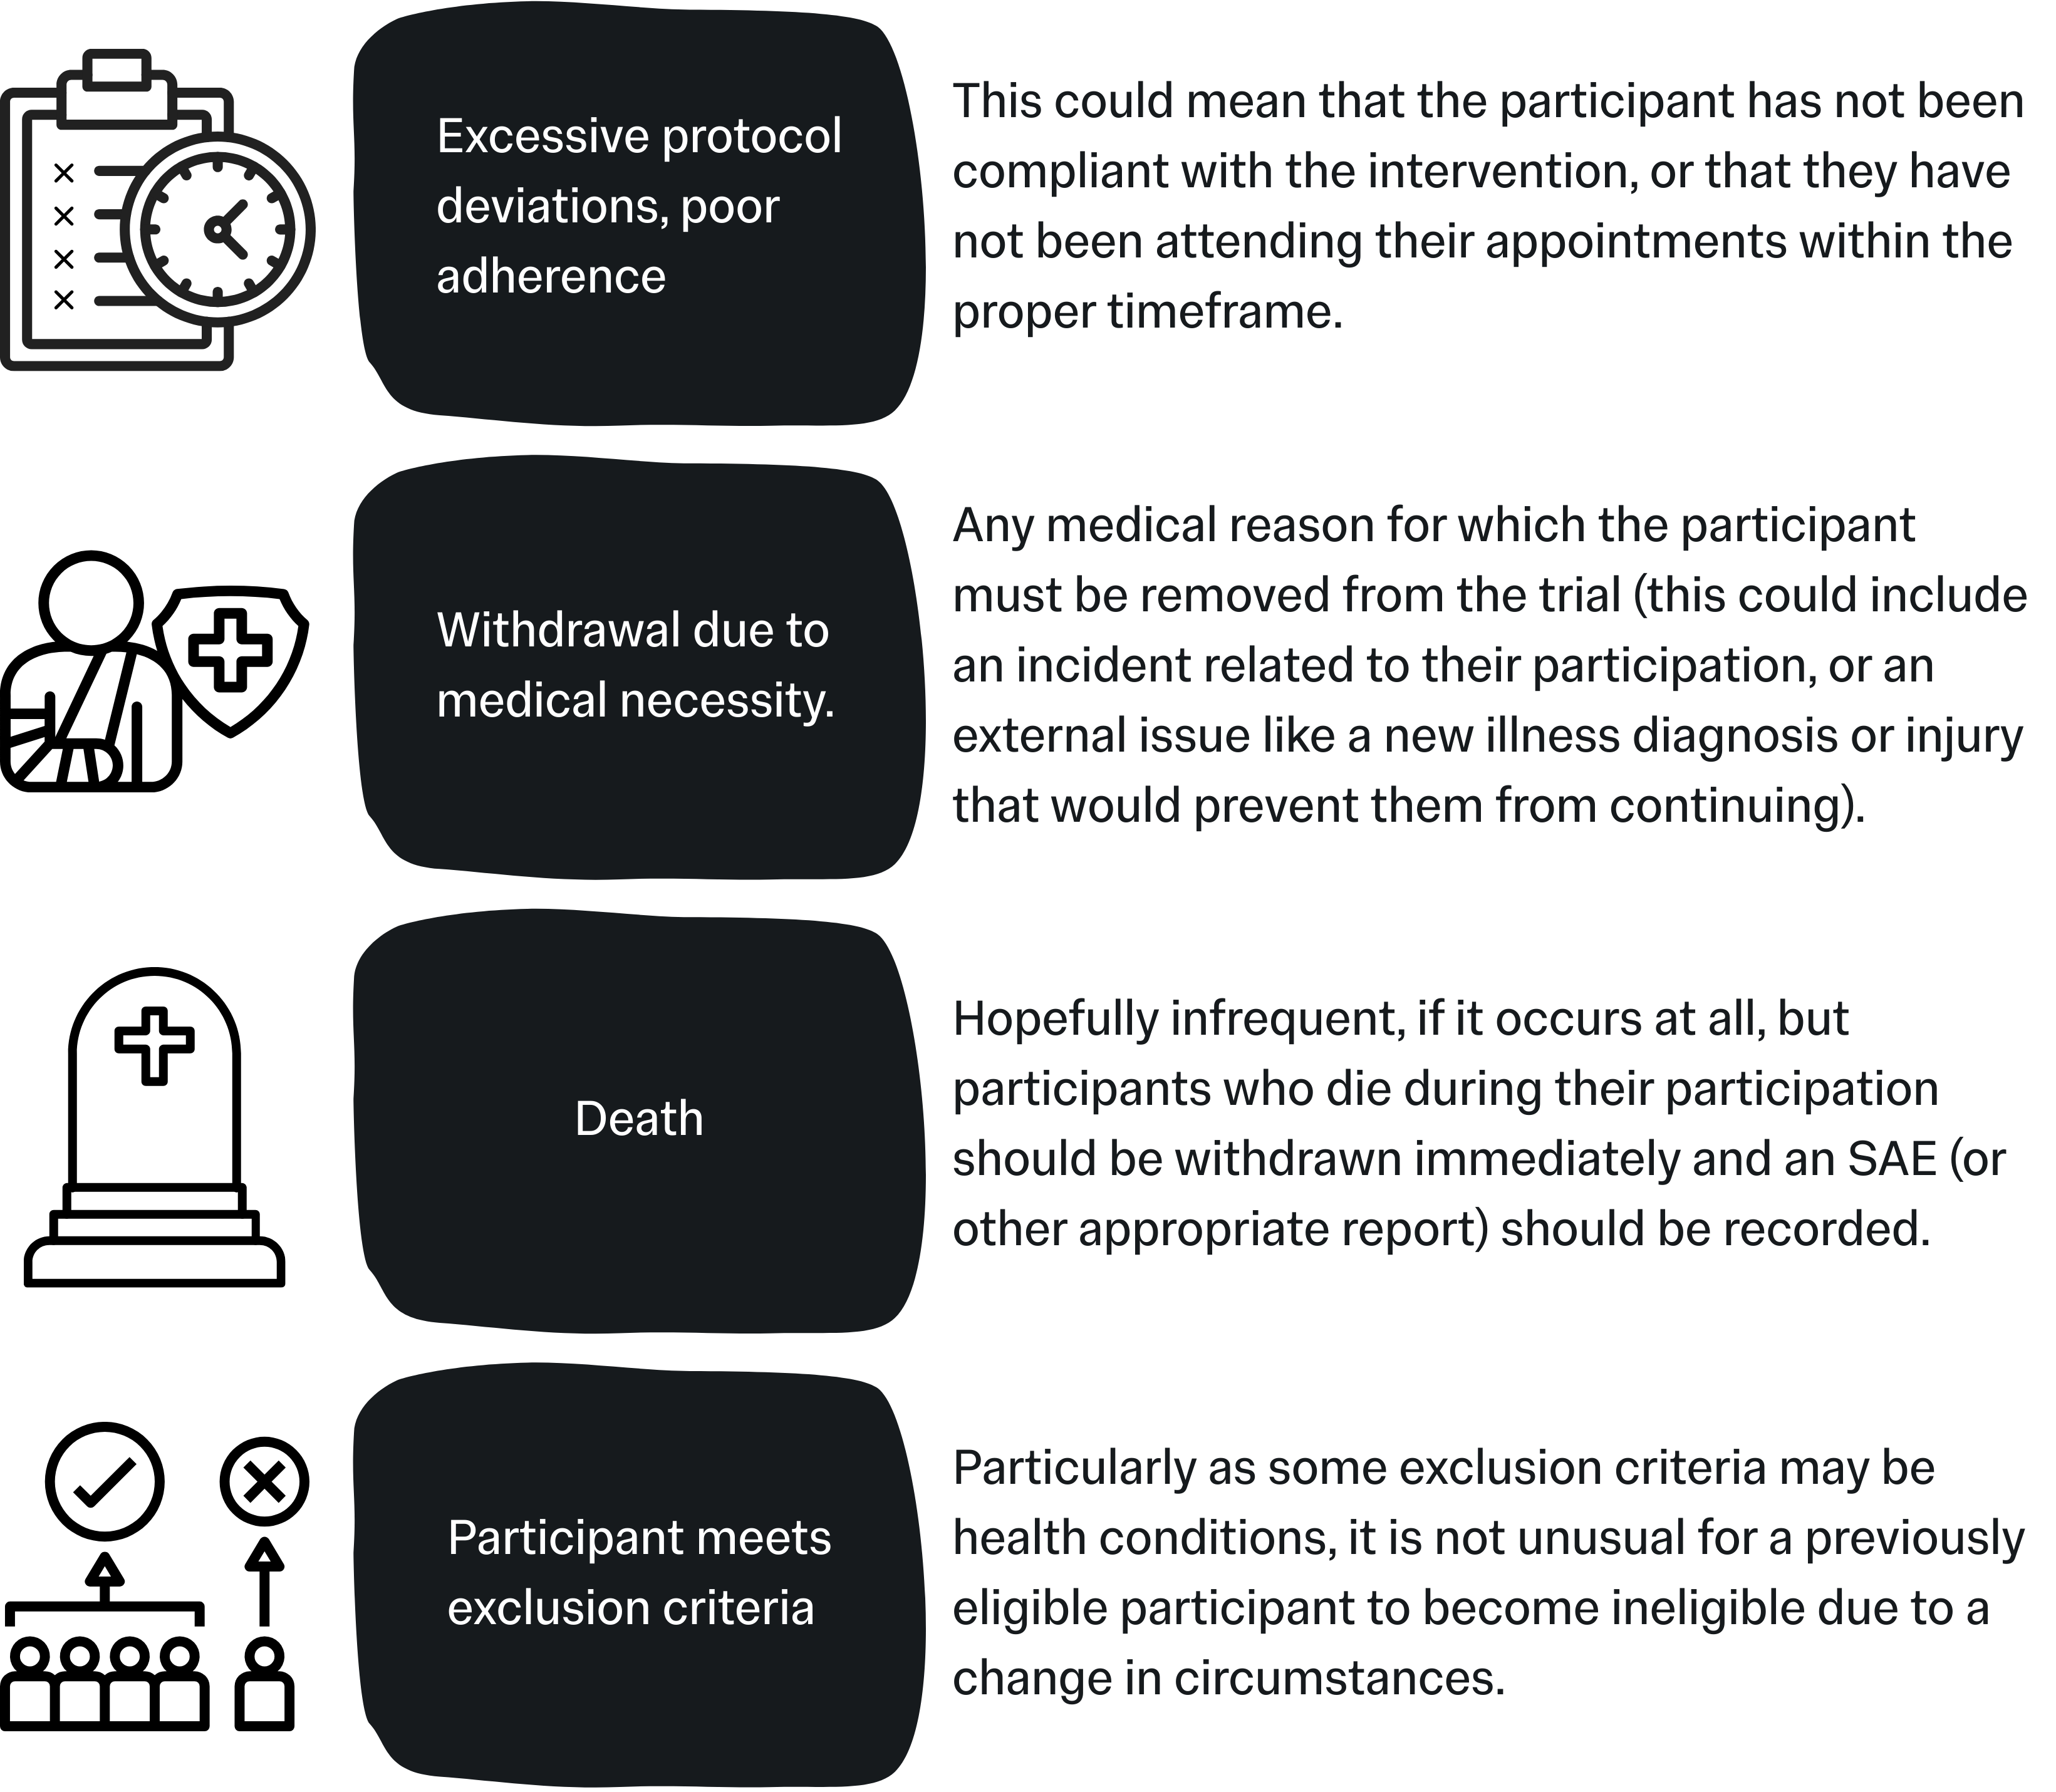
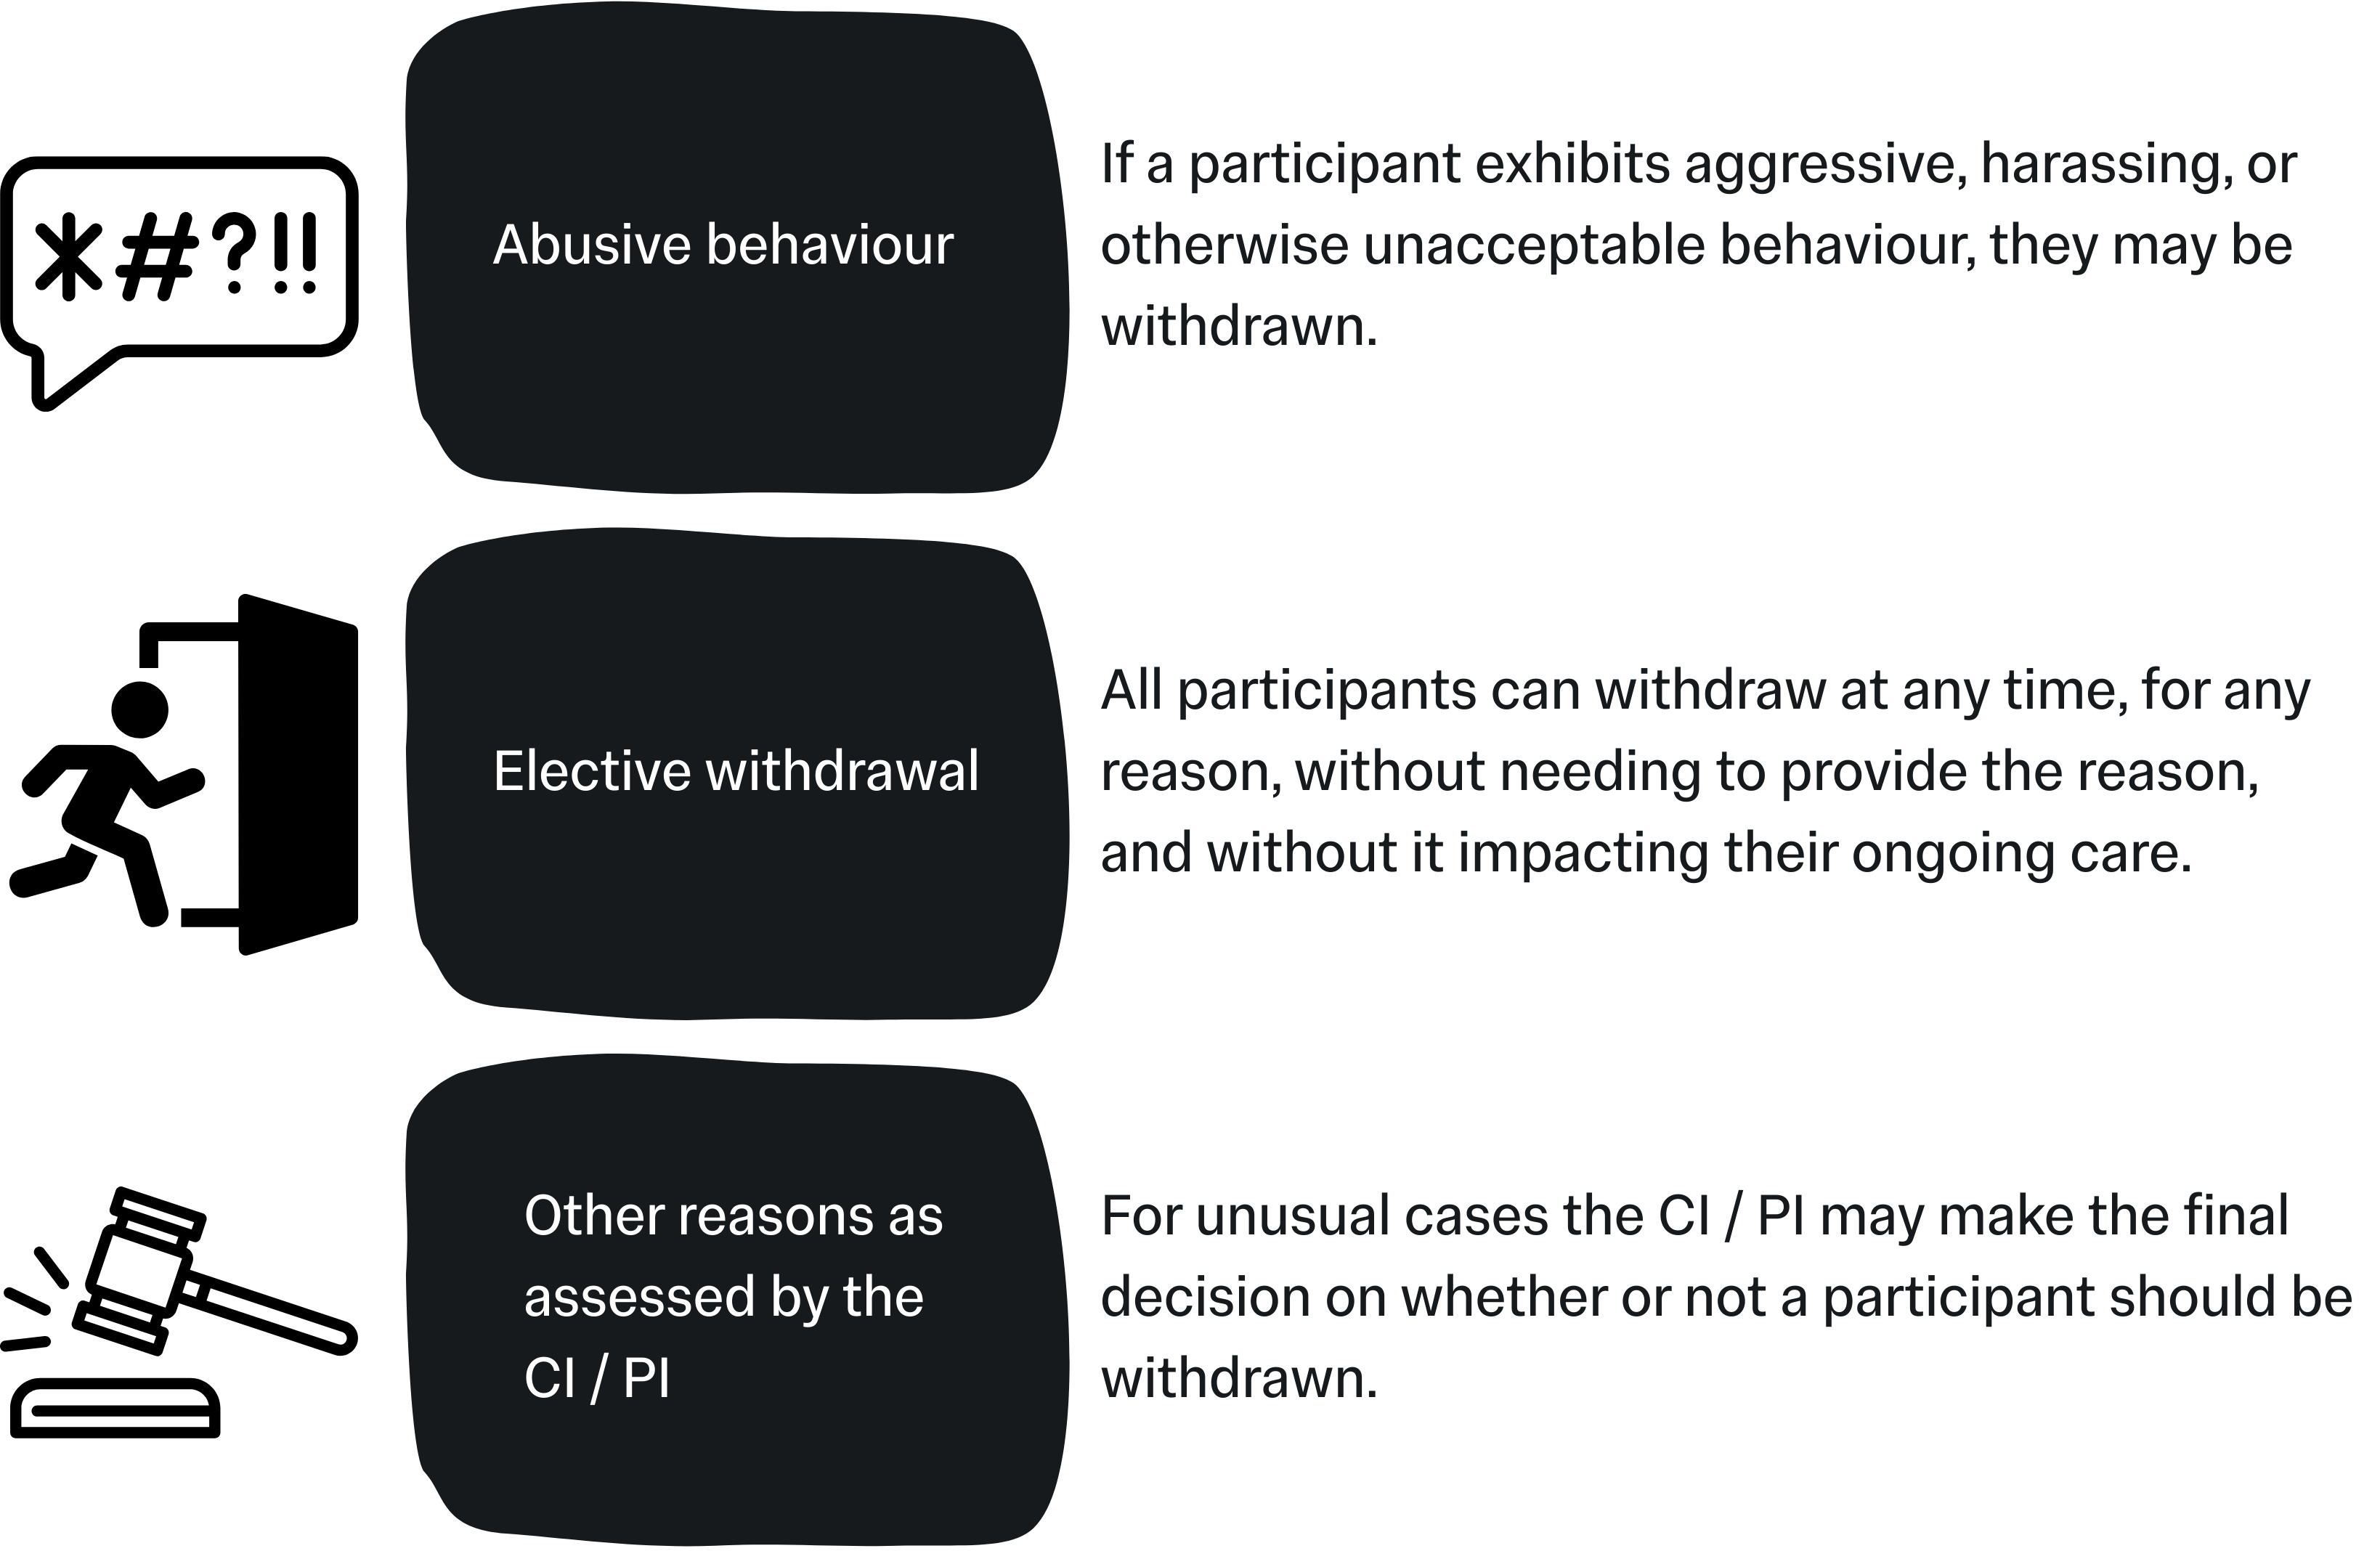
These criteria outline the point at which a participant can be withdrawn (removed) from the study. Withdrawal criteria should be defined to cover the team for any realistic reason they may need to withdraw a participant from the trial but should not be overly strict unless it is absolutely necessary. With the exception of Elective Withdrawals, withdrawals should be conducted at the discretion of the CI / PI and study team.
Common examples include:
Withdrawals: A note on adherence
Adherence to an intervention refers to how well or consistently any given participant has followed the intervention provided to them for the purpose of the project. For example, in a trial testing a new heart medication, this might be checked by seeing if they have missed any doses. This is also known as “compliance”.
There is currently no regulated consensus on limits of adherence, but poor adherence or compliance will have a substantial affect on the statistical power of your data, as well as potentially misinterpreted results (false negatives or false positives).
In this section of your protocol you should state any limits on compliance, e.g. number of missed sessions, doses, check-ins etc., and explain how you will assess adherence to the intervention. Depending on your project outline it may be useful to build “adherence reminder sessions” into your project, to help keep participants on track.
Safety Reporting
- A. Adverse Reaction (AR)
- B. Serious Adverse Reaction (SAR)
- C. Suspected Unexpected Serious Adverse Reaction (SUSAR)
- D. Adverse Event (AE)
- E. Serious Adverse Event (SAE)
- F. Protocol Deviation
- G. Device Deficiency
- H. Adverse Device Effect
- I. Serious Adverse Device Effect
- J. Serious Public Health Threat
Any untoward medical occurrence in a patient / participant administered with an intervention, pharmaceutical or otherwise, where there is reasonable certainty that there is a causal relationship between the intervention and the reaction. In practice this could mean scenarios such as a dermatological rash appearing soon after ingesting a medication, mild bruising after using a medical device, an incidence of vasovagal syncope after a blood draw, or any similar reaction.
A Serious Adverse Event (SAE) (see below) where there is a reasonable degree of certainty that the reaction has been caused by the administered medicinal product or device. In practice, some of the most common SARs are anaphylactic allergic reactions.
Also known as Serious Suspected Adverse Reactions (SSARs) - Serious Adverse Reactions (SARs), where “unexpected” means that the nature and the severity of the reaction are not consistent with any reference safety information or known information about the intervention. In practice this may mean a one-off reaction in one particular subject, such as a severe, previously unknown allergic reaction. The Sponsor is required to report SUSARs to the MHRA and the REC within a specific timeframe.
Any untoward medical occurrence in a subject to whom a medicinal product or device has been administered, whether or not that occurrence is related to the medicinal product or device. In practice, this means recording any medical or clinical change a patient has experienced since their last visit. This could include coughs, colds, and flu’s, food poisoning, accidental injuries, or new hospital referrals or admissions, amongst others.
Any Adverse Event that:
- Results in death;
- Is life threatening, or places the participant at immediate risk of death from the event as it occurred;
- Requires or prolongs hospitalisation;
- Causes persistent or significant disability or incapacity;
- Results in congenital anomalies or birth defects;
- Is another condition which investigators judge to represent significant hazards.
SAEs must be immediately reported to the Sponsor, unless stated otherwise in the protocol and approved by the REC.
When, at any time, a participant’s progression through the procedures defined by the protocol is altered, or otherwise does not strictly adhere to the prescribed procedures. In practice, this can mean occasions when a participant has an appointment outside the required time window (perhaps they had to cancel, or no-showed), instances where it is clear the participant has been non-compliant with the prescribed intervention, instances where a visit or phone call was not documented correctly by the study team, amongst others. Protocol deviations also cover non-participant related issues such as incidents involving the medicines or devices involved in the intervention (e.g. poor storage of, or damage to, the items, supply chain issues that mean alternate consumables have to be used instead of the usual supply etc.).
Any inadequacy in the identity, quality, durability, reliability, safety, or performance of an investigational device, including malfunction, user error, or inadequacy in information supplied by the manufacturer.
Any adverse event deemed to be directly related to the use of the investigational medical device.
Any serious adverse event deemed to be directly related to the use of the investigational medical device.
(EU Medical Devices Co-ordination Group on the EU Regulation 2017/745) An event which could result in imminent risk of death, serious deterioration in a person’s state of health, or serious illness, that may require prompt remedial action, and that may cause significant morbidity or mortality in humans, or that is unusual or unexpected for the given place and time.
N.B. This definition will usually only apply to projects handling dangerous biological material, such as live bacteria or viruses, deadly diseases, infectious diseases, or infected biological material such as blood.
Defining Expected Reactions

It can also be valuable to define in your protocol any expected or anticipated adverse reactions or device deficiencies. For example, if your project involves blood tests, you may record that participants may experience some mild discomfort during the blood draw. If your project involves a new app-based patient tool, you may record that participants may experience some issues with the app (include any known problems or potential issues) and how they can report any issues and how you plan to mitigate the delays these issues might cause to participation.
When conducting a project involving a medical device, technology, pharmaceutical, or a medical procedure, you should also record the “relatedness” of any incidents. Don’t just make a simple “related / unrelated” decision, use a scale for degrees of relatedness such as “Unrelated / Unlikely / Possible / Probable / Definite”.
For example, if a participant in a trial of a new medicine reports food poisoning-like symptoms once in the trial, you may report this as Unrelated or Unlikely; but if they repeatedly report the same symptoms, you may report it as Possible or Probable. If you establish a pattern where, for example, the majority of the sample report the same symptoms with a reasonable degree of similarity, you could upgrade these decisions to Definite.
In the protocol, you should include the above definitions of adverse events as well as including a thorough outline of any expected events or occurrences and how they will be handled to maximise participant safety.
Your protocol should outline how each of these events will be:
- Handled in the immediate moments (e.g. noting minor events in the patient file, or emergency procedures for serious incidents).
- Immediate reporting for SAEs and other serious incidents, to whom, and by what channels (e.g. by phone call to the Chief Investigator).
- Further reporting and record-keeping (e.g. events being recorded in a database to be discussed at a monthly meeting).
When reporting any of the above events, it is vital to adhere to any internal safety reporting policies and procedures. If you are unsure of how to classify an event, you should check with your CI in the first instance. Your Chief / Principal Investigator must be notified immediately of any SAEs, SARs, or SUSARs and they will make the final decision for next steps (it should be clarified that notifying the CI, should be completed after stabilising and ensuring the safety of the participant in question, and any team members present, depending on the circumstances).
Your CI / PI is required to notify both the Sponsor (immediately, usually via phone call) and the Research Ethics Committee within 3 days, in writing, of any SAE, SAR, or SUSAR. Depending on the event, the Sponsor may require an Urgent Safety Submission via IRAS.
Recording Adverse Events
Your protocol should also briefly outline expectations for how the administrative team will record any adverse events (serious or otherwise), protocol deviations, device deficiencies etc.
You will need to keep a record of any and all incidents that fall under the above definitions, which should be categorised in a logical and practical manner, additionally classed as “serious” or “non-serious”, and you should organise regular (ideally monthly, depending on how many participants you see per month) meetings that include your CI / PI to discuss any new incidents. Your CI / PI will then be able to assess how the incidents were responded to, if they have been categorised and defined correctly, if any further reporting needs to occur, and will sign-off on them if they are happy with the procedures to date. When recording incidents involving participants it is vital to note the anonymised participant ID of the participant involved, not their actual name.
You do not need to try and define the categories within the protocol as this can be completed as the study progresses.
Beginning your project with a strong incident reporting system can help you monitor and track any problems and can better protect the safety of your participants by allowing you to spot any patterns or recurring issues.
Urgent Safety Measures
On occasion, there may be an event so serious that the Research Ethics Committee and Chief Investigator decides on the implementation of urgent safety measures. This usually means the immediate suspension of study activities but can also mean the severe limitation of study activities until the event has been analysed and understood, and that it has been ascertained that there is no further danger to any other participant, or to the study team.
In this event, the Chief Investigator must report the measures to the study REC immediately by phone call and within 3 days in writing.
Data Collection

Methods
Data reliability and validity is directly tied to the data collection methods. In your protocol, you should outline how you intend to capture data from participants and participant/clinician interactions, state how and where you plan to store data, and how data will be communicated with your statistician for analysis (include an overview of the timeline, where there are more than one data transfers planned).
The quality of the data you obtain from your project will be defined by the quality of the data collection tools you use. Data collection tools can include:
- Questionnaires and interviews
- Clinical equipment for sample gathering
- Laboratory equipment for sample analysis
- Observations
- Electronic devices such as iPads or phones, and internet/digital forms
Your choice of data collection tools can also impact protocol adherence, data accuracy, user acceptance, and how quickly you will receive data. You should endeavour to choose data collection methods that are appropriate to your project, but that are accessible to the people creating data, whether that’s clinicians or participants directly.
Note that significantly different answers can be obtained for some outcomes e.g. harms, depending on who completes the measure (participant, investigator, other personnel). As such, it can be useful to collect data on subjective experiences and outcomes from both the participant and the investigator.
Sample forms and templates should be stored in the Appendices of your protocol.
Management
It is common to have a separate, full version of your projects data management plan, but you should include the main details in your protocol.
Include a description of data storage plans, including data formats, and locations, and data security measures. You must be able to demonstrate how you plan to maintain the integrity of the data, and how you will protect participant data from unauthorised access or loss.
Validation
This process specifically refers to how data will be checked and ensured to be correct prior to being transferred to your statistician.
For example, in a project using paper forms, on a weekly basis a qualified member of the team may transcribe those forms into a digital format.
This transcription should then be checked by another person on the team. Any errors or queries should be struck through with a single line, and annotated with the correction, reviewer’s initials, and the date.
Another example would be checking digital databases for errors or missing items. Similarly, this process should also be checked by a second person.
Where the project collects non-numerical data, there may be a coding system in place (e.g. assigning a number to words in specific categories). Anyone involved with data transcription and validation must be trained on the systems in place, to ensure these practices are as consistent as possible.
Data validation will usually take place at a specific location, where the person validating can have access to any hard copy files, as well as digital data. Completing these tasks in a secure location such as a research facility also protects your data. It means you don’t have to move hard copy files or hard drives/laptops between locations, and it means the data has less chance of being viewed by persons not involved in the project (e.g. as opposed to working in an open plan office or public space).
The protocol should outline the standard data validation practices that will be completed during the project, and should be in enough detail that readers can accurately replicate the process. The integrity of your data dictates the quality of your results, and will influence where you can disseminate your work.
Outcomes & Statistical Methods

There are two types of outcome: primary and secondary (sometimes referred to as “other”). The primary outcomes are those that are of main interest and will be stated in the objectives section. Secondary outcomes are other foreseeable outcomes from the project that may be of interest.
The protocol should define, for each outcome:
- The specific measurement variable i.e. the specific data collected from participants;
- The participant-level analysis metric, what the data collected represents (e.g. change from baseline, final value etc.), which will be used for the analysis;
- The method of aggregation, which is the summary measure format for each group (e.g. mean, proportion of a group with a certain score etc.);
- The specific measurement time point of interest for the analysis (e.g. change to blood cholesterol at six weeks, or similar).
You should explain the rationale for the choice of outcomes, and should explain how the result to be obtained is:
- Valid
- Reproducible
- Relevant to the target population
- Responsive to changes in the health condition being studied
N.B. Subjective outcomes are more vulnerable to bias than objective outcomes.
Regarding statistical methodologies, whilst you should have a full Statistical Analysis Plan in place, it is prudent to add an overview of the statistical plans and methodologies in your protocol.
This overview should include:
- Statement of the primary outcomes
- Any other outcomes
- Short description of the planned statistical analysis methods for each outcome
- How missing data will be handled
- Which participants and what data will be included in each analysis
- State any comparisons and which groups the comparisons will include
The SPIRIT (2025) guidelines include great details and examples of how to include information on statistical methods in your protocol.
Study Monitoring
Outside of routine day-to-day quality control and data management, you should organise regularly scheduled monitoring visits from an appropriately qualified third party. This process is designed to check the processes undertaken across the project, and ensure they are of high quality, with high adherence to the protocol. Additionally, study monitoring can be beneficial to both participant safety and to the integrity and quality of data gathered.
Initial visits will be conducted across all Sites, but if the findings are good, future visits may be undertaken based on risks. Additionally, visits usually occur every 4-6 months for low risk projects, but higher risk projects or projects where concerns have been identified will have more frequent visits. Your study monitor will be able to give you more information for your specific project when you initially engage with their service.
Appendices
The appendices of your protocol should be organised and should only include important information that would be inappropriate to include elsewhere in the document.
This can include:
- Manuals and specifications for any medical devices being used on the project.
- Template documents including the:
- Participant Information Sheet
- Participant Information Sheet (Summary)
- Consent Form
- File Note
- GP Letter
- Case Report Form (CRF)
- References
It is important to note that many of these items may be duplicated within other documents such as the Trial Master File and the Site File. You should not include trial documentation such as Research Agreements or REC Favourable Opinion letters here – Those documents should be stored in the Trial Master File.
General Guidance for Protocols
- Document & Version Control
- Including Literature & Background
- Personnel & Places
- Study Specific Procedures
The front page of the protocol should include a table of versions and edits, and who signed off on them. These changes will primarily occur across the development of the protocol before the project commences. The table usually includes three columns: New version number, date completed, signature. It is prudent to start your version numbers at v0.1 for the first iteration, use v1.0 for the final draft (that will be submitted to REC), and use v1.1 onwards for any subsequent changes, such as edits requested by the REC.
Once a REC Favourable Opinion has been achieved you must not change the protocol unless a substantial amendment is required i.e. where there is a change to the research process or similar. All substantial amendments must be submitted to REC before commencing.
It is not sufficient to change the protocol alone, as the new protocol must be submitted to ethics along with any other altered documents or items and the reasons for change.
Where the substantial amendment relates to a safety concern, your Chief Investigator will make a decision about whether the study must be suspended until the new process is approved.
Every page should include a footer that incorporates the page number, document title, version number, and version date.
You should be aiming for an average of at least one reference per 100 words.
References should primarily come from academic journals and peer reviewed literature. Occasionally there may be necessity to use other sources for reference material, for example reference books or tools (such as the British National Formulary (BNF)), websites, media outlets or specific media reports, or legislation.
When referencing sources that are not journals / articles, make sure you follow any referencing style guidance that may apply, for example, if the proposal must use APA referencing style, make sure all your sources are referenced in this style.
It is good practice to use superscript numbers in the text to indicate a reference, and to make sure that the number in the text (e.g. “journal quote” 1) corresponds to the list number of that reference (so in this example, the reference would be number 1 in the references list). Additionally, references should be organised in the order they first appear / are referenced in the text.
N. B. Some funders / ethics guidelines will require the reference to be named within the text. In these cases, you should use the “Name (Date)” format of in-text referencing, and the references list should be organised in the order each reference first appears in the text.
Avoid the use of jargon where possible and explain any acronyms at the first point the term is used in the text. It is usually prudent to include a glossary of acronyms and any study specific terms within the first few pages of the protocol.
The references section can usually be treated as either a full section or as an appendix.
Personnel are primarily recorded in the Delegation Log, but there should also be an accurate list within the protocol.
Sites should also be denoted in the protocol, specifically name, address, and any important contact information or opening times.
Over time personnel may change and records, including the Delegation Log should be updated promptly and accurately. Any changes should be recorded and acknowledged / witnessed by an appropriate second person.
For studies where there are unique, study specific procedures, especially in cases where novel technologies or medicinal products will be in use, the procedures should be stated in as clear and plain language as possible.
It is important to remember that not everyone who needs to read and understand the protocol is an expert.
Download this Resource / Contact Us
You can download a copy of this resource here: How to write a Study Protocol (PDF)
You can find the SPIRIT (2025) Statement for Protocols at https://www.consort-spirit.org/ and you can find additional information on Safety Reporting here and here.
You can also see templates for protocols and other study documents provided by the Research Governance & Integrity Team (RGIT) here!
If you would like to contact us, or if there is a resource you would like to see, reach out to us using this form!