
Extreme environments requires special skills, knowledge or equipment in order to survive without injury or incident.
This advice applies equally to walking in the Lake District in the UK or to trekking in the jungle in Brazil. Although there are generalities, each environment will come with its own hazards and therefore each trip will be unique and will require thorough risk assessment and research before committing to the venture.
Location
Prior to starting fieldwork at a new or unfamiliar location try to ensure that you know the area, the routes you will use and the hazards you may encounter. A reconnaissance trip is advised. The purpose of such a visit is to establish:
- Local permissions and consult with persons in control of land or property about local hazards.
- Whether the locality will allow fieldwork tasks to be undertaken and achieved.
- Access arrangements to the site.
- Contingency plans in the case of emergency (e.g. telephone points, escape routes, nearest available help etc).
- If a reconnaissance trip is not possible advice might be sought from people who are familiar with the area, particularly previous fieldworkers at the site, landowners etc.
- On arrival at the site at the start of fieldwork on the spot assessments should be carried out to note changed circumstances and the existence of new and specific hazards.
- Working alone in the field should not be attempted unless there is absolutely no alternative and then special provisions should be made to mitigate any associated risks.
- In areas where game shooting takes place wear high visibility clothing in the appropriate season. Learn where and when organised shoots will be taking place and plan accordingly.
Types of enviroments your off-site work may take you to:
Extreme environment 1
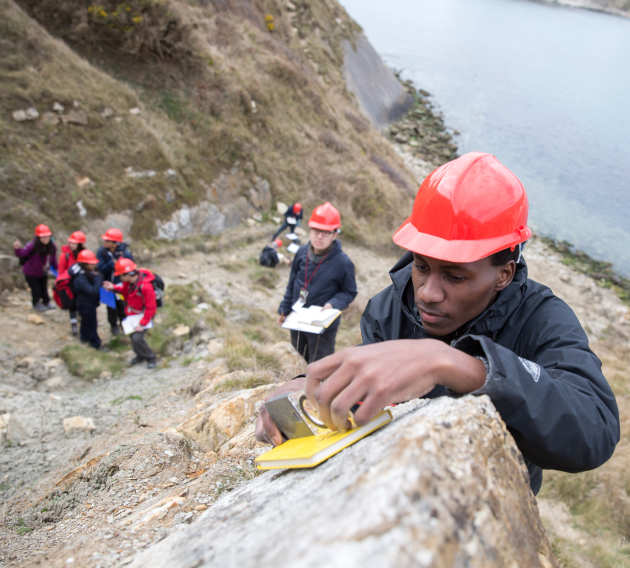
- Areas of high relief, altitude and cliffs
- Agricultural land
- Railways, motorways and roads
- Woods and Forest
- Coastlines, Estuaries, Mudflats and Saltmarshes
- Bogs, Mires and swamps
- Rivers, lakes, reservoirs and their margins
- Hot climates
- Deserts, uplands and arid zones
- Cold climates
Potential hazards: - Falling rocks, working at height, uneven ground, hard and jagged surfaces, altitude sickness.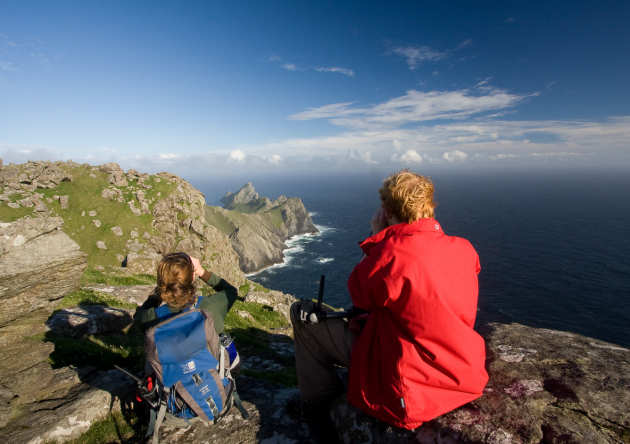
- Always move carefully over rough rocky or vegetation covered terrain, taking care to avoid loose boulders and watch out for burrows. Do not run down scree slopes or steep hills, and take care not to dislodge loose rocks or other objects.
- Ensure that local relevant authorities are given the details of your location and dates of work. Always carry a mobile phone (with fully charged battery and credit) and GPS.
- Always carry a survival bag and, and in winter, a sleeping bag. (see check lists) If you are immobilised for any reason put on any spare clothing and use the survival bag without delay.
- Summon aid using communications equipment and or flares.
- Do not attempt to climb rock faces or steep and dangerous slopes without proper climbing equipment and the skills necessary to carry out the operation.
- Where work has to be carried out below rock faces a hard hat of correct specifications must be worn.
- After reconnoitring the ground ensure that the team are aware of any special hazards such as cliff edges or loose/unstable rocks.
- Do not work near cliff edges as there are often unstable overhangs
Altitude sickness
Altitude sickness is a common condition that can happen when you climb to a high altitude too quickly. It can occur at any height above 2,500m and can affect anyone, no matter how fit or experienced.
The decrease in atmospheric pressure makes breathing difficult because you are not able to take in as much oxygen. Most cases are mild, with symptoms that can include:
- headache
- nausea
- dizziness
- exhaustion
In rare cases, altitude sickness can cause fluid to build up either on the lungs or the brain. These are very serious conditions and require immediate medical attention. Symptoms of severe altitude sickness can include:
- a bubbling sound in the chest
- coughing up pink, frothy liquid
- clumsiness and difficulty walking
- confusion leading to loss of consciousness
Treatment
If you have mild symptoms of altitude sickness, you should not go any higher for at least 24 to 48 hours. You can continue to climb if your symptoms improve after this.
If your symptoms get worse or do not improve after 24 to 48 hours, you should descend by at least 500m.
Severe altitude sickness is a medical emergency. Someone with severe symptoms should immediately descend to a low altitude and seek medical help.
Prevention
Proper acclimatisation to altitudes of about 2,500m or more is the best way to prevent altitude sickness. It usually takes a few days for the body to get used to a change in altitude.
Ascending slowly will give your body time to adapt to the change in altitude. For example, once you are above 3,000m (10,000 feet) try not to increase the altitude at which you sleep by more than 300-500m a night.
Keeping hydrated is also important, but make sure you avoid alcohol.
Potential hazards: Livestock, especially those with young, machinery, barbed wire, electric fences, unstable stacks of hay, straw or boxes, unfenced slurry and silage pits or reservoirs, high voltage cables, and chemicals and pesticides, especially during spraying.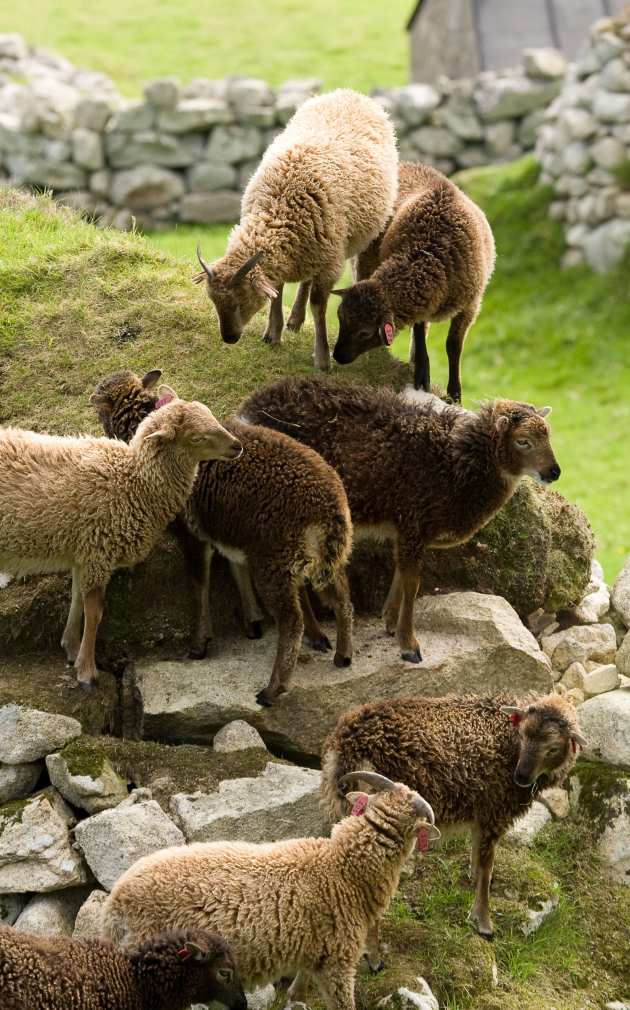
- Always seek permission from the land owner before working on or crossing agricultural land and take their advice on where it is safe to work.
- Never climb dry-stone walls or fences always use a stile or gate and shut gates behind you.
- Do not chase or worry livestock.
- Do not interfere with machinery or attempt to operate devices that you are not competent to operate.
- Do not light fires unless you have been given permission by the land owner, and always take your rubbish away with you.
Potential Hazards - Fast moving vehicles, trains, high voltage electricity, road or rail side detritus.
- Special permission is required before conducting any work on or beside railways and motorways.
- Fieldworkers must comply at all times with the regulations issued by the rail and road authorities.
- High visibility clothing is obligatory when working near any road or railway.
- Never enter tunnels and exercise special care in road or rail cuttings where space is limited.
- On motorways a prominent warning signal, such as an orange flashing light or reflective triangle is obligatory.
- Permission is not strictly required to work alongside roads other than motorways but for safety purposes if plans are made to work on verges or carriageways owned by the local authorities permission should be sought from the local authority and the police informed.
- Display clear warning signals when working near bends, hill crests or narrow cuttings.
- Position any support vehicles to provide protection for pedestrians.
Potential hazards: Difficulty of movement, uneven and slippery terrain, disorientation, fire, equipment.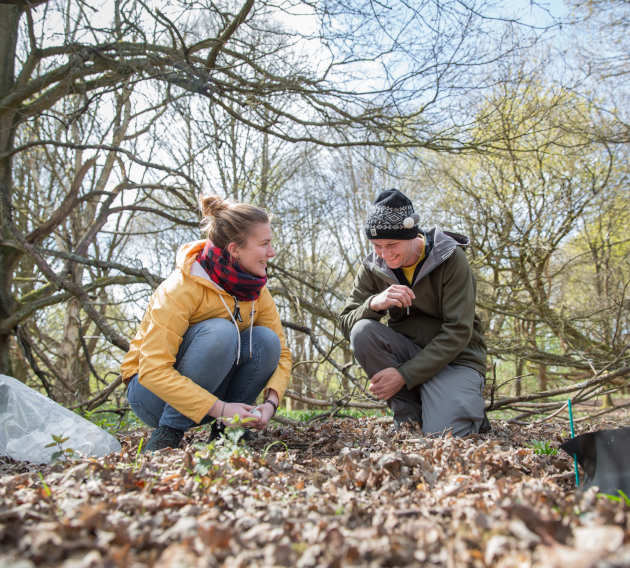
Difficulty of movement:
- Work and movement in forests is more difficult and time consuming and work must be planned accordingly.
- If climbing steep slopes do not rely on vegetation for support as it may be rotten or shallowly rooted.
- Leaf litter and brush may hide holes or uneven ground and care must be taken when walking off paths.
-
Work in tropical tree fall gaps requires special care as there is usually a tangle of fallen branches and regenerating vegetation.
Uneven and slippery terrain:
- Try to avoid rocks, boulders and fallen trees as these often have a covering of moss and may be slippery when wet.
-
Never climb onto cut logs as these can be slippery or unstable.
Disorientation:
- It is easy to get lost in a forest and difficult to locate someone. Keep your position continually in mind and plot way points on a map.
- Note the position and bearings of prominent features such as streams, ridges, firebreaks, paths etc.
- Stick to defined paths and tracks as much as possible, where this is not possible use tags or flagging to mark your route.
- Carry a map and compass at all times, and a where required by your risk assessment, a GPS device.
-
Where practical and as required by risk assessment notify the local manager, forestry officer or other responsible person of your presence, probable location and departure time. If these arrangements are made it is vital that you also notify them that you have cleared the area otherwise a search may be instigated if you do not check in again.
Fire:
- Never smoke or build uncontained fires in a forest. Do not light fires when instructed not to do so by wardens or your own risk assessment tells you that there is a sever risk of any fire spreading.
- Gas stoves should be used on firm ground cleared of flammable material.
- Ensure any fire embers are thoroughly extinguished and hot cooking utensils cooled before leaving unattended.
- Take care not to leave anything that might start a fire, such as glass.
- Avoid parking your vehicle on tracks or fire breaks.
-
If camping overnight ensure that fire drills are established and they are known by all team members, tents should be well spaced out and no flammable material left in the vicinity of any fire.
Equipment:
- This type of fieldwork may require the use of saws, chain saws, axes or other forestry equipment. These should not be used alone and only by competent persons operating within the codes of practice and Standard Operating Procedures for each tool.
- Any climbing or work at height including ladders or forestry observation towers, must be thoroughly risk assessed first and never carried out alone.
-
Tree climbing using rope techniques or other methods should only be done by experienced and trained persons who should be accompanied at all times by another trained person using double rope fail to safety techniques.
Potential hazards: Tides, exposure, uneven and slippery terrain, heavy seas, soft mud, disorientation.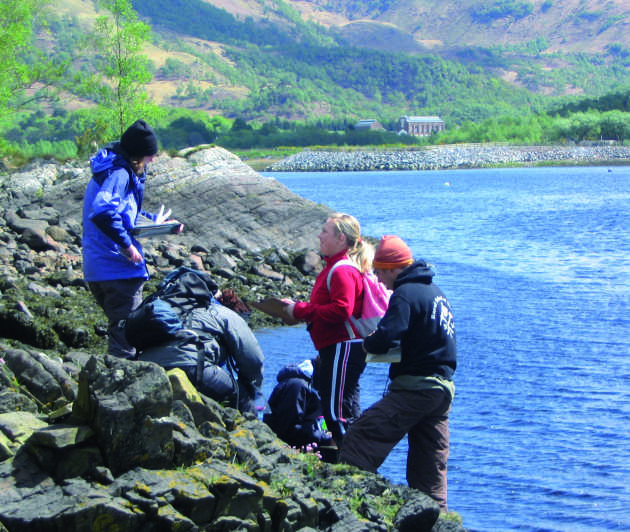
Tides:
- Work at rocky shores, estuaries, mudflats and salt marshes is often limited by the tides. The tide will progress rapidly across shallow sloping shores and may cut you off before you realise it. These areas are also subject to strong currents therefore swimming to safety is not an option.
- Knowledge of the tides is essential, ensure you understand and use up-to-date tide tables.
- Wherever tides are relevant you should check your watch immediately before departing and regularly during the course of the work, set alarms if required.
- If in doubt seek local advice from harbour masters, coast guards etc.
- Allowance should be made for local conditions and changes in the weather which can affect the state and timing of tides.
- Exit points from the beach should be noted prior to starting work, particularly where the beach backs onto a cliff or steep slope.
- Set times for packing and leaving and stick to them.
- If you are caught in a strong tide or current and have no choice but to swim never fight the current, you will make little or no progress and quickly become exhausted, swim across it towards your nearest point of safety e.g. land or other platform .e.g. on an outgoing tide in a bay you may have to swim for the headland rather than the beach in front of you even though it may be a considerable distance away.
Exposure:
- Check weather forecast before working and adjust work plan accordingly.
- Prepare plenty of food and hot drink.
- Ensure you have suitable waterproof and windproof clothing and good boots.
- Consider using a diver's dry suit and buoyancy aid if wading in water as it provides both warmth, waterproofing and buoyancy in the event of total immersion.
- Never use a dry suit without a buoyancy aid as any air in it may move to your feet when totally immersed and invert you.
Uneven and slippery terrain:
- Rocky shores are very uneven, loose and can be extremely slippery particularly in areas where seaweed or lichen covers the rocks.
- Many encrusting organisms, such as barnacles, have sharp surfaces.
- A life jacket/buoyancy aid is recommended (subject to risk assessment) if working close to the water's edge
Soft mud:
- Mud may become too soft to support a person and may exert a strong hold on anything lodged in it.
- When traversing soft mud test the surface using a pole.
- If your feet begin to sink into the mud avoid violent movements.
- If boots or waders become stuck in the mud, slowly slip out one foot from the boots and rest the leg on the surface taking care to distribute the weight over as much surface as possible. Repeat the process for your remaining leg and lie horizontally on the mud surfaces. Leopard crawl to firm ground keeping the maximum area of your body in contact with the ground.
- Do not carry heavy loads, or if unavoidable use a sledge.
- Follow known paths and safe routes.
- Seek local advice and hire guides if the area is known to be treacherous.
Disorientation:
- Estuaries, mudflats, wide beaches and saltmarshes are featureless areas where it is easy to get lost if mist or fog develop.
- Always carry a compass and where possible a GPS device.
- Keep a note of your location on a chart.
- Always know the bearing you need to take to walk to safety.
- Carry a whistle or other means of attracting attention.
- If possible, walk out the way you came in as this is likely to be safe
Poisonous animals:
- In the UK weaver fish have barbed dorsal fins that inject a painful venom if you are unlucky enough to step on one. They burrow into the sand in shallow water.
- In warmer seas there are a variety of stinging, biting and poisonous creatures inhabiting the water including lion fish, fire coral, sea urchins and snakes.
- Wear foot protection if wading in water.
- Know how to identify hazardous animals and keep clear of them.
- Ensure your team has medical knowledge and equipment to deal with an incident if it occurs
Potential hazards: Wet unstable ground such as a raft of vegetation overlying deep water e.g. sphagnum moss or peat mud. Looks solid but hides deep water.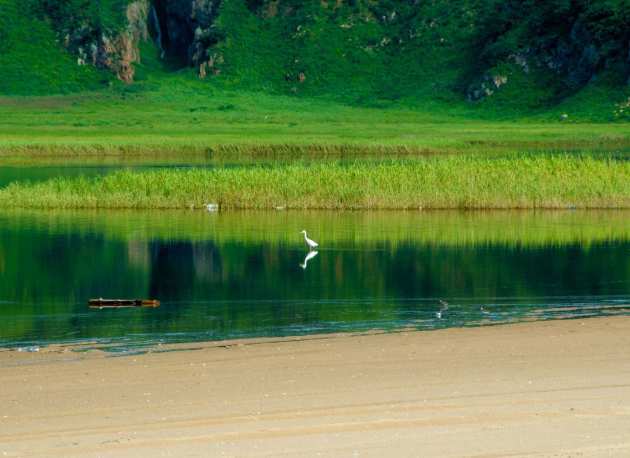
- Do not attempt to cross a bog of any type unless absolutely unavoidable. If it is essential to do so try to keep to the drier upstanding parts and to any tussocks of grassy plants, and avoid any non vegetated areas.
- If you begin to sink lie flat on your back and call for assistance.
- Keep calm, and if possible fr ee your legs to the horizontal.
- Use your survival bag or any other suitable object as a buoyancy aid. Even a plastic bag or waterproof can be used to trap air and provide limited support.
- Still lying flat crawl back in the direction of your approach using any tussocks for support.
- If you become immobilised try to get behind some vegetation for shelter, put on some spare clothing and use a survival bag.
- Follow known paths and safe routes.
- Seek local advice and hire guides if the area is known to be treacherous.
Potential hazards: Exposure, boat work, deep water, pollution, slippery shores.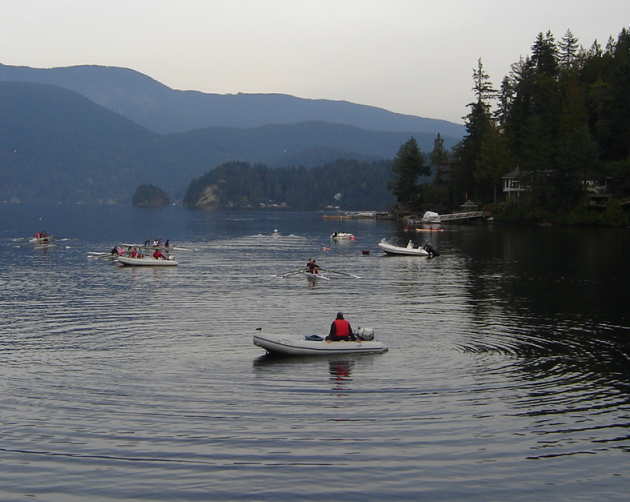
Exposure:
- Check weather forecast before working and adjust work plan accordingly.
- Prepare plenty of food and hot drink.
- Ensure you have suitable waterproof and windproof clothing and good boots.
- Consider using a diver's dry suit and buoyancy aid if wading in water as it provides both warmth, waterproofing and buoyancy in the event of total immersion.
- Never use a dry suit without a buoyancy aid as any air in it may move to your feet when totally immersed and invert you.
Boat work:
- Any work on the water requires the use of a lifejacket/buoyancy aid and an experienced boat handler preferably qualified to RYA 2 standard for powered craft.
- Safe Navigation in rivers requires a knowledge of charts, bouys, lights and boat handling.
- If working off a boat anchors should be ready for use.
More information maybe found in the use of boats section under Transport .
Deep water:
The risk of lone working should be incorporated into any risk assessment and avoided where possible.
Wear a buoyancy aid when near deep water.
Pollution:
- Be aware of possible health risks from polluted rivers and water.
- Seek local advice and permissions from land owners, water ways agencies and water authorities before starting work.
- DO NOT handle drums or other suspicious containers washed up on shores or riverbanks. Report pollution to the Environment Agency.
- DO NOT contribute to pollution yourself. Take all of your waste materials back to base for safe and legal disposal.
Slippery shores:
- Rivers always have currents and often have slippery banks so great care should be taken near to the water edge.
- River and lake margins concealed beneath the water level can present unseen dangers in the form of steeply sloping ground, or soft deep mud with concealed rubbish, broken bottle, scrap metal etc.
- Wear a buoyancy aid or life jacket.
The body's response to heat:
Peripheral circulation helps to dissipate heat but when the air temperature is high or physical exertion is increased the body sweats and cooling is increased by evaporation of the sweat. The body must keep its core temperature to within a few degrees of 37. Deviation from this quickly leads to unconsciousness and potential major organ damage or failure.
Other problems:
Excess exposure to the suns ultra violet radiation may lead to "sun burn" of the skin which can cause painful burns and long term harm.
Tropical
Potential hazards: Remote location, Dehydration, heat stress, hazardous animals and plants, illness and infecion.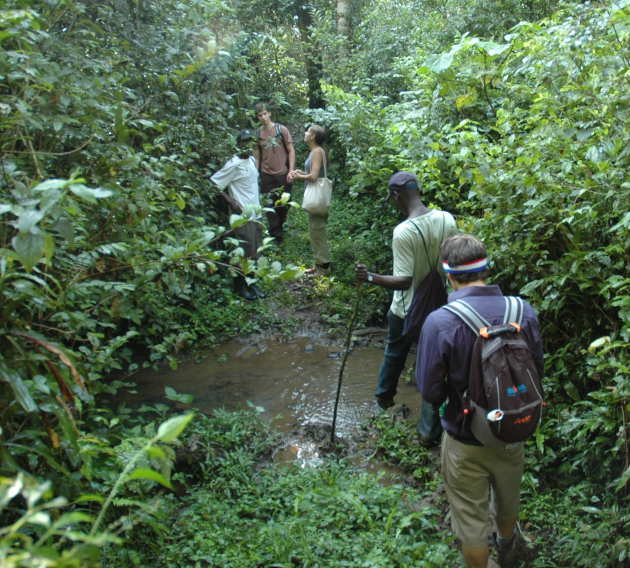
Remote location:
- The potential hazards may be more difficult to estimate in advance, the distances from help are likely to be greater and the communications more difficult.
- There may be a language barrier.
- The emergency and medical services are not the standard of those in the UK.
- Arrangements in case of sickness or accident should be specifically investigated before departure and rechecked upon arrival and amended as necessary.
Dehydration and heat exhaustion:
- High humidity in tropical climates reduces the effectiveness of sweating as a means of losing heat from the body.
- Allow time for the team to acclimatise to the heat and plan work accordingly, this may take up to 10 days.
- Ensure that everyone knows the symptoms of dehydration and heat stress and keep an eye on your colleagues.
- Ensure everyone drinks plenty of fluids. Any one with strong coloured urine is not likely to be drinking enough.
- Plan drink stops where everyone drinks together.
- Take plenty of water with you. Bare minimum for 12 hours is 2 litres per man. May need up to 8 litres.
- Ensure that contingency plan are in place to cope with allowing people suffering from the heat to recover while still enabling the main party to achieve the goals of the expedition.
- Boil all drinking water, including that used for brushing teeth, or use a reliable water purification method that removes bacteria e.g.. Water sterilisation tablets. Filters may not be effective.
- Avoid alcohol during the day and excessive drinking in the evening as this dehydrates you.
Hazardous animals and plants:
- There should be an evaluation of the risks associated with plants and animals to ensure that all members of the party are aware of the risks and how best to guard against them.
- Snake Bite. Venomous snakes do not always inject poison. Keep the victim calm and immobile. Seek immediate medical advice and arrange for evacuation to a hospital of field medical station. DO NOT apply a tourniquet unless under medical supervision or attempt to suck out the poison, all movie stuff that has a very limited beneficial effect and may harm the patient. Where possible and required by risk assessment (e.g. you are hunting and trapping venomous snakes) appropriate anti venoms should be available to the team Medical Officer.
- Always take advice if fieldwork is likely to be in snake infested areas so that the correct vaccines can be carried by someone who can use them correctly. Know where the nearest hospital which can deal with snake bites is located.
- All wild animals should be regarded as potentially dangerous especially if surprised as they will have means to defend themselves when threatened. Be aware of the type of local wild life that you may encounter and take measures to avoid surprising them whenever possible. Take particular care in forests where they cannot be seen at a distance and flight is often difficult. Never approach elephants, bears, big cats or other large animals no matter how apparently cute and docile. Do not interfere with young animals even if they look abandoned, mum is usually not far away and is unlikely to be happy with your attentions. Take great care during mating seasons as otherwise shy animals can become aggressive, e.g. Deer stags will charge you and even the uk domestic bull may see you as a threat to his herd.
- If working with soil or leaf litter it is advisable to wear protective gloves to protect against scorpion or centipede stings/bites.
- In thick undergrowth always wear long sleeved shirts and trousers. This will help protect against insect bites and stings and plants that have spines and stinging hairs.
- Use insect repellent.
- Bites and stings should be treated with topical anti septics where possible. Any scratches or cuts should be treated likewise.
Illness and infections:
- Swimming or paddling in rivers, lakes and ditches should be avoided as a number of infections, e.g. leptospirosis, Schistosomiasis may be transmitted by this route.
- Contact Occupational Health well in advance of embarking on the expedition to obtain advice on the types of vaccination you may need for the destination country.
- Get vaccinated in advance of travelling as some require time to take effect.
- Milk should be boiled unless it has been pasteurised.
- High risk foods should be avoided, including raw or partly cooked shellfish, underdone meat, salads, cream, ice cubes, ice-cream and unpeeled fruit and vegetables.
- Water should be boiled or sterilised by chemical treatment.
- If you feel unwell during the trip seek immediate medical advice, many life threatening diseases start with flu like symnptoms e.g. Cerebral Malaria (Plasmodium falciparum). Refer to Occupational Health Travel advise site
Washing and showering:
Water may be contaminated with disease causing agents. Take local advice and consider the risk and whether you can treat the water prior to use. If in doubt use baby wipes or be prepared to smell a little rather than risk becoming ill.
Potential hazards: Remote location, Dehydration, heat stress, hazardous animals and plants, illness, sun exposure.
Remote location:
As for tropics.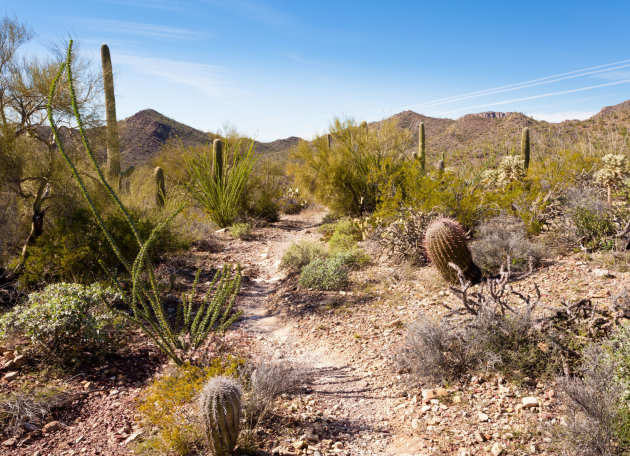
Dehydration and heat stress:
As for tropics except -
- Humidity is not such a problem but the overall temperatures may be a lot higher.
- Follow the advice for preventing sun burn below.
- Ensure everyone drinks plenty of fluids. Any one with strong coloured urine is not likely to be drinking enough.
- Plan drink stops where everyone drinks together.
Hazardous animals and plants:
- There should be an evaluation of the risks associated with plants and animals to ensure that all members of the party are aware of the risks and how best to guard against them.
- As Tropics above
Illness and infections:
- Water should be boiled or sterilised by chemical treatment.
- If you feel unwell during the trip seek immediate medical advice.
Sun exposure:
- Work in the shade limiting exposure to the sun for as short a time as possible.
- Wear protective clothing made from light-coloured, loose-fitting cotton material.
- Wear a lig ht-coloured, wide-brimmed hat.
- Cover the back of your neck.
- Use sunscreen, minimum factor 15 and sun block.
- Consider starting outdoor work early and finishing before lunch, spending the hottest part of the day indoors and then continuing out of doors from mid-afternoon till early evening.
- Do not fall asleep in the sun!
- Work a buddy system.
Climates include: High latitudes (Polar), high altitudes.
Hazards: Environmental impact, Extreme cold leading to hypothermia, cold injury, (frost nip, frost bite,) wind chill, Sun burn, snow blindness, heat stress, dehydration, inadequate training and preparation, altitude sickness.
Polar:
Polar regions are, as the name implies typically at high latitudes. However similar environments may be found at high altitudes near the equator. e.g. ice caps and glaciers.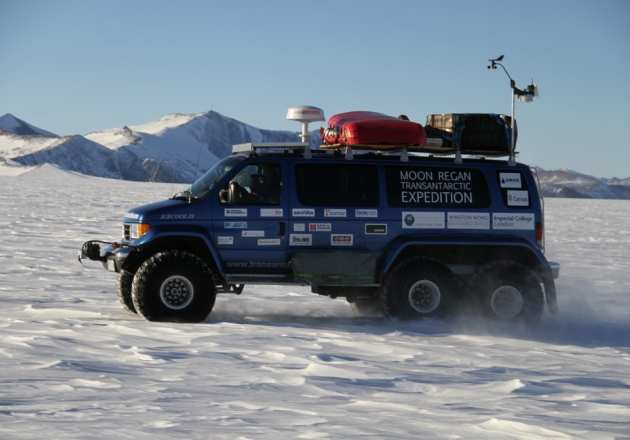
Environmental impact:
Permission MUST be sought from the relevant authorities before entering polar regions as these are fragile environments where damage takes a long time to repair. Planning shall show how the expedition proposes to minimise impact on the environment. Weather can be highly changeable with time and location and it is important to be prepared for all eventualities.
Hypothermia:
- Hypothermia is a medical condition which occurs when the core body temperature drops below 37oC. It may occur in anyone whose energy requirement exceeds energy available and is usually associated with cold, wet and windy conditions.
- Glucose rich food or warm drinks, warmer protective clothing and renewed activity usually prevents mild hypothermia becoming worse.
- Mild or early hypothermia left unchecked, very quickly develops into an untreatable condition.
- Once the inner core has lost about 5oC, the victim becomes uncooperative, unresponsive and quickly unconscious. Victims in this condition must be protected from the elements and further heat loss.
- A victim who is able to respond and walk should be given drinks, more clothing and escorted to warm sheltered accommodation if possible.
- One who is unresponsive and unable to walk unaided, should be put to ground - in a tent, building or shelter with gentle heat applied to their surroundings.
- Attempting to reinstate circulation rapidly in someone who is unconscious is a very dangerous act often causing afterdrop (cold peripheral blood reaching the body core and warm blood being moved to the surface) which can have fatal consequences.
- Proper layering using light-weight and comfortable fabrics traps the air warmed by the body, while moisture vapour from perspiration is conducted away from the skin.
- Layer 1 - Wicking: The first layer for cold weather exposure should keep you warm and dry and "wick" perspiration away from the skin quickly and effectively.
- Layer 2 a, b, c, etc - Insulation: Multiple thin layers are better than one thick one. Insulating layers may need to be added or removed depending on activity levels. The principal is to trap warm air but still provide ventilation.
- Layer 3 - The Shell: Outerwear should be appropriate for the activity. Jackets and trousers should allow perspiration vapour to vent while blocking wind and rain. The material must reduce heat loss by convection, radiation and conduction and assist the rest of the layers in providing dryness and comfort.
- The head and neck have a rich and plentiful blood supply and lose heat faster than any other part of the body. A human body may lose 70% of it's heat through the head. The hat should insulate as well as being wind and rain proof.
- Hands: If the bodies core temperature starts to drop the body limits the amount of blood pumped to extremities in order to preserve heat within the vital organs. Always wear gloves that are breathable and waterproof.
- Feet: Your feet are in contact with the ground and allow heat to escape by conduction. Footwear should be durable, waterproof with good tread on the soles and breathable. Two layers of socks are recommended, thicker outer insulating socks with a thin pair of wicking inner socks.
Cold injury
Frost nip:
- Frostnip - is a condition BEYOND any discomfort created by coldness. It affects extremities like toes, fingers, ears and nose. If ignored it may develop into frostbite.
- Frostnip is characterised by loss of feeling and a whiteness in appearance of the skin. The condition is caused by lack of circulation.
- Frostnip can be prevented by staying warm, active, well hydrated, keeping energy levels up, suitably clothed and alert to its onset.
- Operate a buddy system where each should often ask how the other feels or if numbness is occurring; observe the colour of cheeks, nose and ears where exposed; asking particularly about toes and fingers.
- If frostnip is established then apply warmth NOT HEAT to the affected parts. E.g. Place your hands against a warm part of your body's trunk.
- Nose, ears and cheeks can be treated with additional layers of insulation (e.g. balaclava hat or scarf) and with 5 minutes of physical activity.
- To improve circulation to the feet loosen laces and crampon straps to allow blood to enter tissues. Where it is safe to do so remove boots, change wet socks and replace boots.
- Take a warm drink and some food, increase your exercise level and get out of the wind as soon as you can.
Frostbite:
- Frostbite may occur when frostnip is left unchecked. There is no pain associated with the early onset. The appearance is similar to that of frost nip but some of the tissue may be dead or even frozen.
- Frostbite does NOT turn black for a day or two but blistering is quite common in the first few hours. Blisters should NOT be deliberately burst in the field.
- Urgent medical help is required.
- It may be possible to walk for several hours on frozen feet but once boots are removed mobility problems may occur.
- Wrap the injured part with soft, windproof insulation.
- Take high calorie nourishment and increase body temperature with activity where possible.
- Passive re warming, as used for nip, does not always work but is worth trying.
- Rapid re warming using fire or hot water is NOT recommended.
- Never take alcohol.
Wind Chill:
- Wind makes the air temperature feel lower than it is. This is because the moving air takes away the warm layer just above the surface of the skin increasing cooling by convection.
- Prevent wind chill by wearing wind proof clothing or working in sheltered environments.
- Choose rest breaks in the lee of some structure or feature out of the wind.
Sunburn and snow blindness:
- Just because it is cold does not mean that the suns radiation is diminished. Exposed skin can still be harmed by the UV radiation and reflection from the white ice or snow may enhance it's effects.
- Ensure that all persons use adequate sun protection including high factor sun creams and sun block.
- The reflection from the snow and ice also serves to increase the overall light intensity which if the eyes are unprotected may lead to snow blindness. This condition is usually temporary but painful.
- Ensure every one uses suitable eye protection such as wrap around sunglasses of appropriate UV protection factor or snow/ski goggles.
Dehydration and heat stress:
- See advice for tropical climates .
- Exertion coupled with many insulating layers may actually prevent the body from losing excess heat and cause heat stress related illness and if insufficient fluids are consumed, dehydration.
- Ensure the team are aware of the risks and ensure that rest breaks are built into the work activities where everyone checks each others physical condition, comfort, nutrition and hydration.
Training:
- Training for polar environments should take place before the expedition in conditions as close to those to be experienced, i.e. low temperatures, high winds, drifting snow, and white out conditions. The team should use exactly the same equipment and carry out the proposed activities in these conditions especially navigation. The difference being that emergency help will be more immediate in the training scenario than the real thing.
- All persons engaged in the activity must be briefed on the likely hazards and how to minimise the risk.
High altitudes:
For the purposes of this guidance high altitudes is anything above 1,500m.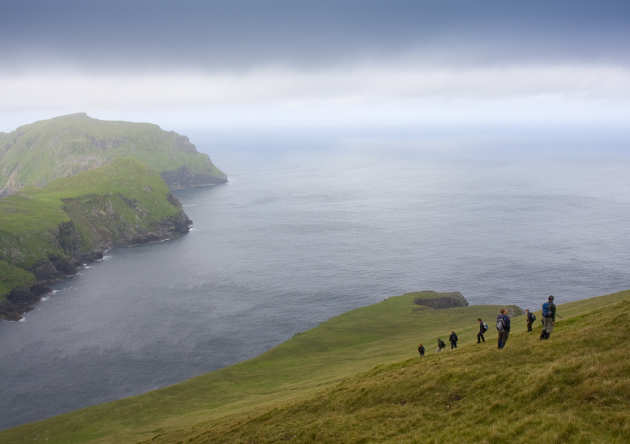
- See also advice above on polar climates.
- Work at high altitudes requires considerable skill and expertise. Expert advice should be sought from all available sources both from within the UK and at the proposed site so that activities at high altitudes are well planned and researched.
- Good sources of information include UIAA Mountain Medicine Centre Information Sheet 1 (mountain sickness, Oedema, and travel to high altitudes).
- If venturing into altitudes above 5,500m the UIAA Mountain Medicine Centre Information Sheet 3 (Diamox, Dexamethasone and Nifepedine at high altitudes) is of particular importance.
- The Lake Louise Self Analysis System should be considered as an aid to assisting team members to identify the onset of altitude sickness.
Climbing and caving:
- Climbing and caving are activities that require considerable experience and skill on the part of all participants to carry out safely and with the minimum of risk. Additional advice from other sources including appropriate National Governing Body (NGB) advice should be sought before embarking on any venture where these skills will be required.
- Good organisation is required with special attention being paid to supervision and planning for emergencies.
- There is a requirement for climbing and caving activities to comply with the Work at Height Regulations. There is no longer an exemption for adventure activities. All work related climbing and caving is subject to the regulations.
- Caving includes the exploration of the parts of mines no longer worked.
- Climbing means climbing, traversing, abseiling, or scrambling over natural terrain or man made structures.
- These activities must comply with the recommendations and good practices laid down by the sports national governing bodies including Mountain Leader Training UK, and the British Caving Association.
- Compliance with these NGB standards is likely to ensure that the requirements of the Work at Height Regulations are met.
- Risk assessments must be completed and all plans and protocols documented including references to the appropriate NGB guidance.
- Training for climbing and caving expeditions must take place in conditions similar to that which is expected during the expedition.
- Persons leading these activities should be competent, have the correct level of experience for the planned activity and posses the relevant NGB qualifications.
- It is accepted that the nature of the work will require dynamic risk assessment as the environment and circumstance may rapidly change particularly in an emergency or rescue situation. This is why the competence and experience of the activity leader is so important to the overall safety of the team.
- All equipment should be designed for the task and comply with the appropriate EN series or the Union International des Associations d'Alpinisme standards.
- Equipment must be inspected for wear or damage before and after the activity.
- All damage or wear must be reported and the equipment taken out of service and replaced.
- Records of inspection should be kept.
- Fall protection and belays should be checked immediately before applying a load (although there is no requirement to document this check).
- Consideration must be given to preventing items from falling and from striking persons below.
- Edge protection for fall hazards should be provided where possible.
- Helmets of an appropriate standard must be worn at all times during the activity.
- All members of the expedition should be aware of the dangers posed by fragile surfaces such as snow bridges and ice over water.
- The risk assessment should consider the use of two rope techniques.
- Fall arrest equipment e.g. the ropes where they are not actually being climbed should be of sufficient strength to take shock loads expected and where necessarily adapted to the weight of the person on the activity.
- Harnesses should be adjustable to fit the person.
- Weather forecasts should be obtained before and during the activity. High winds and rainfall can make climbing more hazardous.
- Rain that has fallen several days earlier may continue to affect underground water levels for some time and may cause flooding in previously dry caves.
- The risk assessment should consider the geology of the rock and climbing and caving activities tailored appropriately.
Personal Field Equipment
Personal survival kit plus first aid (Word version).
Hill Walking Kit
Basic kit including additional kit for overnight stay in the field (Word version).