Timetabler Calendar is a web-based application designed for use by staff and students to view their own timetables and timetables for other resource types (rooms, modules, groups, staff) timetable. It provides read-only access to timetable data that is held in the Celcat database in an easy-to-use format, accessible to individuals with College Username, displaying the timetables for the whole academic year (July to June).
The timetable is subject to change and users are encouraged to check for updates regularly
Timetabling Calendar Help Sheet
- Logging in
- Multiple Browsing Profiles
- The Home Page
- Browsing Panel, Searching & Filtering
- Timetable Views
- Sidebar Events & Resources Details
- Event Filters
- Share Timetable
- Printing/Saving PDFs Timetables
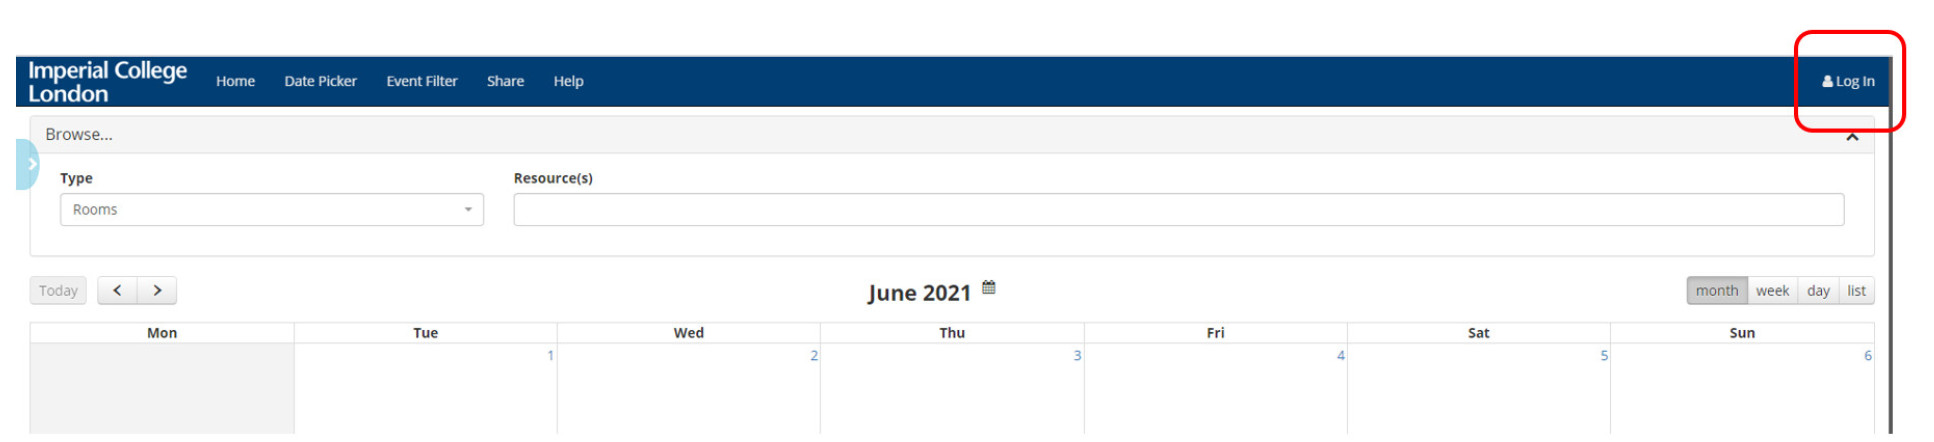
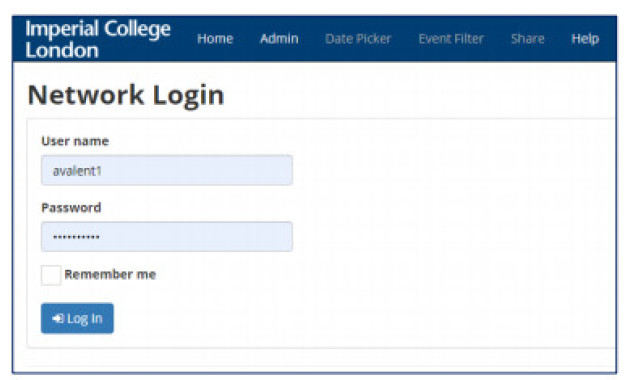
Login to Timetabler Calendar using your college credentials (username and password). All staff and students will be able to log in to Timetabler Calendar. If the user’s details are registered in Celcat database, they will be able to view different resources (staff, modules, groups, programmes, rooms) timetable (authenticated users). If the user’s details are not in Celcat database ((unauthenticated users) or are external users (anonymous users) without IC credentials, they will be able to view only the ROOMS timetables. This might be the case for all staff in facilities, ICT department, or NHS staff. When the user opens Timetabler Calendar the view defaults to ROOMS view. If the user has IC credentials will be able to Login via clicking on the right-hand side of the page.
If you wish to be added to the Celcat database, complete the Request to add a new Staff / Student record to Celcat ASK Form. Once the request is submitted a member of the Central Timetabling Support Office (CTSO) will process the form and will be in touch with you. If you have any queries please email the Central Timetabling Support Office (CTSO)
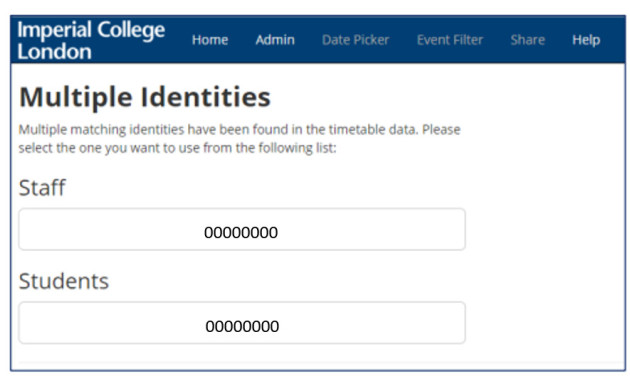 The Timetabler Calendar allows users that have multiple identities in the database, e.g. those who can log in as a Staff Member or as a Student. If a record is not in Celcat the unauthenticated user will be able to view only Rooms timetables.
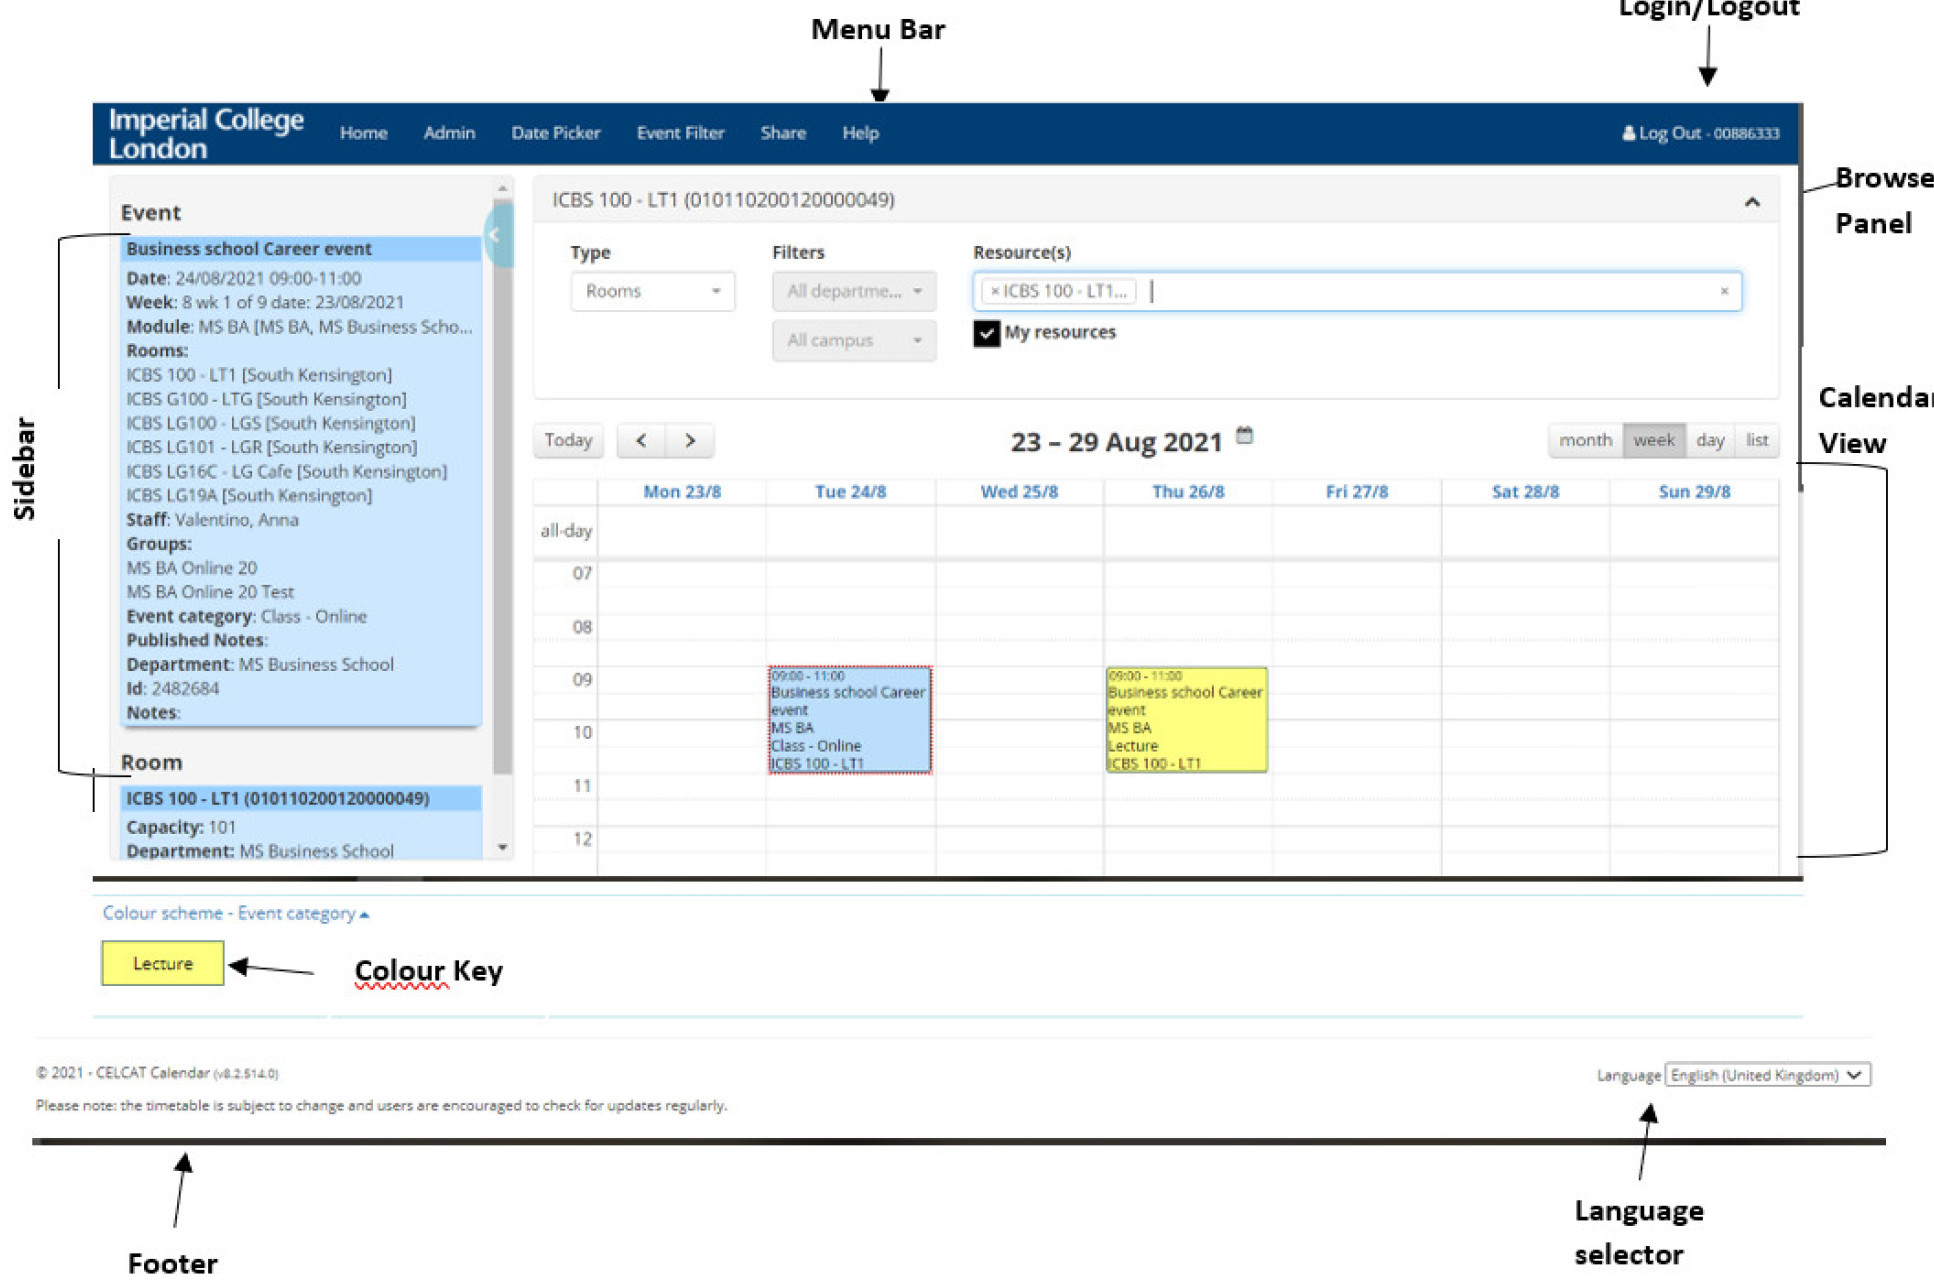
The homepage contains the following main elements:
- Menu bar - The application menu
- Login / out - A login/logout link
- Browse panel - A panel for resource selection
- Sidebar - A panel used to display currently selected resources and events
- Calendar view - The main calendar view displays appointments for the selected resources and provides date navigation
- Colour key - A key to the colour coding of appointments
- Language selector - A drop-down allowing you to select a different user interface language that is remembered locally
- Footer – This will contain global information such as Timetable is still in draft form
Find a Resource
To find a resource, select the “Type” and then enter the first few characters of the Resource's name (and/or unique name in Resource(s). Calendar will then display matching resources and you can keep typing or scroll the list to select the required item. When selected, the resource is added to the Resources textbox, and the relevant events displayed in the calendar. You can continue adding more resources (of the same type) and they are added to the selection.
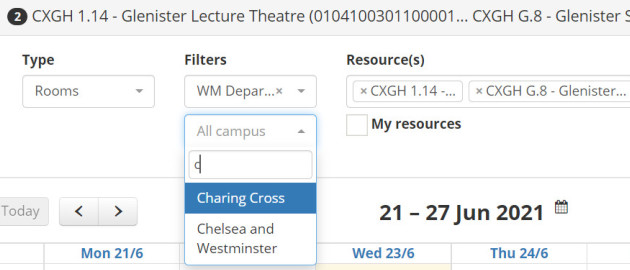
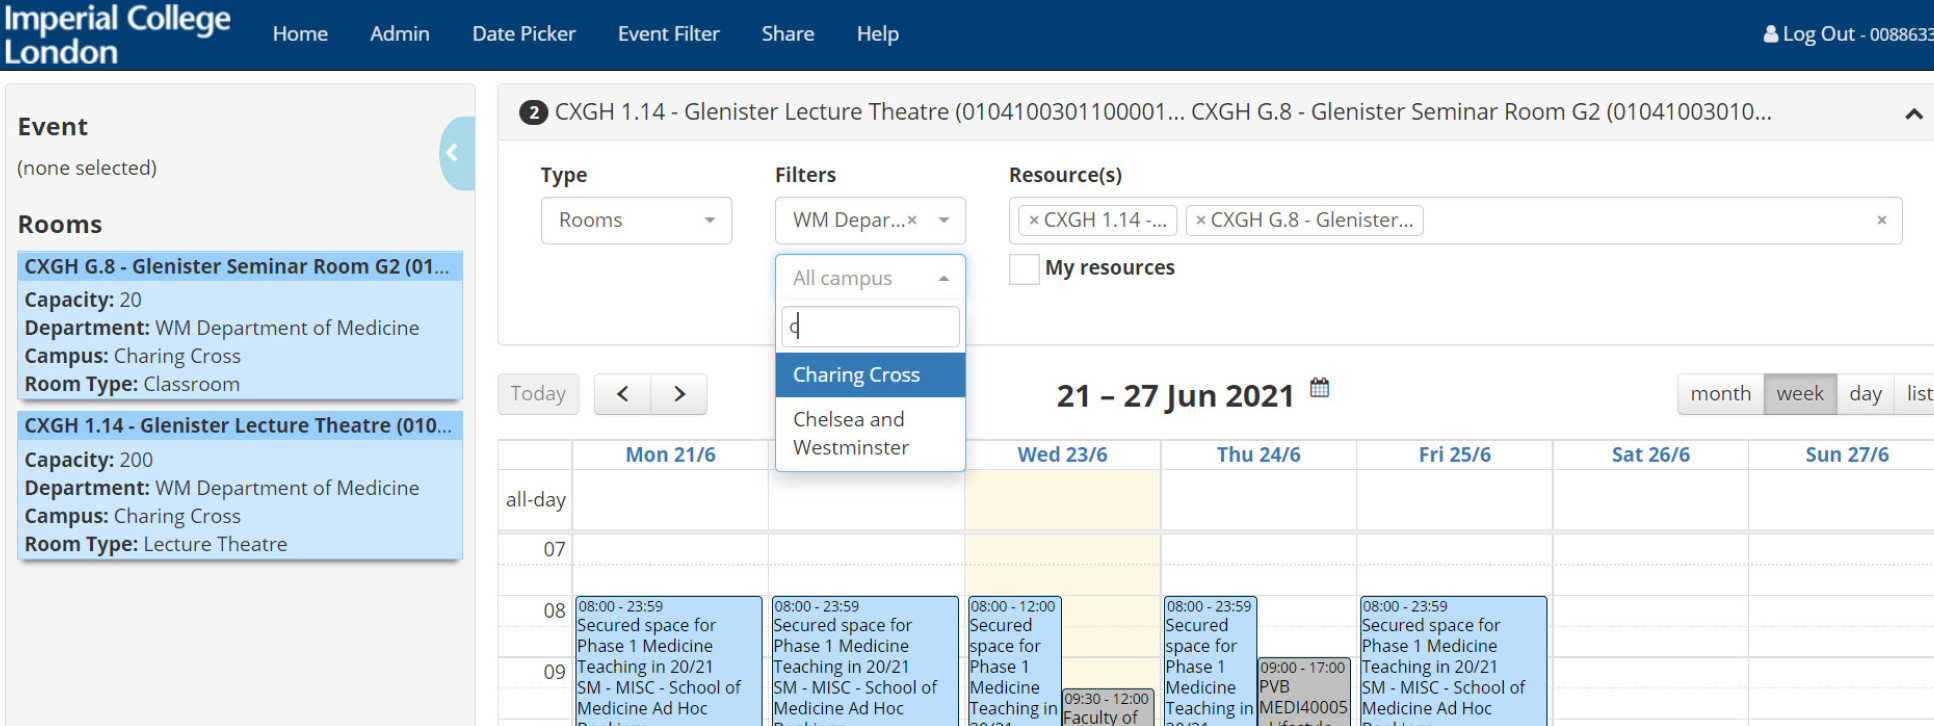
Filters
To aid you in finding specific resources of the type selected, you can filter down the resources available to the Resource(s) field by selecting the Department they are allocated to. In addition, Modules can also be filtered by Programmes and Rooms can also be filtered by Campus. If both the Department and additional filter are used, only resources that match both filter selections will be available. For example, if Type is Rooms, the department filter is WM Department of Medicine and the Campus filter is Charing Cross, then the only resources available to choose from in Resource(s) will be the one with the specified filters.
Remove a Resource
You can remove a selected resource by clicking the “x” button at the start of the resource name, or you can remove all selected resources using the “x” button at the right side of the text box. When you use the “Type” drop-down list to select a different resource type, Calendar remembers the previous selection so it’s easy to switch between them.
My resources
If the “My Resources” checkbox is set, the Calendar will automatically determine which resources are relevant for the user and display them in the Resources list (users won’t need to type any characters to filter the results list). The resources list will show all the resource items that the user is linked to in the events.

Views
The main calendar view displays appointments for the selected resources, the following calendar views are available:
- Month – a calendar month
- Week – a single week, e.g. Monday - Sunday
- Day – a single day
- List – a week shown in list format
You can select the current view using the view buttons at the top right of the calendar.
Date Navigation (Date Picker)
You can navigate the calendar dates using the navigation buttons on the top left of the calendar and you can quickly select a year/month using the month picker (click the calendar Month / Year title). As soon as you select a month, the Calendar automatically closes the month picker and navigates to the selected month.
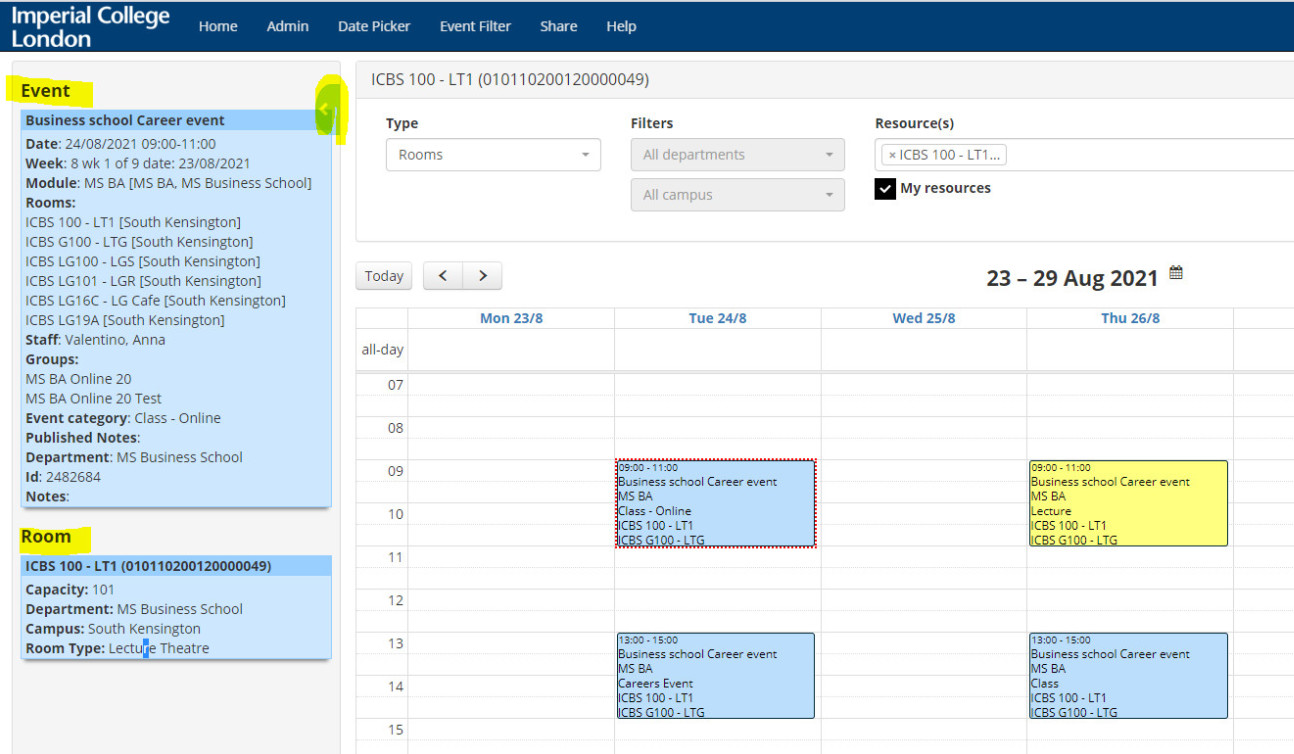
The Sidebar can be opened or closed using the blue button at the top right of the panel. The Sidebar contains details about any currently-selected resources and the currently-selected event.
Using the hyperlink data, if the user click on the Staff and email details Calendar will open up Outlook
When the user clicks on an event in the main calendar view, the event details are displayed in the Sidebar. When resources are displayed in the event details in the Sidebar, the user can click a resource name to navigate to the calendar for that resource (e.g user click on the module of that events, the timetable will change to show that module full timetable)
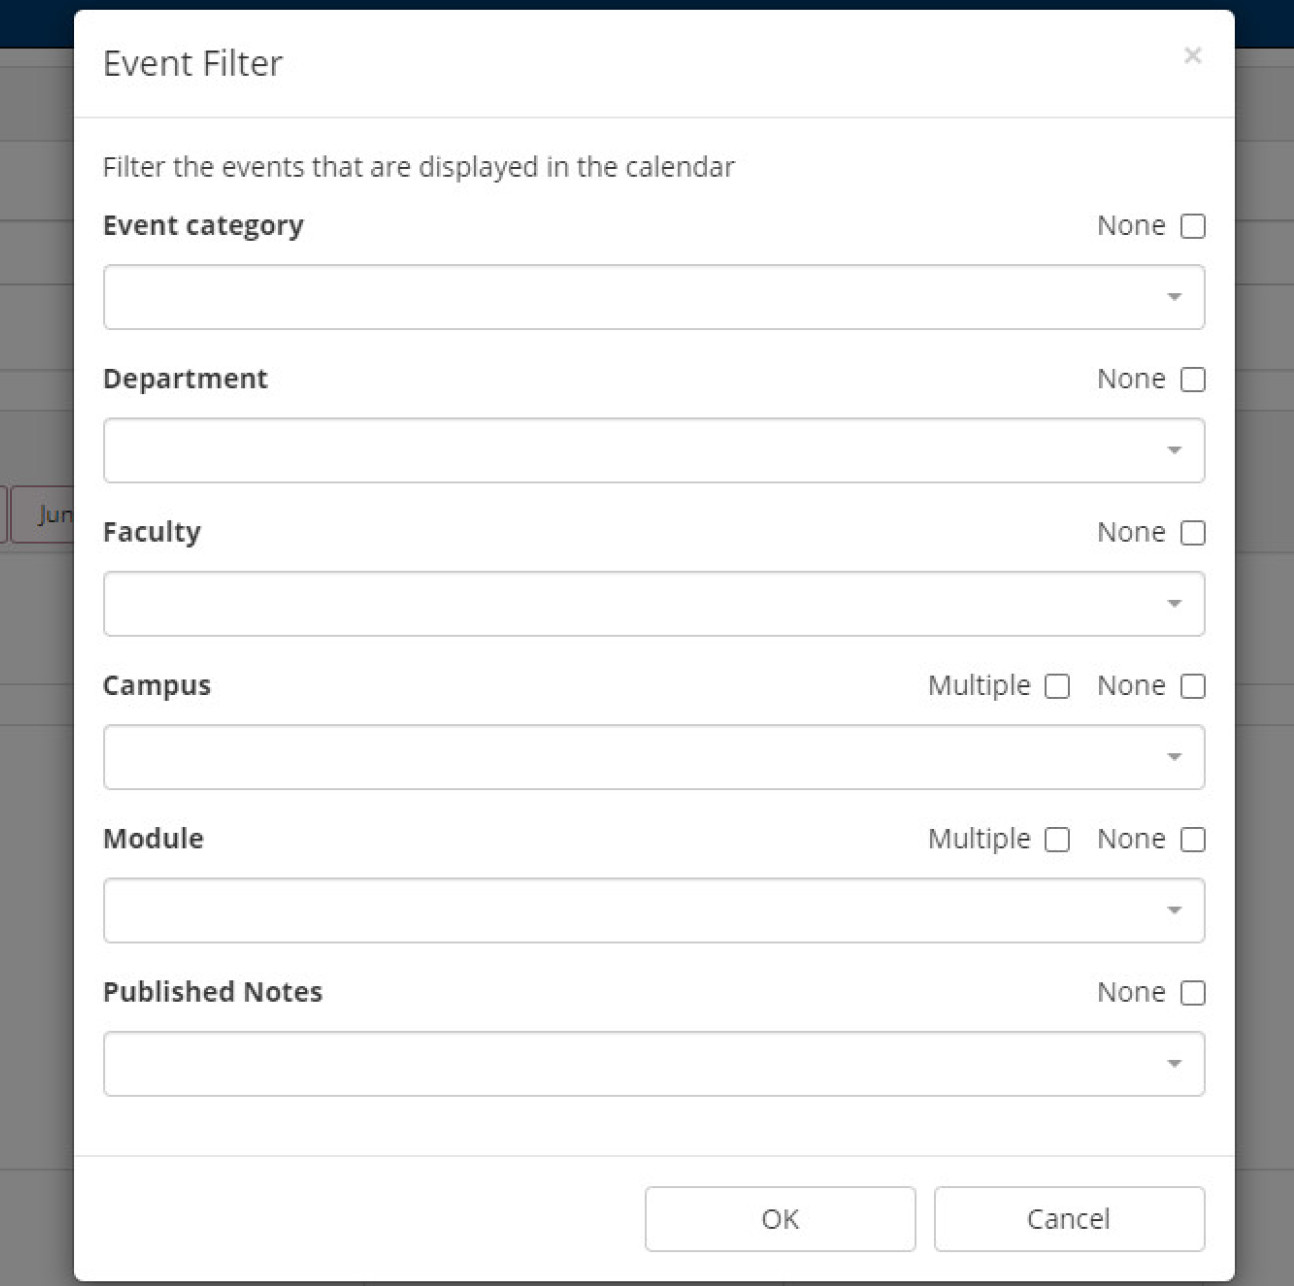
The Event Filter function allows you to filter the appointments that are displayed in the calendar via event category, departments, faculty, campus modules, or custom fields.
Use the dropdown boxes to specify a single value for one or more of the parameters, or use the checkboxes to indicate that matching events should have no value for the corresponding parameter. When multiple parameters are specified, they are applied using OR logic (e.g. if you specify a category and a department, the filter displays events that have the chosen category or that are in the chosen department). Click “OK” to apply changes. The calendar displays the following alert when an event filter is active.

The “Clear Filter” button is a quick way of clearing the filter (without having to reopen the event filter dialog). The event filter settings are remembered for the session.
Users can use the Share Calendar functionality to share URLs with colleagues. Click any of the Copy buttons to copy the suggested URL to your clipboard. The recipient of one of these URLs can place it in their browser address bar and display the corresponding calendar view (based on the necessary permissions)
If users want to Share one event, make sure the event is highlighted before clicking on the Share functionality

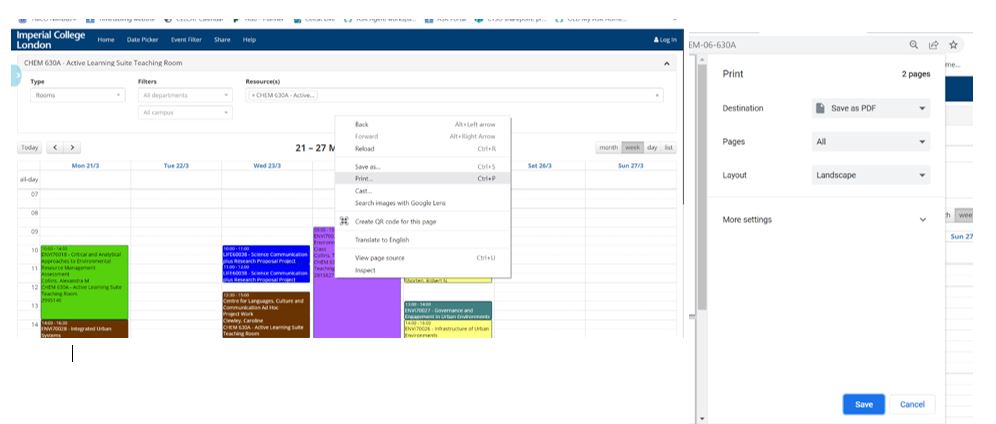
As an example, if you wanted to print the timetable for Room CHEM 630A, in the ‘Type’ field select ‘Rooms’, and in the ‘Resource(s)’ field begin typing CH and in the drop-down list you can select the room.
Once you have selected the desired view, right click with the mouse and select print. In the printer field select ‘Save as pdf’ and then click ‘save’. Save the document in your desired location.