 Location: Bessemer level 6 - B629
- Staining
- Embedding (cryostat and microtome sample preparation)
- Sectioning with cryostat (cryosectioning) and microtome
- Use of the chemical fume hoods
- Chemical preparation
HistologyItems
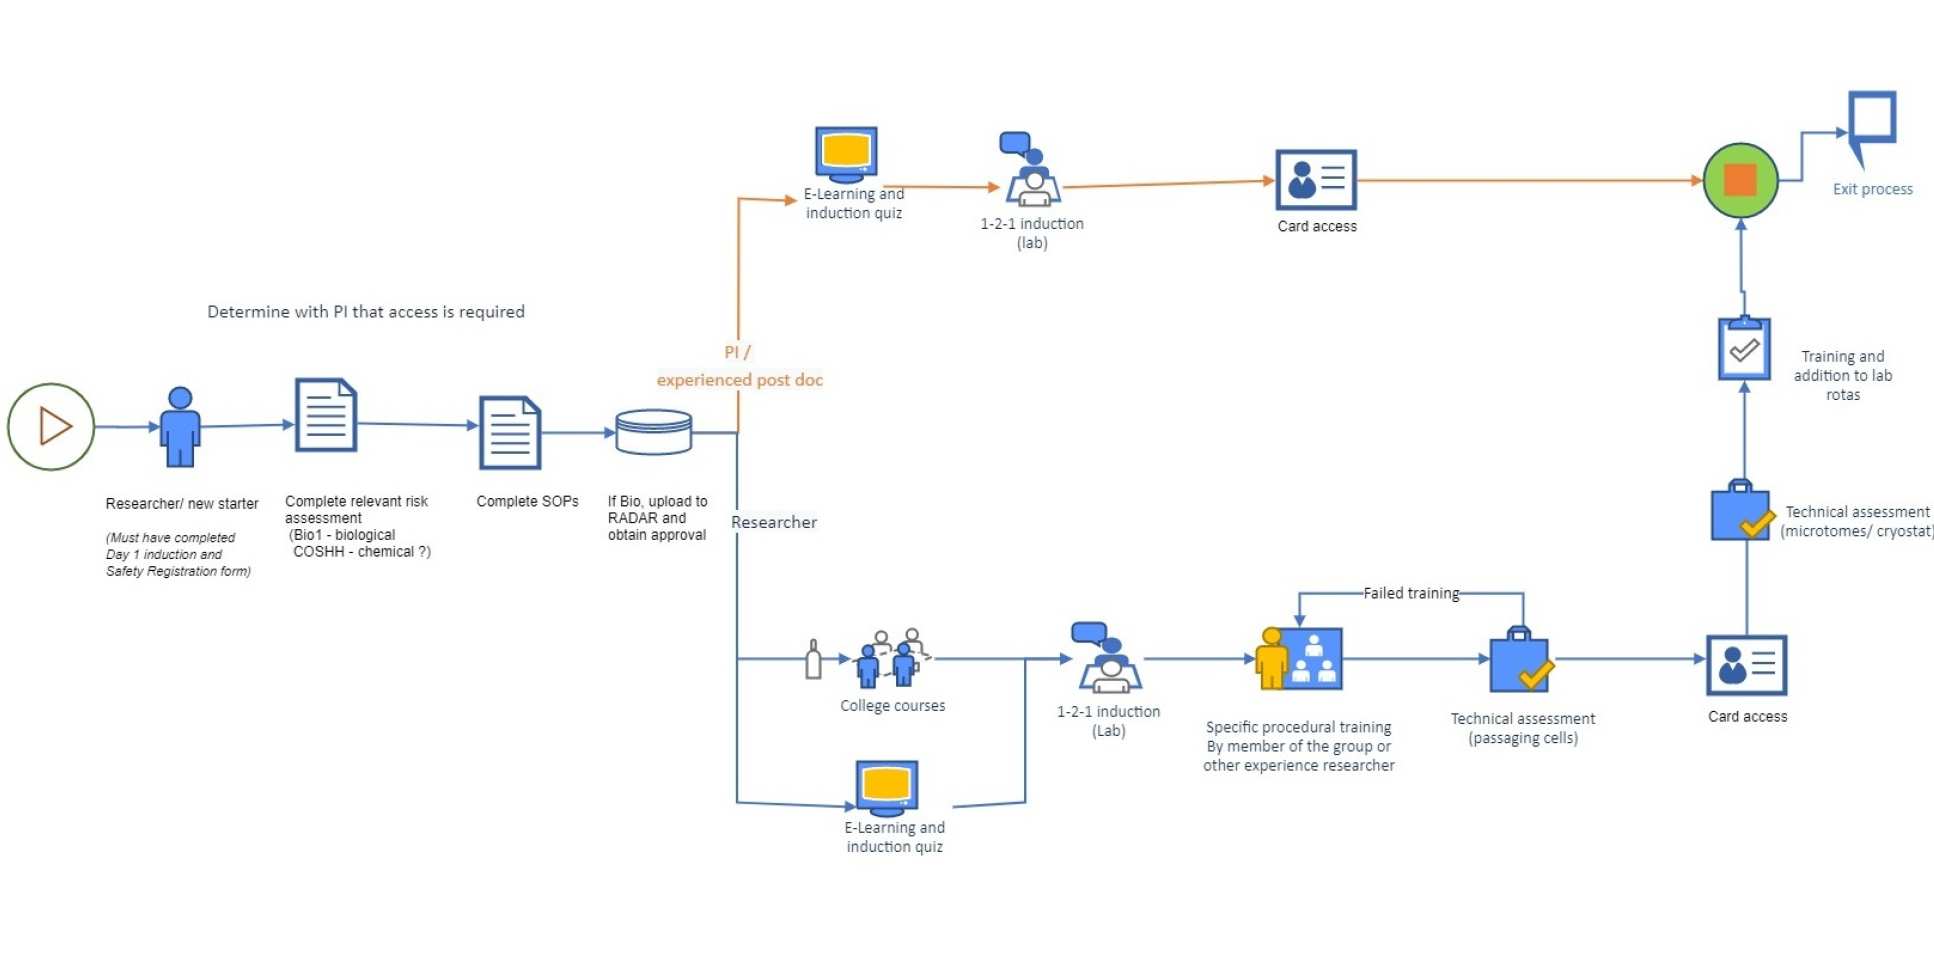
In order to gain access to the laboratory a number of steps must be completed:
-
A safety registration form must be filled in for all users (this should be done with your supervisor on your first day).
-
A risk assessment must be done, or exist, for the work. Note: A specific risk assessment form, for example the Bio1 form for biological agents, may be required.
-
Read and understand the Histology Lab Rules.
-
Please take a short quiz so we can assess what you require training for: Histology induction quiz
-
A laboratory Induction (read the Induction form beforehand) must be completed specific for the use of the Histology laboratory, B629. Contact Joel Eustaquio. Sign up for induction on the Technical Academy
-
Fill and upload Histology Laboratory Induction form to Laboratory Inductions folder
-
A Training Record form must be completed to gain access to the lab.
-
COSHH assessments must be present and signed for all chemicals to be used during the work. If no form exists it must be completed and submitted for approval.
-
SOP's should exist for standard methods
Note that usage charges cover the maintenance and running of equipment. New equipment is added by academic cost-sharing and grant proposals.
 |
Cryostat NX70 |
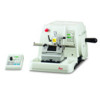 |
Microtome Leica RM2255 |
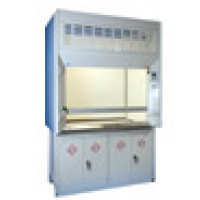 |
4 x ducted fume hoods and a chem-prep LEV area available to work with hazardous chemicals, staining, fixations, adjust pH solutions etc. |
 |
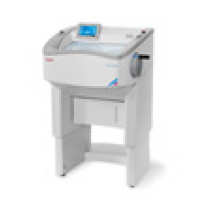
A manual cryostat housed in the core Histology laboratory. Microprocessor Controls, Digital LED Chamber and Quick Freeze Temperature Display, Dual Refrigeration, SystemBright MicroTome allows for Precise Cutting, Temperature Range: Ambient to -40° C |
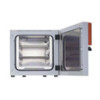 |
Embedding Ovens, vacuum oven and drying cabinet |
 |
KEDEE Embedding Station |
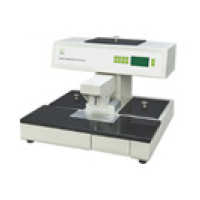
Histocutter This robotic microtome/imaging system expertly constructs high-throughput, high resolution, 3D histological imaging, capturing and aligning thousands of multi-spectral high-quality images and making them ready for quantitative analysis and 3D visualisation.The Histocutter is ideal for conducting studies where optical penetration is limited like in bone and cartilage. Vascular tracers, bone growth indicators (calcein, alizarin red) and en-bloc dyes can be imaged, while unstained tissues can also be seen. |
|
| |
|
 |
Departmental Equipment Wish List Items of equipment can be added to the departmental equipment wish list for addition to future PI grants and shared multi-user grant proposals. Examples of current items include a new cryostat, microtome and embedding station. Once added to the core facility the equipment is management, serviced and maintained by the Core Facility Technical Team. |
Microtomes are commonly instruments used in the department's laboratories to section tissues. These devices pose potential hazards to users during sectioning and/or the cleaning process.
Potential hazards:
- Sharp blade
- Sharp blade holder corners Ergonomics
Potential Biohazards associated with parafinized tissue based on the source of the material:
- Creutzfeldt-Jacob Disease Scrapie
- BSE
- Other potentially transmissible prion diseases
![]()
Sharpness of Blade: A microtome blade is extremely sharp and must be handled carefully.
The rotary handle of the microtome must always be set in the locked position when changing a paraffin block or the blade. New blade should be placed in the blade holder and clamped before the rotary wheel lock is released. Wrist guards should be added where possible. Once the blade is seated and secured the rotary wheel lock can be released and the knife and holder advanced to the specimen block. If adjustments need to be made to the specimen, remove the blade from the housing.
Removal of the blade: Disposable blades must always be removed using forceps or a similar instrument. Do not remove the blade holder from the microtome with a blade present or transport the housing with the blade present. . The Biological sharps container must be kept adjacent to the microtome to reduce the distance that a blade would be moved; For microtomes with reusable blades cut resistant gloves must be used when removing and sharpening the blade.
Microtome cleaning:
Before the microtome is cleaned, the rotary wheel must be locked and the blade removed from the blade holder. Use caution other components of the microtome may also have sharp edges. Cut resistant gloves must be worn under nitrile gloves when a microtome is being cleaned.
Products commonly used to freeze tissues include:
Histo-freeze
Other name its under: Cytofreeze
- Aerosol can
- Clear, weak or odour-less gas
- Concerns to lab personnel:
-
Frostbite
Optimal Cutting Temperature (OCT)
- Use: embed tissues prior to sectioning
Water soluble glycol and resin compound – used a support medium
Slight alcohol odor - Concerns to lab personnel:
- None known; does not contain hazardous materials
- None known; does not contain hazardous materials
Dry Ice
- Concerns to lab personnel
- Use in a well-ventilated space
- Wear appropriate gloves for handling (i.e. cryogenic)
- Frostbite
![]()
Appropriate PPE: A lab coat, eye protection (safety glasses or goggles), and nitrile gloves must be worn while handling tissues to be sectioned. While changing the blade, cut resistant (Kevlar or stainless steel mesh) gloves must be worn under a pair of disposable nitrile gloves.
Helpful hints:
-
Training must be documented and provided by a knowledgeable and responsible person within the laboratory before any work is completed. Standard Operation Procedures should be made available to all users and posted near the point of operation.
-
Schedule Breaks: Regularly scheduled breaks and rotation of tasks during the sectioning process will help prevent errors due to fatigue.
-
The Manufacturers' Manual Refer to the manual or contact the manufacturer for additional information regarding specific safety information
-
All Incidents should be reported to your supervisor and the technical managing are area (Marta) immediately and must be reported on the college SALUS system
If you have questions please contact your supervisor, Marta Garcia Bellmunt or another member of the departments Technical or Safety teams.
Techniques
For light microscopy, three techniques can be used: the paraffin technique, frozen sections, and semithin sections.
The paraffin technique is the most commonly used. Once the sections are prepared, they are usually stained, to help distinguish the components of the tissue. Unstained, it's hard to make out much detail, because the optical density of the different tissue components is very similar.
What is the paraffin technique?
In this technique, tissues are fixed, and embedded in wax. This makes the tissue hard, and much easier to cut sections from. The sections are then stained, and examined with the light microscope.
1. Fixation:
Square tissue blocks (about 1cm in each dimension), or whole organs, are fixed by chemical fixation:
The chemical added binds to and cross-links some proteins, and denatures other proteins through dehydration. This hardens the tissue, and inactivates enzymes that might otherwise degrade the tissue. Fixation also kills bacteria etc. It can also enhance tissue staining.
The fixative most commonly used is 4% paraformaldehyde in PBS at neutral pH.
2. Dehydration and clearing:
To cut sections, the tissue has to be embedded in paraffin wax, but wax is not soluble in water or alcohol. However, it is soluble in a paraffin solvent called 'xylene'. Therefore, the water in the tissue needs to be replaced with xylene. To do this, first the tissue has to be dehydrated, by gradually replacing water in the sample with alcohol. This is achieved by passing the tissue through increasing concentrations of ethyl alcohol (from 0 to 100%). Finally, once the water has been replaced by 100% alcohol, the alcohol is replaced with xylene, which is miscible with alcohol. This final step is called 'clearing'.
3. Embedding:
The tissue is placed in warm paraffin wax, and the melted wax fills the spaces that used to have water in them. After cooling, the tissue hardens, and can be used to cut slices (sectioned).
4. Sectioning:
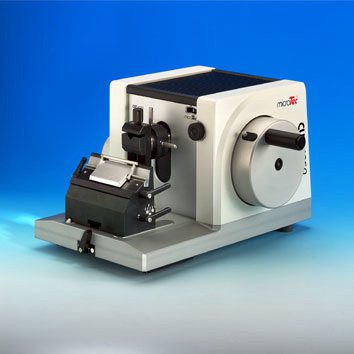
The tissue is trimmed, and mounted on a cutting device called a microtome (shown in the picture). Thin sections are cut, which can be stained and mounted on a microscope slide.
5. Staining and Mounting:
Unfortunately, most staining solutions are aqueous, so to stain the sections, the wax has to be dissolved and replaced with water (rehydration). This is essentially step 2 in reverse. The sections are passed through xylene, and then decreasing strengths of alcohol (100% to 0%) and finally water. Once stained, the section is then dehydrated once again, and placed in xylene. It is then mounted on the microscope slide in mounting medium dissolved in xylene. A coverslip is placed on top, to protect the sample. Evaporation of xylene around the edges of the coverslip, dries the mounting medium and bonds the coverlips firmly to the slide.
Are there any other ways of making sections for the light microscope?
There are two further ways that are sometimes used:
Frozen sections:
Tissues are frozen rapidly in liquid nitrogen, and then cut in a refrigerated cabinet (a cryostat) with a cold knife, then stained and observed in the microscope. This procedure is faster, and can preserve some tissue details that may be lost by the paraffin technique. Sections are 5 - 10 µm thick.
Semithin sections:
It is sometimes hard to see detail in thick sections. To get around this, sections can be embedded in epoxy or acrylic resin, which enable thinner sections (less than 2 µm) to be cut.
What is H&E?
What kinds of histological stains are there?
Most cells are colourless and transparent, and therefore histological sections have to be stained in some way to make the cells visible. The techniques used can either be non-specific, staining most of the cells in much the same way, or specific, selectively staining particular chemical groupings or molecules within cells or tissues. Staining usually works by using a dye, that stains some of the cells components a bright colour, together with a counterstain that stains the rest of the cell a different colour.
Basophilic and acidophilic staining.
Acidic dyes react with cationic or basic components in cells. Proteins and other components in the cytoplasm are basic, and will bind to acidic dyes.
Another way of saying this is that cytoplasmic proteins are acidophilic (acid liking - i.e. bind to acidic dyes).
Basic dyes react with anionic or acidic components in cells. Nucleic acids are acidic, and therefore bind to basic dyes.
Another way of saying this is that nucleic acids are basophilic (basic liking).
H&E staining
The most commonly used staining system is called H&E (Haemotoxylin and Eosin). H&E contains the two dyes haemotoxylin and eosin.
Eosin is an acidic dye: it is negatively charged (general formula for acidic dyes is: Na+dye-). It stains basic (or acidophilic) structures red or pink. This is also sometimes termed 'eosinophilic'.
Thus the cytoplasm is stained pink in the picture below, by H&E staining.
Haematoxylin can be considered as a basic dye (general formula for basic dyes is:dye+ Cl-). Haemotoxylin is actually a dye called hematein (obtained from the log-wood tree) used in combination with aluminium ions (Al3+). It is used to stain acidic (or basophilic) structures a purplish blue. (Haematoxylin is not strictly a basic dye, but it is used with a 'mordant' that makes this stain act as a basic dye. The mordant (aluminium salts) binds to the tissue, and then haematoxylin binds to the mordant, forming a tissue-mordant-haematoxylin linkage.)
Thus the nucleus is stained purple in the picture below, by H&E staining.
This means that the nucleus, and parts of the cytoplasm that contain RNA stain up in one colour (purple), and the rest of the cytoplasm stains up a different colour (pink).
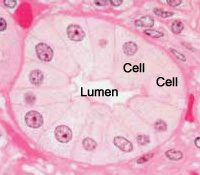
This is a picture of a group of cells lining a duct.
The lumen of the duct, and two cells are labelled.
Can you spot the nuclei?
What structures are stained purple (basophilic)?
DNA (heterochromatin and the nucleolus) in the nucleus, and RNA in ribosomes and in the rough endoplasmic reticulum are both acidic, and so haemotoxylin binds to them and stains them purple.
Some extracellular materials (i.e. carbohydrates in cartilage) are also basophilic.
What structures are stained pink (eosinophilic or acidophilic)?
Most proteins in the cytoplasm are basic, and so eosin binds to these proteins and stains them pink. This includes cytoplasmic filaments in muscle cells, intracellular membranes, and extracellular fibres.
How do we make sections for the electron microscope?
Tissue blocks are generally fixed in glutaraldehyde, (whereas light microscopy normally uses paraformaldehyde).
They are postfixed in osmic acid.
The tissue is then dehydrated, and transferred to propylene oxide, which will mix with the resinous embedding medium. This is hard so that thin sections can be cut (60 to 80nm thick). The sections need to be this thin, as electrons do not penetrate very far into tissue.
The tissue is infiltrated with the unpolymerised resin, and then heated gently, to polymerise it.
Sections are cut using a glass plate wedge, or a diamond knife on a device called an ultramicrotome.
The cut sections are stained with heavy metal salts. This is because these metals are electron dense, and scatter the electrons. Fewer electrons from these regions reach the film, and on the negative, these regions appear whiter than less electron dense areas. Therefore, this staining increases the contrast of the image. When a print is made from the negative, these regions then appear black. So, on final prints, black areas represent electron dense areas.
Stains commonly used are osmium (as osmic acid), uranium (as uranyl acetate) and lead (as lead hydroxide).
Other Core Facilities


Technical Contact

B200, 2nd Floor, Bessemer Building, South Kensington Campus
+44 (0)7894 329 366