Why a PDF/A compliant format?
PDF/A is the standard format used around the world for archiving electronic documents. It allows documents to be viewed in their original appearance across different software. A PDF/A file differs from a standard PDF file in that it forbids features that aren’t suitable for long-term archiving.
-
Global integration. Information can be stored in any language, with the PDF/A format making sure that texts are correctly displayed on any device - including those in Arabic, Japanese and Cyrillic.
-
Long-term preservation. The nature of a PDF/A file is to archive digital information for a long period of time. This could be useful in libraries, banks and other archives.
-
Ability to reuse content. The specific format of this PDF file means that you can reuse the content easily. These files are also relatively straightforward to convert to Word, HTML and e-Books.
Operating systems
Follow these steps to convert your Microsoft Word to PDF/A format.
1. Open your document in Word
2. Select File then Save As
3. Click More options and then change the save as type to PDF
4. Click the Options button that becomes available toward the bottom of the window.
5. Under PDF Options check the box for “PDF/A compliant” and click on OK
6. Click on Save
7. The document will open in Adobe Acrobat
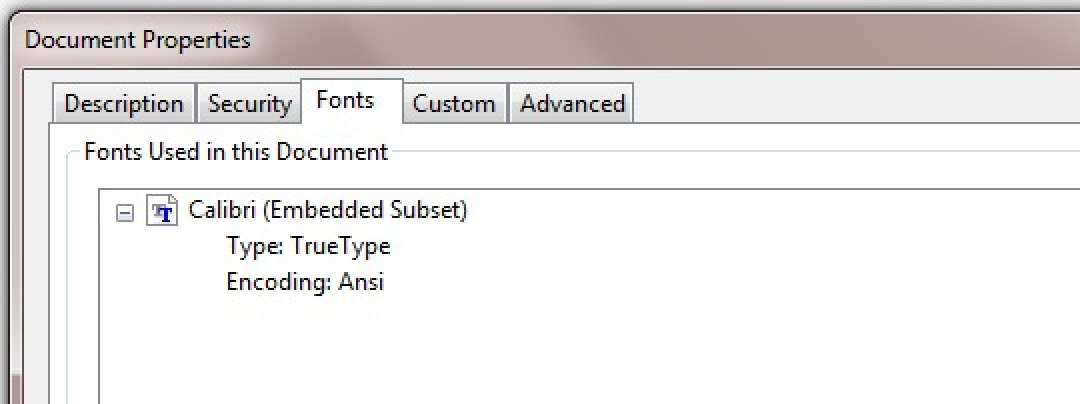
8. Select File>Properties>Fonts and ensure that the Fonts are all embedded as shown below (Embedded Subset).
9. Confirm that in Adobe you have a blue ribbon at the top of the window claiming PDF/A compliance
Follow these options to convert a Mac Word document to PDF/A
Option 1:
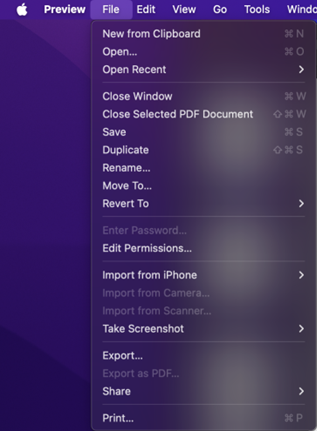
1. From the file menu, select Save As
2. Click on the file format dropdown and select PDF
3. Click on Export
Option 2:
1. From the File menu, select Print
2. Click on the PDF button in the lower-left corner of the print dialog box
3. Select Save as PDF
4. Select a location to save the file
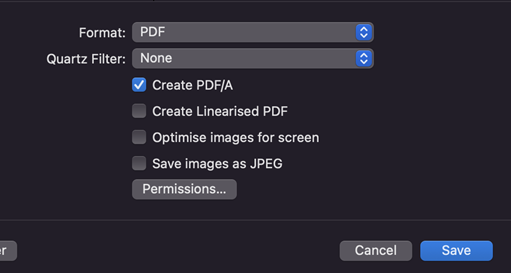
Create a PDF/A from the PDF created
5. Open the PDF file
6. From the file menu, choose the Export option
7. Tick the PDF/A option and then press Save.
Please note: If you have created your thesis in Microsoft Word on an Apple Mac and you encounter a PDF/A compliance error when attempting to upload to Spiral, please try to create your PDF/A on a Windows machine rather than the Apple Mac before getting in touch for further guidance as this may resolve the problem.
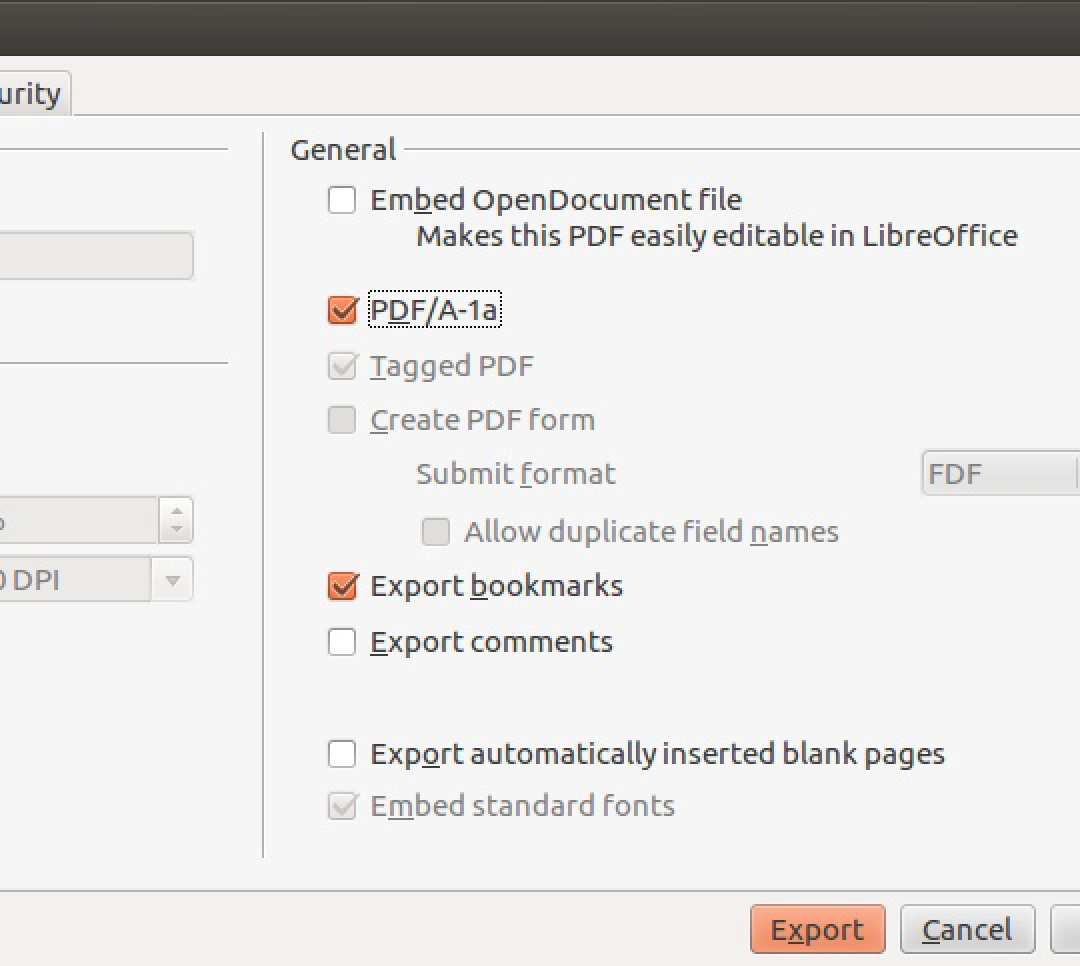
Follow these steps to export your Open Office document as a PDF.
1. Select File and then Export as PDF from the drop-down menu
2. An options window will open
3. On the General tab make sure that Save as PDF/A-1 is ticked
4. Click on the Export button, give the export file a name and click on Save
There are 2 common ways of creating PDF files from (La)TeX documents.
1. use a device independent (.dvi) file and the dvipdf device driver
2. go directly from the .tex file to the .pdf file by means of pdf(la)tex
Since LaTeX is more commonly used, only the LaTex commands will be given here. Although command line instructions are given, they also indicate the sequence followed by GUI interfaces.
1. (.dvi) method
1. Create your LaTeX document, filename.tex, with any text editor (avoid word processors as they put in stray characters).
2. At the terminal/command prompt, issue the command latex filename.tex to create filename.dvi.
3. At the terminal/command prompt, issue the command pdflatex file.dvi to create filename.pdf
4. Check that fonts are embedded (see below)
2. (pdflatex) method
1. Create your LaTeX document, filename.tex, with any text editor (avoid word processors as they put in stray characters).
2. At the terminal/command prompt, issue the command pdflatex filename.tex to generate filename.pdf.
3. Check that fonts are embedded (see below)
With both methods repeat step 2 as necessary to generate those parts (e.g. table of contents, cross references) that are dependent on information, such as page number, from later parts of the document. To have this information available for the next time through step 2, at least one additional file is generated containing the necessary information. In most cases one repeat is sufficient.
Check that fonts are embedded
Use Adobe reader to check that fonts have been embedded.
1. With the PDF file open, select File > Properties
2. In the Document Properties window that opens, click on the Fonts tab. If the font has been embedded it will be noted in brackets following the name of the font.
3. The following images show the font tab for two PDF files from the same Microsoft Word document. In the first image not all of the fonts have been embedded, in the second all fonts have been embedded.

Why a font might not be embedded
All PDF viewers have specific fonts included. The most frequently used of these fonts are known as the Base 14 fonts. These fonts are:
- Courier
- Courier-Bold
- Courier-BoldOblique
- Courier-Oblique
- Helvetica
- Helvetica-Bold
- Helvetica-BoldOblique
- Helvetica-Oblique
- Symbol
- Times-Bold
- Times-BoldItalic
- Times-Italic
- Times Roman
- ZapfDingbats
To make the resulting PDF file as small as possible, by default, the Base 14 fonts are not embedded. The requirement for submission of your thesis is that all fonts be embedded to ensure that online and print versions are identical. To embed the Base 14 fonts, the parameter pdftexDownloadBase14 in updmap.cfg must be set to true. With TeX Live 2008's default installation this parameter should be true. If it is not the case with your installation, follow the instructions with the installation for changing the parameter as the change does more than just changing the value of the parameter in the updmap.cfg file.
Tip: Ensure that you have added the option pdfa to package hyperref . This option adds some settings for greater compliance to PDF/A & also sets the /F key in link annotations which is a compliance requirement.
1. Save your thesis as a PDF (not a PDF/A)
2. Open Adobe Acrobat Pro and open your thesis PDF
3. Under the All tools menu select Use print production and then select Preflight
4. This will open a menu below (fig.1) and select the PDF Standards library (fig.2):

Fig 1.
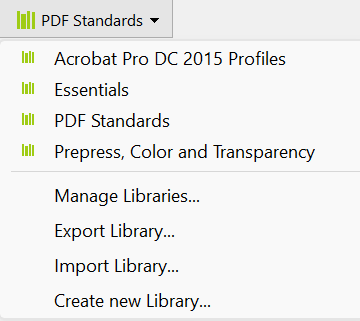
Fig 2.
5. Select the option for Convert to PDF/A-3b and then press the Analyze and fix button.
6. This will automatically produce your PDF/A and will show results below (Fig. 3) highlight any issues:
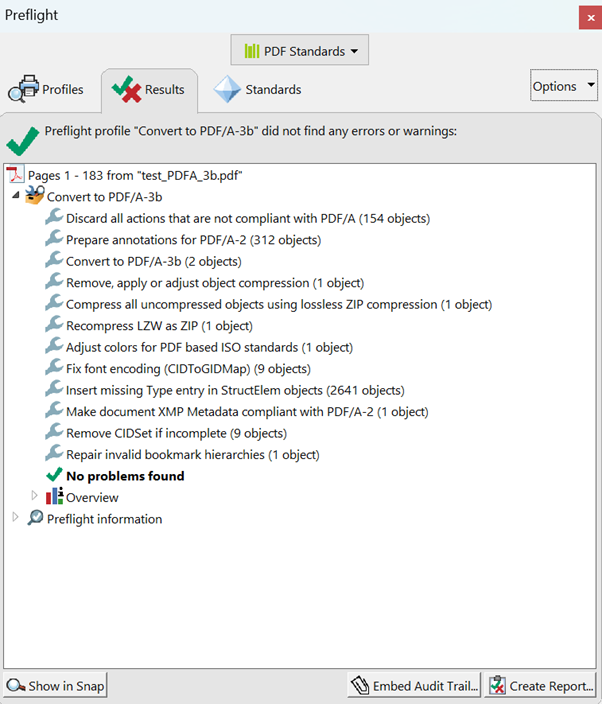
Fig 3.
7. Your PDF/A will now be ready for upload if the green tick and No problems found notice is given. If there are any problems found these can be identified by clicking on Show in Snap window (bottom left) and specific issues can be found.