If you were personally contacted by ORCID@imperial.ac.uk as an affected user of the upgrade, follow the instructions below.
They will guide you through deleting ORCID publication records in order to re-authorise ORCID to Symplectic and benefit from an automatic sharing of publications between ORCID and Symplectic.
Increasingly, funders are choosing to mandate the use of ORCID and using ORCID as the record of publication in funding submission portals.
- Log in to your ORCID profile

2. If you are not taken to your ORCID record click on View my ORCID record in the top right-hand corner.

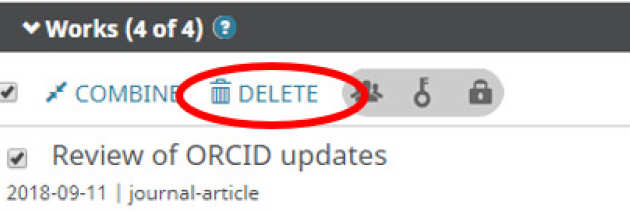
3. On your ORCID record, scroll down to Works. You will see all your publications recognised by ORCID.
4. Click on the select all box to select all the publications.

5. Check through the list of selected items and individually deselect any that do not also exist in Symplectic. The reasons why items may not appear in Symplectic are that they were published prior to your employment at Imperial or you chose to reject items from your Symplectic profile for any reason.
6. Click on DELETE. This will delete all the selected works. Don’t worry, by following the next steps you will synchronise ORCID with your entire Symplectic publications record.
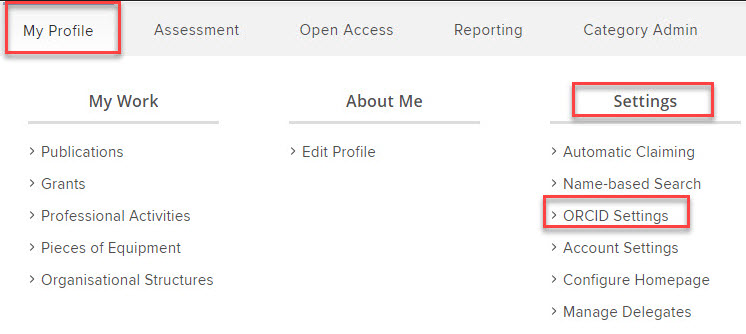
7. Log in to your Symplectic Elements account
8. Go to Menu > My Profile > Settings > ORCID Settings
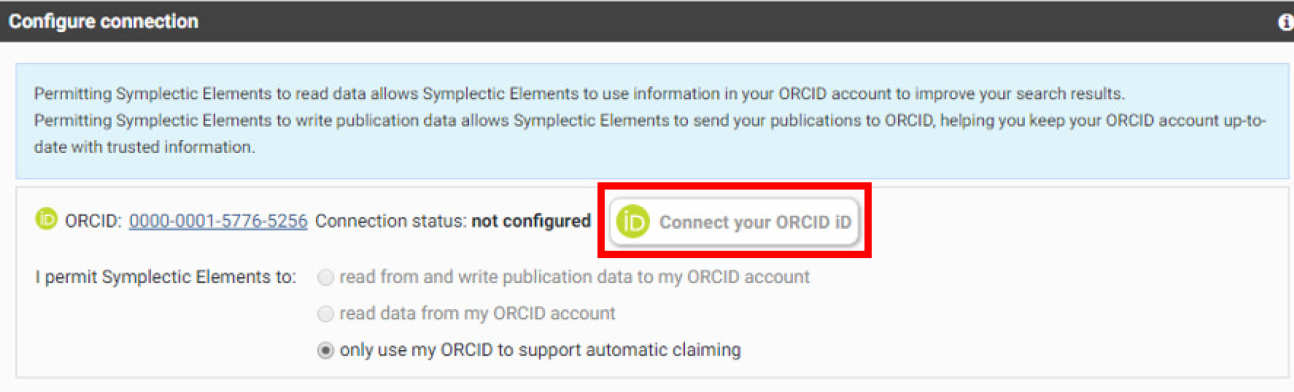
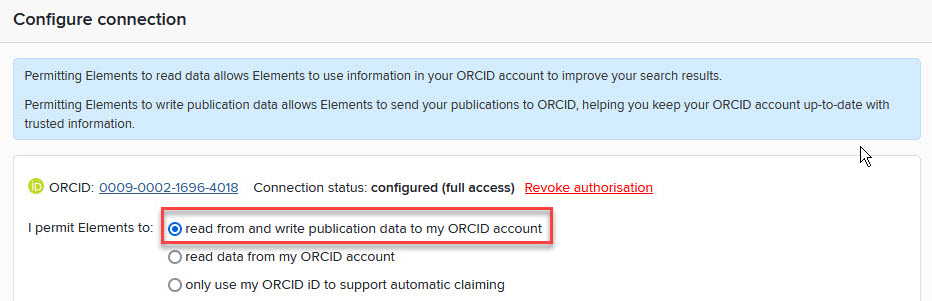
9. Under Configure connection click on Register or Connect your ORCID iD.
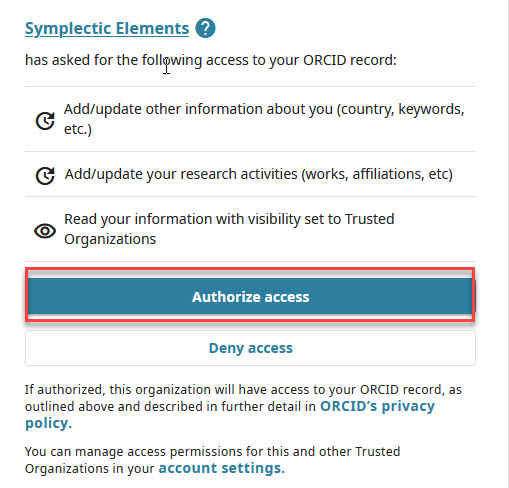
10. Sign into ORCID. If you are asked to authorise Imperial College London, click on Authorize access.
11. Under Configure Connection select the first option I permit Symplectic Elements to read from and write publication data to my ORCID account. Selecting this option will authorise an automatic connection from Symplectic to ORCID, saving you time and administration updating both accounts.
If you do not want to authorise the automatic connection between Symplectic and ORCID, see Setting Symplectic and ORCID permissions.
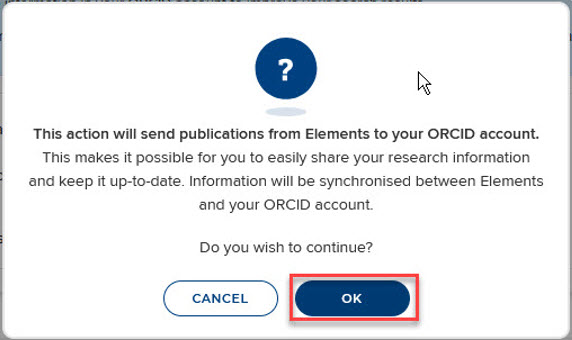
12. In the pop-up box confirming your selection, click on OK.
13. The Manage which publications will be sent options will now appear. These will permit you to choose which types of publications are sent from Symplectic to ORCID. Review the options and descriptions offered.
14. Click on Run Sync and wait to see a pop-up box confirming synchronisation.

15. Wait to see a pop-up notification confirming synchronisation. Now you can exit Symplectic and ORCID.

Within 48 hours your Symplectic account will be synchronised with your ORCID account, or not, if you selected otherwise.
You can change these settings by revisiting ORCID settings in Symplectic.
Need help?
Contact orcid@imperial.ac.uk
![]()