To register your machine or device for use on the Halls of Residence network, follow these steps:
- Plug one end of an Ethernet cable into your device or adapter and the other end into any College data socket
- Open a web browser and you will be redirected to the College self-registration webpages
- Follow the registration steps as directed
If you encounter any issues with the self-registration process, contact the ICT Service Desk.
Troubleshooting
If you're having issues connecting to the Halls network, please try the following:
troubleshooting acc widget
Windows
- Click Start
- Type Internet options
- Click Connections
- Click LAN Settings
- Ensure Automatically detect settings is the only box that is ticked and click OK

- Try connecting to the network again
If you're still experiencing issues, try the following:
- Click Start
- Type Network and sharing Center
- If connecting via ethernet cable, right click Local Area Connection. If connecting via wireless right click Wi-Fi
- Click Properties
- Click Internet Protocol Version 4
- Ensure the boxes for Obtain an IP address automatically and Obtain DNS server are ticked
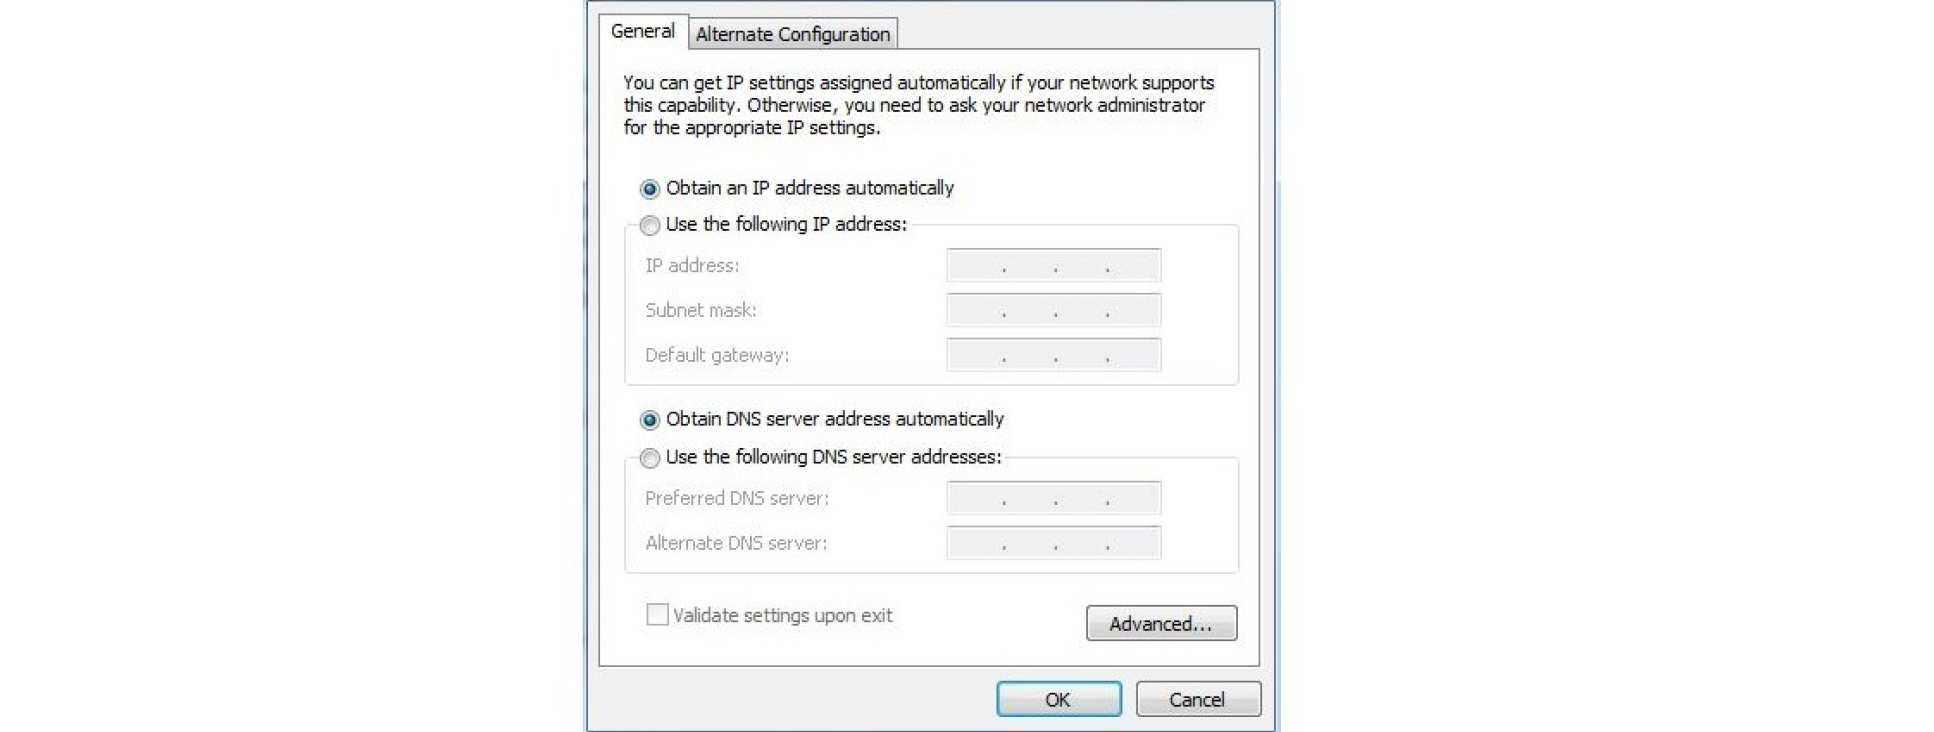
- Click OK
- Click Internet Protocol Version 6
- Ensure the boxes for Obtain an IP address automatically and Obtain DNS server are ticked
- Click OK
- Try connecting to the network again
Mac
- From the Apple menu, choose System Preferences. Then click Network
- Select the interface that you're using to connect to the Internet, such as Ethernet or Wi-Fi
- Click the Advanced button
- Click the DNS tab
- In the DNS Servers section of the window, click the Remove (–) button on any DNS servers that are not greyed out
Try connecting again.