DocuSign is a tool that allows you to create and send electronic agreements for College business. DocuSign defines an envelope as a collection of one or more documents sent to recipients to collect electronic signatures and information.
DocuSign restricts file sizes to a maximum of 25 MB and recommends that files are 5 MB.
Logging in to DocuSign
If you need a login for DocuSign, please complete our New DocuSign user request form.
To log in:
- Go to the DocuSign website and click log in
- Enter your Imperial email address and click continue
- Click the company log in button and you will be logged in
Role types
There are four roles:
- IC Viewer - for signing documents only
- IC Sender - sending and signing of documents
- IC Sender Bulk – same rights and permissions as IC Sender, but also able to send bulk documents using templates
- Department Super User - sets up templates and helps IC senders for their Working Group
A Working Group is a logical business function, e.g. Purchasing, Central Legal or Brian Sciences Research Group.
How to use DocuSign
- Create an envelope
- Add Signers
- Configure Envelope Details
- Tag Documents
- Self-Signing a Document
- Create and Use Templates
- Use Bulk Send
Envelopes are a container that can be sent to multiple recipients for viewing or signing. Envelopes have unique identifiers associated with them, each document within the envelope also carry their own unique identifiers.
Creating an Envelope
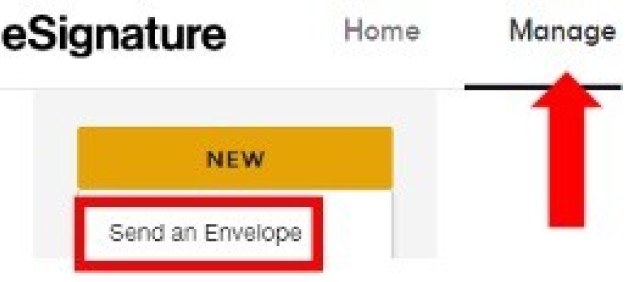
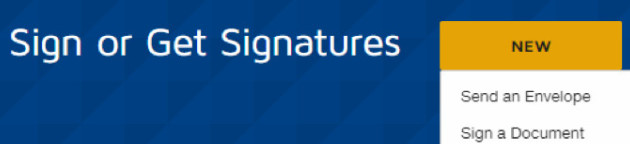
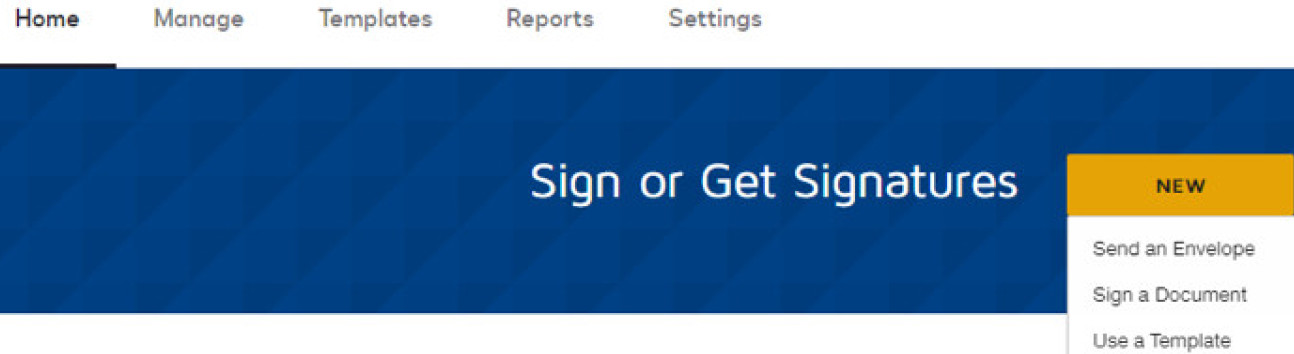
1) Starting at the dashboard, click on Manage > New and choose Send an Envelope from the drop-down
2) After selecting this, you will be taken to the Send interface, from which you will upload documents and edit the envelope's information.
Adding a document
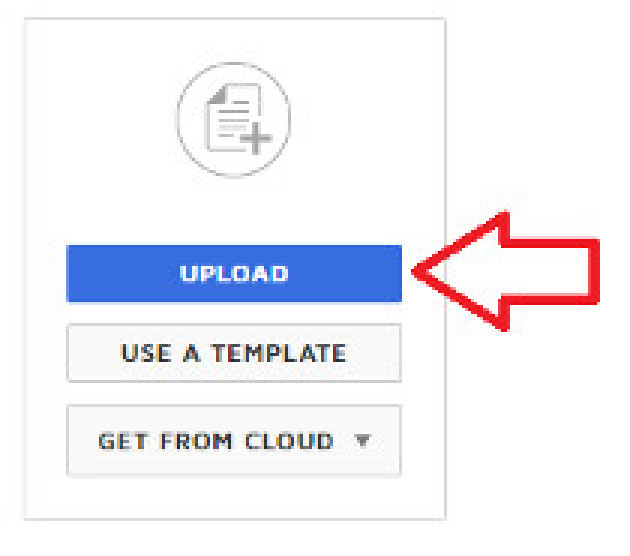
Documents saved on your local computer can be added by clicking Upload under the Add Documents to the Envelope section, you will be prompted to browse your computer for the document.
Create an Envelope from Template
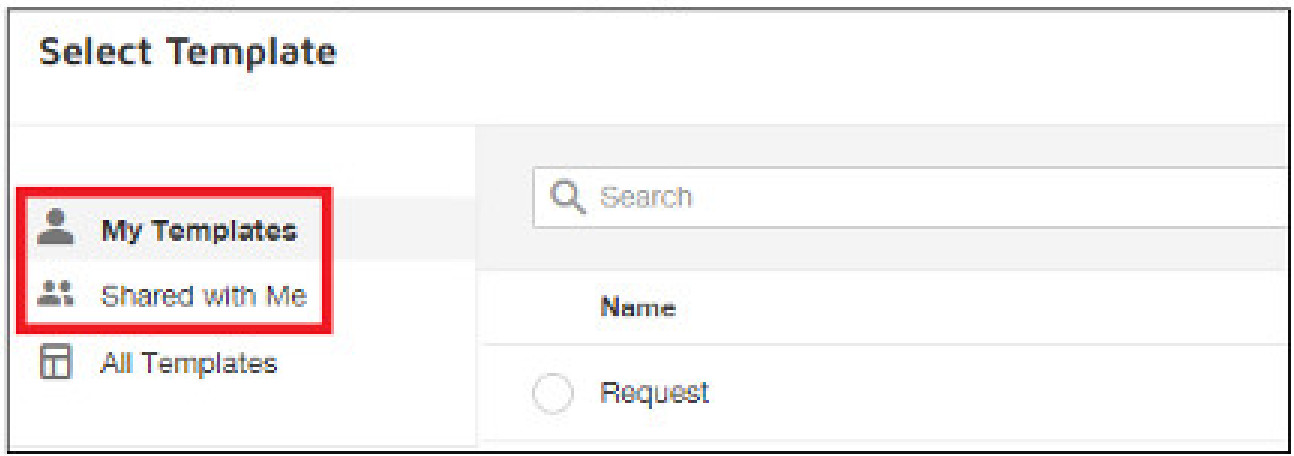
Documents created from Templates can be added by clicking Manage then selecting New then clicking on Use a Template. Choose either My Templates (for templates unique to you) or Shared with Me (for templates created by your group).
Creating Custom Fields
Visit the DocuSign webpages for more information on Custom Fields.
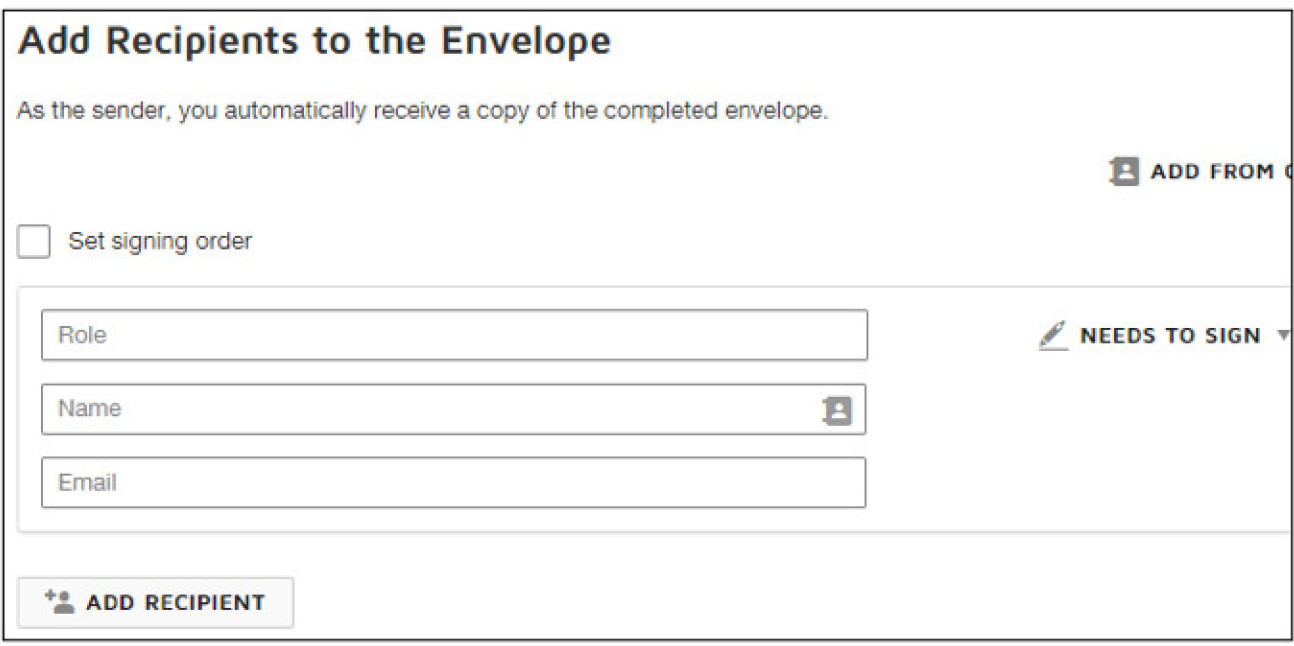
Once the document(s) are added to the Envelope, one or more Signers need to be added.
Adding Signers
Signers are in the Recipients and Routing section of envelopes. The Recipient Name and Recipient Email are required.
When adding Recipients who are Imperial employees, use their College email address (@imperial.ac.uk) to ensure completed documents are associated with their DocuSign account.
Signer Actions
This can give individual signers permissions and roles in the signing process, not all signers will sign a document.
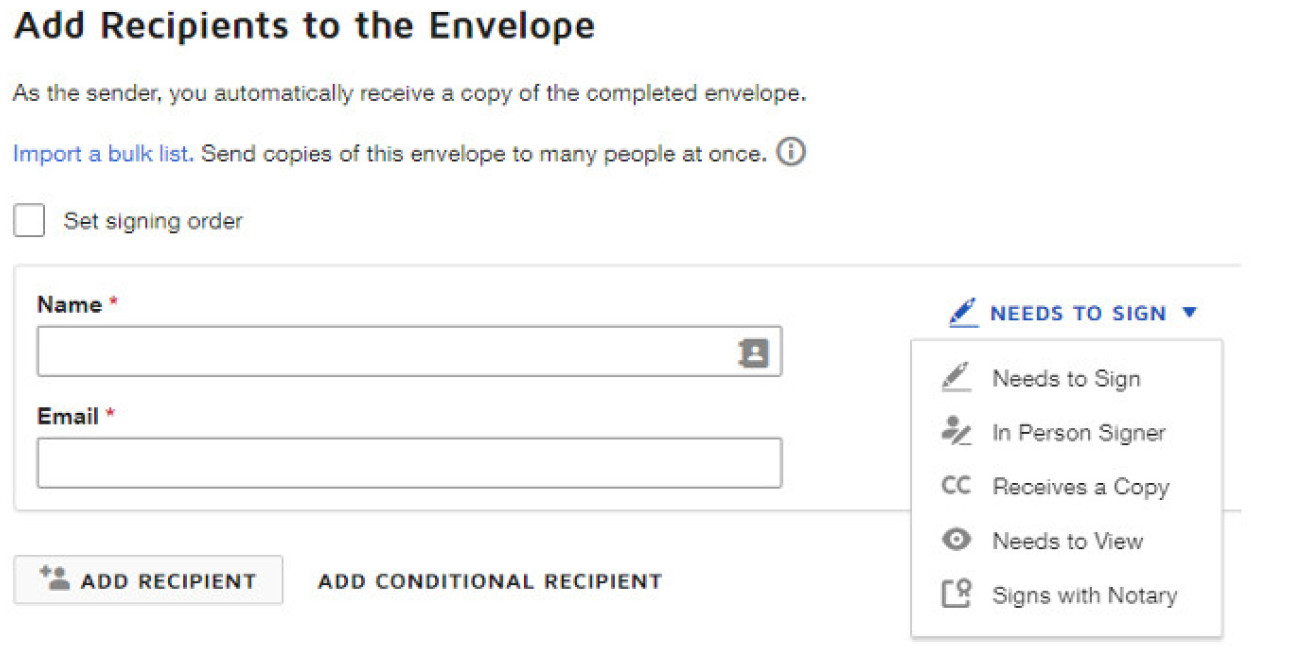
- Needs to Sign – also used to prompt for information such as filling out text fields or selecting radio buttons.
- In Person Signer - This sets up a date and time for the Signer to meet the Sender and digitally or physically sign a document.
- Receives a Copy - This recipient is sent an email with a link to a copy of the Signed document.
- Needs to View - This recipient must open the document link that is emailed to them; the document will not progress to the next signer until this is done.
For a more detailed look into roles, visit the DocuSign webpages.
Signer Verification
An Access Code can be used as an advanced verification method. See the DocuSign webpages for more information.

- Email - By default, recipients must have access to the email address used to send a DocuSign envelope to them. This simply emails the person in the signer field and assumes the email address provided belongs to the correct person. This option relies on the email system's built-in authentication.
- Access Code - An access code is set in the envelope creation process and is provided to the intended signer through a communication channel other than email. The signer must enter the access code to open the document for signing.
- If individualized messages are desired, these can be created per signer. The personalised message is added when adding the recipient.
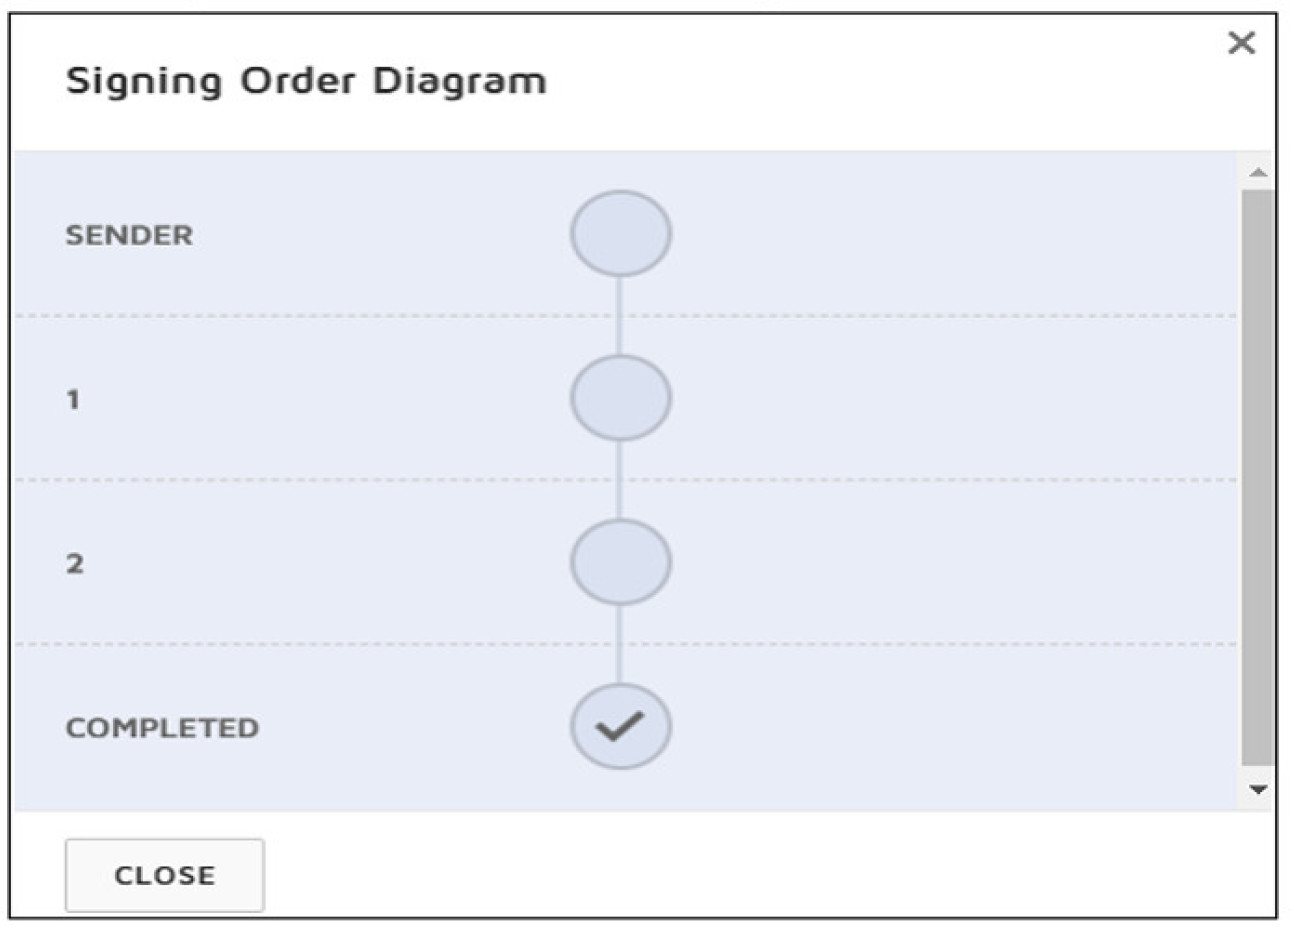
Signing Order
Each signer can be assigned a number that indicated which step they will be in the signing order. The document will be sent to the first person(s) on the signing order, after signing it will then be sent to the next person(s) in the workflow.
Selecting the rectangle of dots will also allow you to drag and drop signers into order.
Use the Signing Order button to open an interface that allows dragging recipients into new sequence configurations for receiving the document.
Envelope Message
During the Envelope creation process, the Sender will need to create a subject and message for all recipients.

Envelope Details
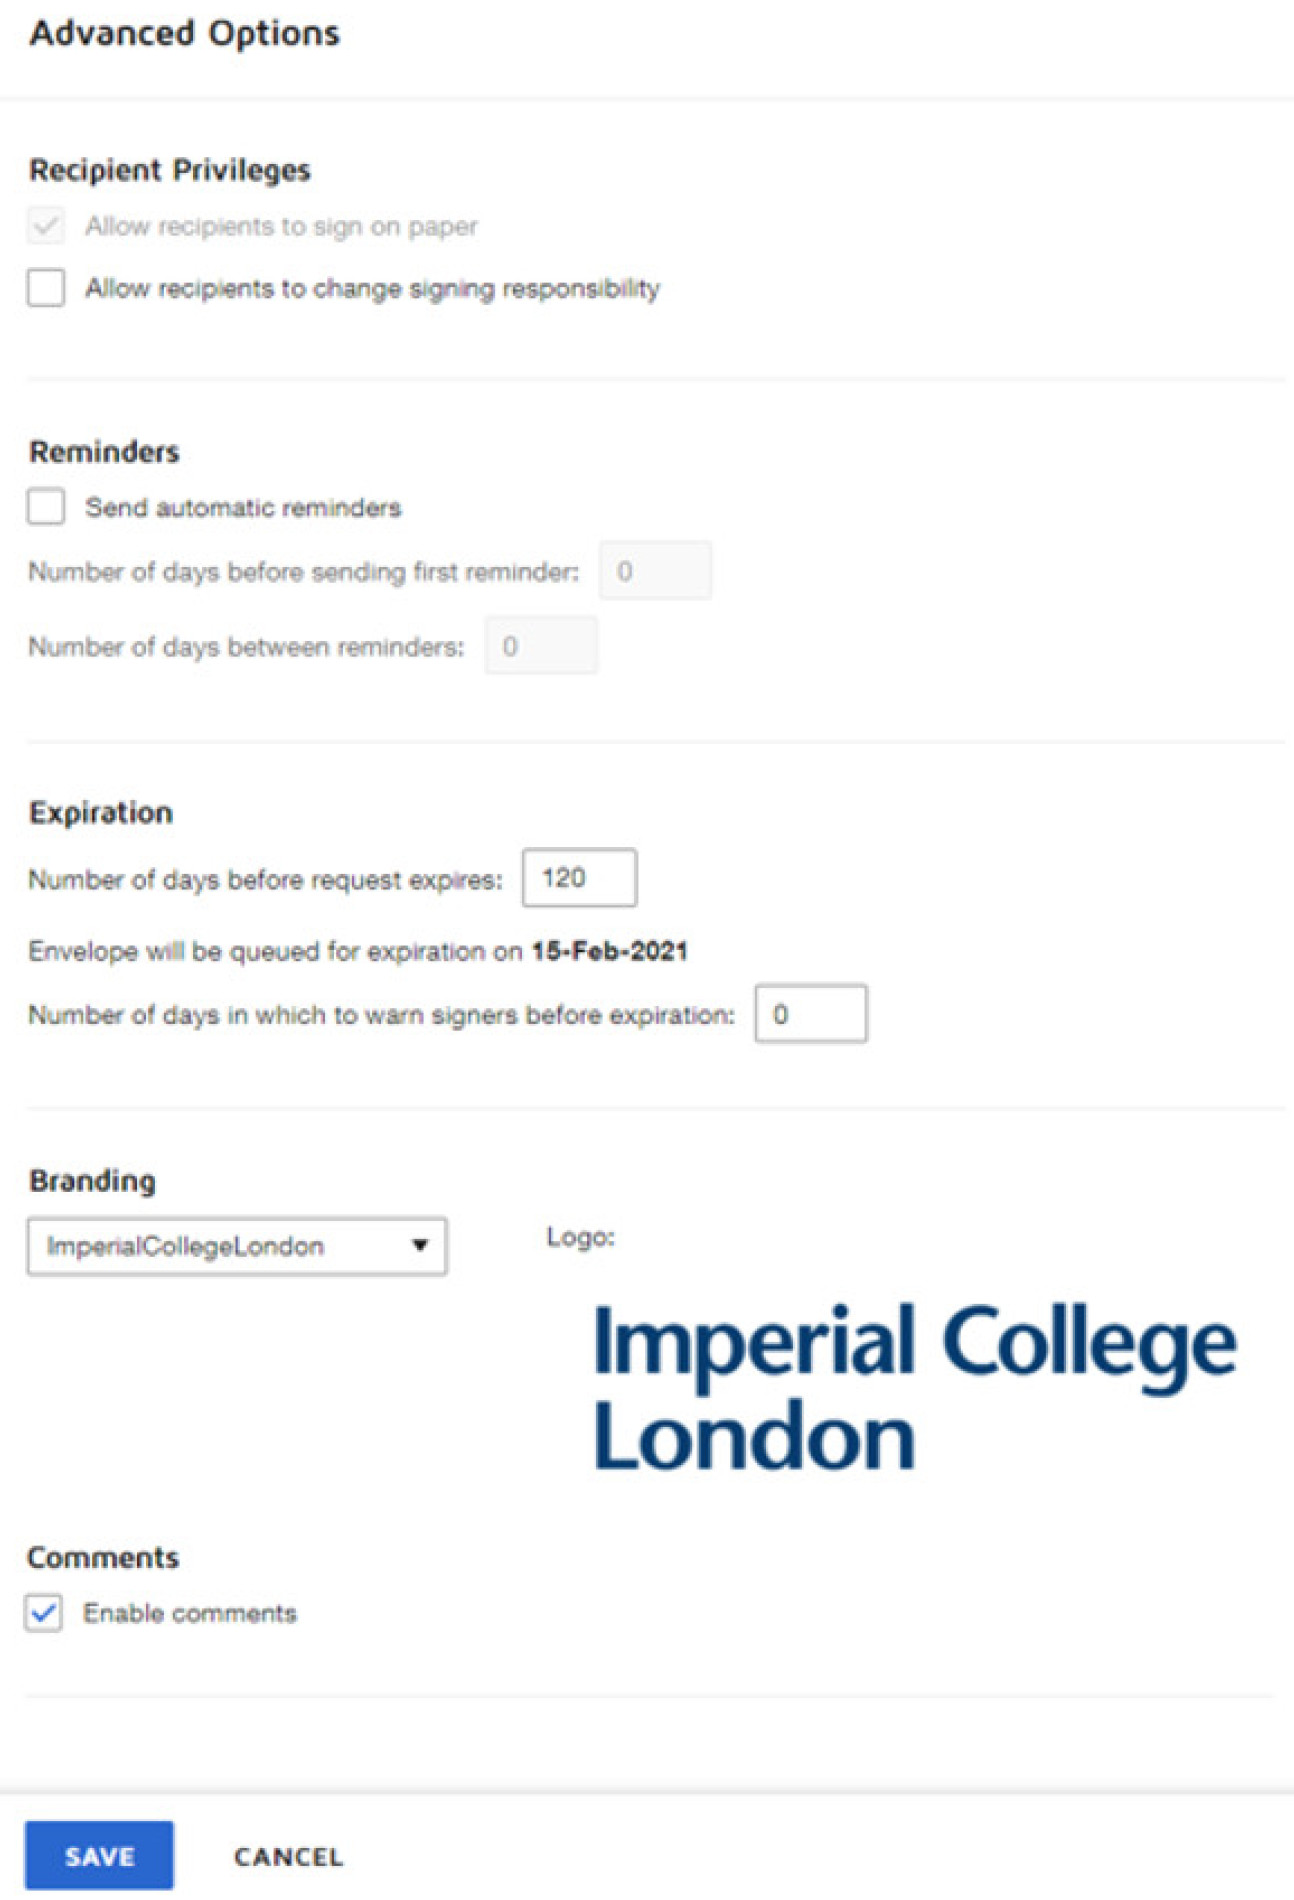
It is strongly recommended that the first checkbox, "Allow recipients to sign on paper" be unchecked. Signers who download, print, sign, and upload a document may not fill out fields correctly or otherwise introduce quality control issues.
Reminders and Expiration
Reminders can be configured to email the signers on a set interval if the signer has not signed the document. These settings are optional, although expiration is not.
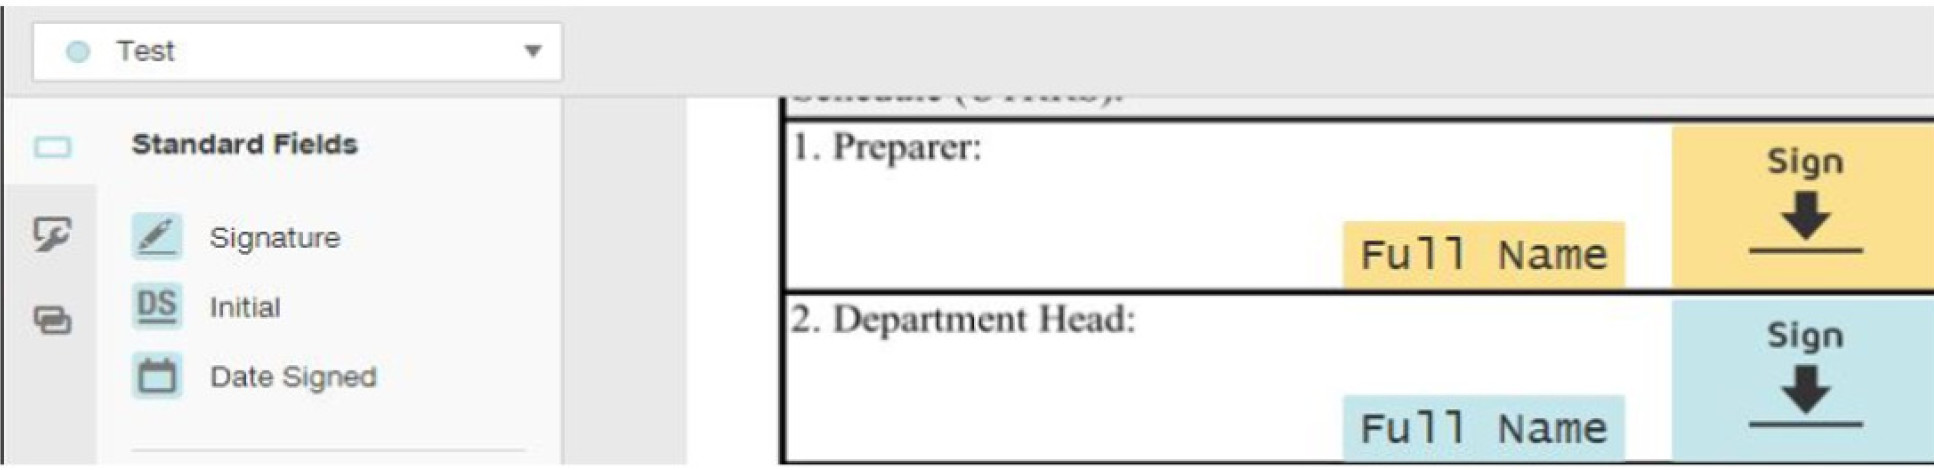
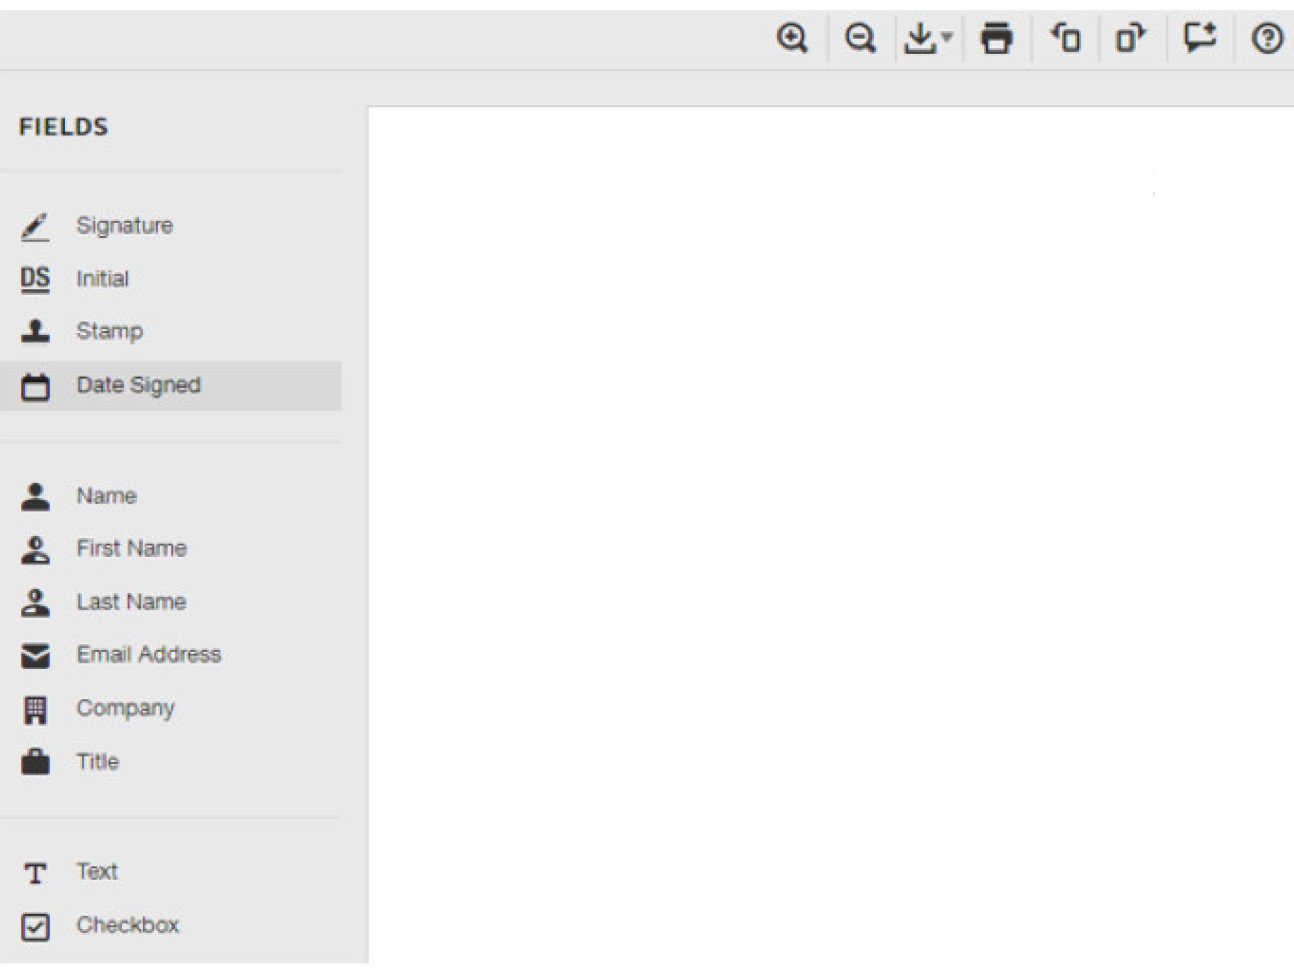
As a part of the DocuSign process, documents that are to be signed must be tagged by the Sender. In addition to signature fields, DocuSign offers a number of fields by default.
Tagging Fields
These fields can be used to tag the document, indicating what type of data goes where. These are dragged into the document and placed in the appropriate location within the open document.
- Signature - Signature Field (Required by default, can be set to optional)
- Initial - Initial Field (Required by default, can be set to optional)
- Signer Attachment - This marks the document for an attachment to be uploaded by the signer selected. (Required by default, can be set to optional)
- Name - The name of the recipient. Defaults to Full Name, can be set to just Last Name or just First Name.
- Email Address - Automatically displays the email address of the recipient.
- Company
- Title
- Date Signed - This field will auto-complete with the date signed and cannot be altered by the recipient.
- Approve - Button for "Approve". Can be renamed, for example "Released"
- Decline - Button for "Decline". Can be renamed, for example "Denied"
- Data field - A flexible field that allows signer input. Can be required or optional, can be set to have validation that requires specific types of data entered, such as numbers or dates.
- Check Box
- Radio Button - Defaults to two radio buttons with a plus sign [+] to allow adding more buttons.
- Drop Down - A list of items to choose from. The Sender builds this list.
- Note - This is a note to the Signer from the Sender and will not be displayed to other recipients and will not be saved in the final document.
- Formula - Make a simple formula based on fields that are numbers or dates.
When tagging documents with multiple signers the sender must choose each signer and tag for them individually.
When switching signers, the previous tags will turn from yellow to another colour indicating to which signer they apply (The colour will match the colour in the circle to the right of the signer's name in the drop-down menu at the top left of the screen).
After tagging is complete, the sender can send the document.
You will need sending permissions to self-sign a document using this feature. To sign a document that is not yet in DocuSign, and optionally to send the signed document to others
- Log into DocuSign
- Go to New ˃ Sign a Document
3. Go to Upload to pull in the document that has been saved to your desktop or server, then click Sign, and on the next page, click Continue to start placing signature and other tags.
Note: If you received the document via email attachment, you must download the file to your desktop or local server before uploading it into DocuSign.
4. In the signing interface, you can drag signatures and other tags into place, zoom, rotate the document, print or download, and select “?” for help from DocuSign, including videos and additional documentation.
 5. When done placing signatures and tags, click Finish in the lower-right corner. You will be asked if you would like to send your signed document to one or more email addresses. If you click yes, the email to the recipient will be sent with the document and the Certificate of Completion attached. The Certificate includes your IP address, which is identifying information that is not secure when sent via email.
As an alternative, to protect your IP address, click No Thanks to return to the DocuSign console. From your Manage tab, select your Sent folder. You will see the completed document, with a Move button on the right-hand side of the page. Select the dropdown arrow on the Move button and select Forward. That displays an interface to enter one or more recipients and an email subject/message. If you only need your recipients to see the document, you should switch their action of “Needs to Sign” to instead be “Needs to View” to send reminders until they open the Review Document link, or select “Receives a Copy” for them to be sent one email with a Review Document link.
The signed document can be downloaded from your Manage tab ˃ Inbox.
Reusable Templates can be created to contain documents, document logic, and signer workflow that will be used frequently. This helps automate the process of sending out multiple envelopes containing the same document to different recipients. Templates can be enabled for groups or individuals in an organization to share.
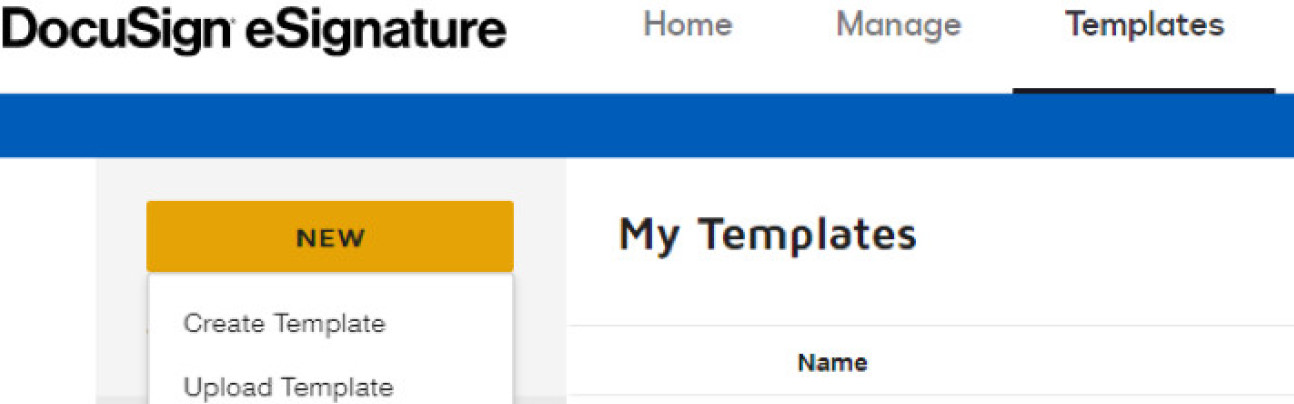
Creating a Template
1. Within the Templates tab of the dashboard, click on New, then select Create Template.
2. Give the Template a Name and Description. Upload a document as you would in an Envelope.
3. Recipients can be added via Email Address if they need to be attached to that document each time it is sent, or generic recipients can be added by simply filling out the Role for that recipient.
4. The Template's Email Message and Envelope Settings can be adjusted just as you would for an Envelope. Click Next to tag the document per each recipient role and save.
Using Templates
When creating a new envelope, existing Templates available to the Sender can be selected for use by clicking the New button on the Home page and selecting Use a Template:
 Visit the DocuSugn support page for more information on how to create a Template.
Bulk send allows you to upload a CSV file containing various elements that assign, address, and send envelopes to multiple users (up to 1,000 per bulk send).
Bulk Send is a feature that is not available by default on all University DocuSign accounts. Please contact the ICT Service Desk to enable this feature on your account.